Under-Canopy Lighting Workflow: 9 Steps to Better Yields
Follow the under-canopy lighting workflow from planning to harvest. Learn fixture placement, PPFD targets, ramping, pruning, and climate control.
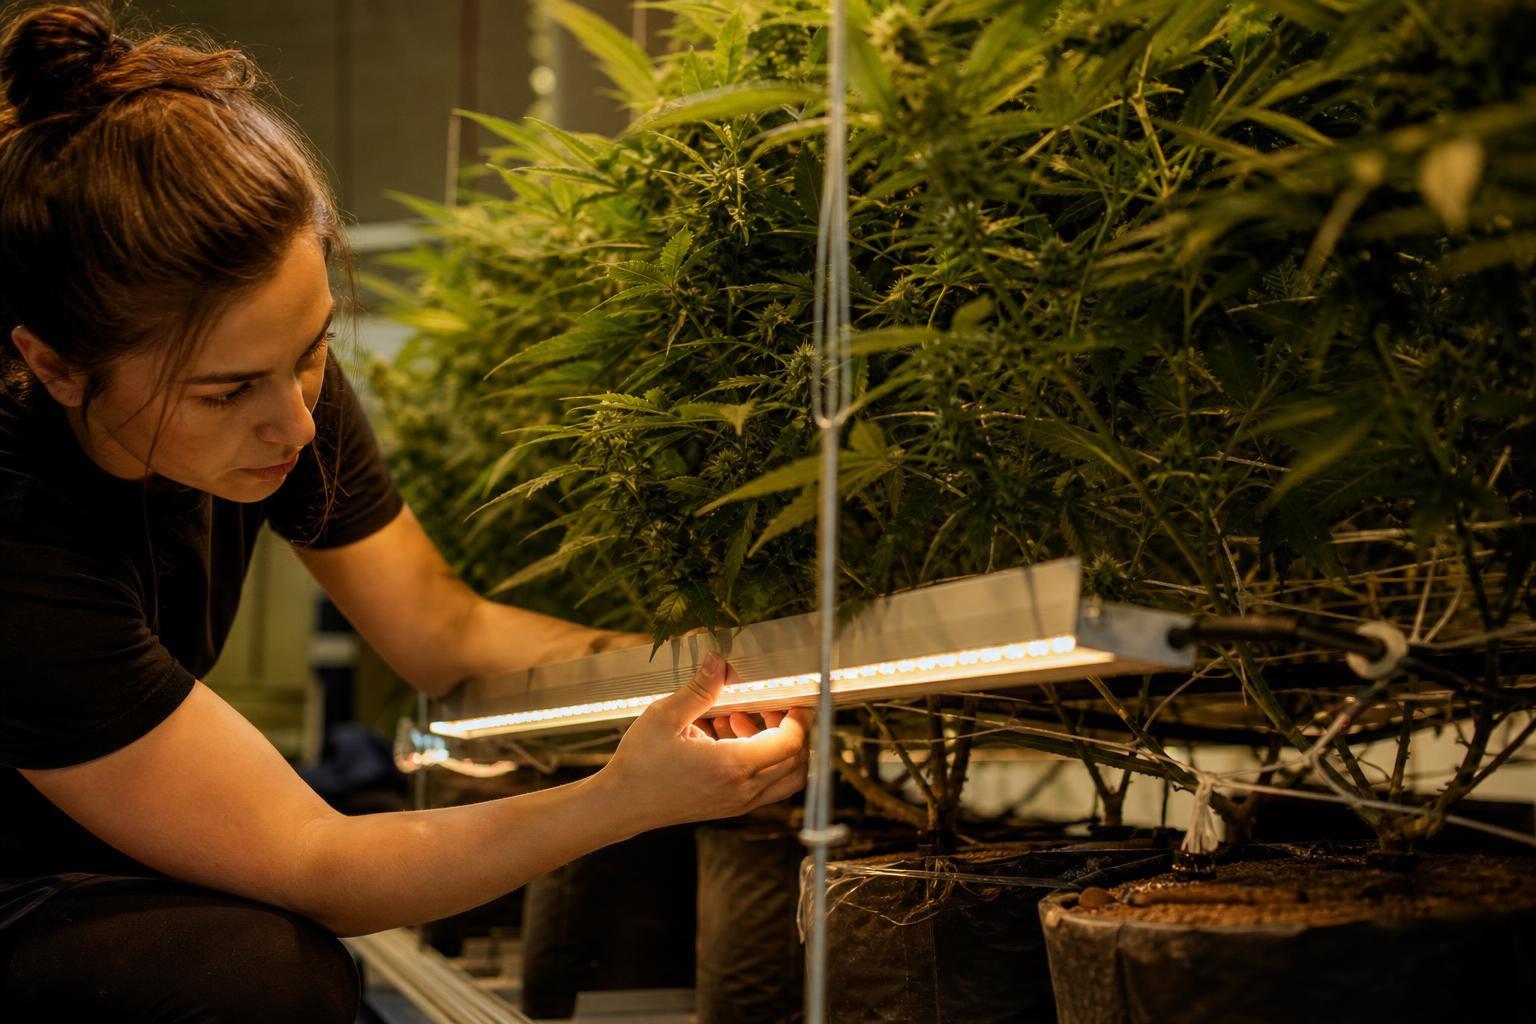
TL;DR: An under-canopy lighting workflow is the full sequence of steps a cultivator follows to plan, install, configure, operate, and maintain supplemental lights beneath the plant canopy. It covers everything from assessing whether your canopy is light-limited, through fixture placement and intensity ramping, to environmental tuning and harvest-day removal. The workflow matters because adding light below the canopy is not a plug-and-play upgrade; it requires coordinated changes to pruning, irrigation, HVAC, and monitoring practices.
What “Under-Canopy Lighting Workflow” Actually Means
Under-canopy lighting workflow refers to the repeatable, multi-step process a commercial grower executes to deploy and manage supplemental lights positioned beneath the plant canopy. It is not a single installation event. The workflow begins before any fixture is purchased (with a canopy light assessment) and continues through every crop cycle, adapting as canopy density, environmental conditions, and plant genetics change from run to run.
The word “workflow” is doing real work in this term. It signals that under-canopy lighting demands coordination across multiple cultivation systems, not just a one-time electrical job.
Explore Thrive’s under-canopy lighting approach
Why This Is Called a Workflow, Not Just a Setup
The distinction between “setup” and “workflow” is the core insight most growers miss early on. Setup implies a beginning and an end: mount fixtures, flip the switch, done. A workflow implies ongoing, sequential phases that repeat and evolve.
When you add a lighting layer beneath the canopy, you change the photosynthetic math for the entire lower plant. Leaves that were barely contributing suddenly become active sugar producers. That shift cascades outward. Water demand increases. Humidity patterns change at the base of the canopy. Heat load rises. Pruning strategies that made sense without supplemental light (aggressive lollipopping, heavy defoliation of lowers) now actively work against the investment. Practitioners on cannabis growing forums consistently emphasize this point: the biggest learning curve is not the lights themselves, but unlearning old habits around canopy management once the lights are installed.
This is why the workflow framing matters. Each phase depends on the one before it, and skipping steps produces disappointing results.
The Under-Canopy Lighting Workflow: 9 Steps at a Glance
Here is the full sequence. Each step is expanded in the section that follows.
| Step | Phase | What Happens |
|---|---|---|
| 1 | Assess | Measure lower-canopy PPFD to determine if plants are light-limited |
| 2 | Plan electrical infrastructure | Verify circuits at bench level, plan for additional load |
| 3 | Place fixtures | Mount bars 8 to 12 inches above substrate, stagger for uniformity |
| 4 | Set activation timing | Turn on fixtures between late veg and week 2 to 3 of flower |
| 5 | Ramp intensity | Start at 40 to 50% output, increase over 2 to 3 weeks |
| 6 | Adapt pruning | Reduce lollipopping, retain more lower bud sites and fan leaves |
| 7 | Tune environment | Adjust HVAC, irrigation (+10 to 15%), airflow, and VPD targets |
| 8 | Monitor and log | Track PPFD, temperature, and humidity at canopy level every 2 to 3 weeks |
| 9 | Harvest-day removal | Remove fixtures during room flip for cleaning and access |
Key Variables the Workflow Addresses
Fixture Placement
Position under-canopy lights approximately 8 to 12 inches above the substrate or pot base, aimed upward. The bars should sit below the lowest significant foliage, not buried within the canopy. A staggered layout (rather than straight rows) has been shown to produce roughly 18% better uniformity across the lower canopy using the same number of fixtures.
For a deeper look at positioning, see this under-canopy light placement guide.
Activation Timing
There is genuine practitioner debate about the best moment to activate under-canopy lights. Some growers start in late veg to smooth the transition into flower. Others argue that running them before week 2 of flower wastes energy because the canopy has not yet filled in enough to create real light deprivation below. One cultivation consultant shared in a walkthrough that the ideal window is 14 to 21 days into flower, after the initial stretch.
The safest starting point: activate when lower bud sites are genuinely light-starved, which typically falls somewhere between late vegetative growth and week 2 to 3 of flower. Genetics, canopy depth, and training style all shift that window.
Intensity Ramping
Starting at full power on day one puts sudden photosynthetic load on leaves that have adapted to shade conditions. The consistent recommendation across practitioners and manufacturers is to start at 40 to 50% output and ramp up gradually over 2 to 3 weeks. One grower on a cannabis cultivation forum put it simply: “Don’t just blast them on Day 1. You probably don’t even need them the first week of flower. After that, it’s about slowly increasing.”
This ramping period gives lower leaves time to upregulate their photosynthetic machinery without stress signals like chlorosis or leaf curling.
Pruning Changes
This is the single most counterintuitive adjustment in the under-canopy lighting workflow. Cultivators trained to lollipop aggressively or strip lower growth are defeating the purpose of the supplemental light layer. When under-canopy lighting is introduced, lower growth that was previously unproductive becomes a yield contributor. A cannabis cultivation consultant reports seeing this mistake constantly with clients: “Most importantly, don’t over-prune your lowers. You got to leave all the bud sites.”
A practical guideline is to retain roughly 75% of fan leaves after a second defoliation event, preserving photosynthetic capacity while still allowing adequate light penetration. The reduced need for aggressive pruning also translates into meaningful labor savings across a commercial operation.
Environmental Tuning
Adding active light below the canopy creates a microclimate shift that requires attention. Leaves at the bottom of the plant that were receiving almost nothing become metabolically active. They transpire more water, generating humidity in a zone that used to be cool and still. The fixtures themselves add heat.
Specific adjustments practitioners recommend:
- Irrigation: Increase volume 10 to 15%. Some cultivars may also need a higher EC.
- Airflow: Validate fan placement before and after install. Stagnant air under a full canopy is one of the most common sources of heat stress when under-canopy lighting is poorly executed.
- VPD monitoring: Track vapor pressure deficit at three heights (top canopy, mid-canopy, substrate level), not just from a single overhead sensor.
- HVAC: Under-canopy bars increase total heat load in the grow space. Plan for this during the electrical infrastructure phase. For guidance on sizing, read this HVAC cooling guide.
PPFD Quick Reference
Understanding the target numbers keeps the workflow grounded in measurable outcomes rather than guesswork.
| Zone | PPFD Target (µmol/m²/s) |
|---|---|
| Top canopy (overhead lights) | 800 to 1,200 |
| Under-canopy supplemental | 100 to 300 |
| Typical supplemental addition from under-canopy bars | 50 to 150 added to lower bud sites |
| Light compensation point (leaves stop being net sugar producers) | ~100 or below |
When overhead intensity reads 1,000 µmol/m²/s at the top but only 300 µmol/m²/s at the base, only 30% of the light needed for optimal growth is reaching the bottom of the canopy. In more extreme cases (dense canopies, tall cultivars), PPFD at the lowest bud sites can fall below the light compensation point entirely, meaning those leaves are consuming more energy than they produce.
Step 1 of the workflow (assessing whether your canopy is light-limited) should use a quantum sensor to check these numbers. If lower-canopy PPFD is below 10% of top readings, or canopy depth exceeds 18 inches from the top light to the lowest bud site, the case for under-canopy lighting is strong.
For more detail on intensity targets across growth stages, see this cannabis PPFD guide.
Common Under-Canopy Lighting Workflow Mistakes
These come directly from practitioner experience, and they consistently show up in grower forums, consultant write-ups, and industry discussions.
1. Over-Pruning the Lowers
The most frequently cited mistake. Cultivators who were taught to strip everything below the canopy continue doing so after installing under-canopy lights, eliminating the very bud sites the lights are meant to serve. This flies in the face of conventional practice, which is exactly why it trips up experienced growers more than beginners. A thorough breakdown of this and other pitfalls lives in this under-canopy mistakes article.
2. Treating Installation as the Finish Line
Some operations mount the fixtures, flip them on at full power, and change nothing else. No irrigation adjustment, no HVAC validation, no pruning protocol update. The result is stressed plants, higher humidity at the base, and underwhelming yields that lead to the wrong conclusion: “under-canopy lighting doesn’t work.”
3. Ignoring the Micro-Climate
Adding bars increases heat load and can trap humid air beneath a full canopy. Without adjusted airflow, this creates conditions favorable to mold and heat stress, exactly the problems commercial growers are trying to avoid.
4. Using Non-Rated Fixtures
The environment beneath a dense canopy is humid. A standard LED bar not rated for wet locations will corrode, short, or fail within a few cycles. UL-listed, properly rated fixtures are not optional in this application.
See the Boost XE under-canopy bar, a purpose-built fixture designed for this environment.
5. Spectrum Mismatch
Running a red-heavy under-canopy bar beneath full-spectrum top lights (or vice versa) creates inconsistent photomorphogenic signals. The general rule: match the spectral profile of your under-canopy fixtures to your overhead lights.
Evidence Snapshot: Does the Workflow Pay Off?
When the full under-canopy lighting workflow is executed correctly, the yield and quality data is compelling:
- Studies consistently show that under-canopy lights can boost cannabis yields by 20 to 30% compared to overhead lights alone. A 2025 peer-reviewed study found a 29.95% increase in dry inflorescence yield, 24.4% higher THC accumulation, and a 12.5% increase in total terpene concentration with intercanopy lighting treatment.
- Research from Wageningen University found that substituting 33% of top light with intercanopy lighting increased fresh fruit yield by an average of 17% in cucumber and tomato, with gains as high as 20 to 24% at higher light intensities.
- In blackberry production, intercanopy lighting at 93 or 185 µmol/m²/s increased fresh fruit yield by 79% and 122%, respectively.
Practitioners on Reddit and cannabis growing forums report variable results, ranging from 3 to 10% on the low end to 25 to 35% on the high end, depending on how well the full workflow was implemented. The variation itself underscores the point: the lights alone are not the variable. The workflow is.
Utility rebates can also offset the upfront investment. Check current rebate eligibility for your region.
Related Terms
A few terms overlap with or get confused with the under-canopy lighting workflow concept. Here is a quick disambiguation:
- Under-canopy lighting (UCL): Fixtures positioned below the canopy, pointing upward. This is the most common term in commercial cannabis cultivation.
- Subcanopy lighting (SCL): Essentially synonymous with under-canopy lighting. Lights below, aimed up. Used interchangeably in most contexts.
- Intercanopy lighting (ICL): Fixtures placed inside the canopy at mid-height, targeting the middle zone rather than the bottom. Sometimes called interlighting or intra-canopy lighting.
- Side lighting: Fixtures mounted at canopy edges, directing light horizontally. A distinct approach from under-canopy, with its own placement and intensity considerations. Compare the two in this side lighting vs. under-canopy guide.
The under-canopy lighting workflow applies most directly to UCL and SCL configurations, though the environmental tuning and monitoring principles carry over to ICL setups as well.
Putting the Workflow into Practice
The under-canopy lighting workflow is not complicated, but it is sequential and it is unforgiving of shortcuts. Assess first. Plan the electrical. Place fixtures correctly. Time the activation to canopy development. Ramp slowly. Change your pruning habits. Adjust the environment. Monitor. Remove at harvest. Repeat next cycle, incorporating what you learned.
The growers who report disappointing results almost always skipped one or more of these steps. The growers who report 20 to 30% yield gains followed the full workflow.
If you are evaluating whether this workflow fits your operation, or need help planning the electrical and layout specifics for your facility, reach out for a consultation.
Frequently Asked Questions
What is the difference between under-canopy lighting and intercanopy lighting?
Under-canopy lighting places fixtures below the canopy, aimed upward to illuminate the lowest bud sites. Intercanopy lighting positions fixtures inside the canopy at mid-height, targeting the middle zone. Both are supplemental strategies, but their placement, fixture types, and the sections of the plant they serve differ.
When should I turn on under-canopy lights during a crop cycle?
The practitioner consensus falls between late vegetative growth and week 2 to 3 of flower. The trigger should be canopy density: when the lower bud sites are genuinely light-deprived (typically below 100 µmol/m²/s), it is time to activate. Starting too early wastes energy; starting too late shortens the benefit window.
How much PPFD should under-canopy lights deliver?
Most recommendations target 100 to 300 µmol/m²/s at the lower bud sites. Supplemental bars typically add 50 to 150 µmol/m²/s without affecting canopy-level intensity from overhead fixtures.
Do I need to change my pruning practices when using under-canopy lighting?
Yes, and this is the most commonly missed step. Traditional lollipopping removes the growth that under-canopy lights are designed to support. Retain more lower bud sites and fan leaves to capture the return on your lighting investment.
How much does irrigation need to change?
Plan to increase irrigation volume by 10 to 15%. Lower leaves that become photosynthetically active transpire more water, and some cultivars may also benefit from a slightly higher nutrient EC.
Will under-canopy lights increase my HVAC load?
They will. The fixtures add heat below the canopy, and the increased transpiration from newly active leaves adds latent moisture to the air. Validate your airflow and HVAC capacity before and after installation.
How often should I check PPFD levels once fixtures are installed?
Re-check every two to three weeks during active growth. As the canopy fills in and plant architecture changes, both the light reaching lower sites and the distribution pattern will shift. Place sensors at canopy level, not above it.
Is the under-canopy lighting workflow a one-time process or does it repeat?
It repeats every crop cycle. While the electrical infrastructure and fixture mounting may be semi-permanent, the activation timing, ramping schedule, pruning adjustments, and environmental tuning need to be calibrated to each run’s specific genetics, canopy density, and facility conditions.