Under-Canopy Light Placement: 2026 Guide to Higher Yields
Under-Canopy Light Placement made simple: heights, spacing, PPFD targets, timing, and ROI. See 24–30% yield gains with our 2026 pro guide.
TLDR
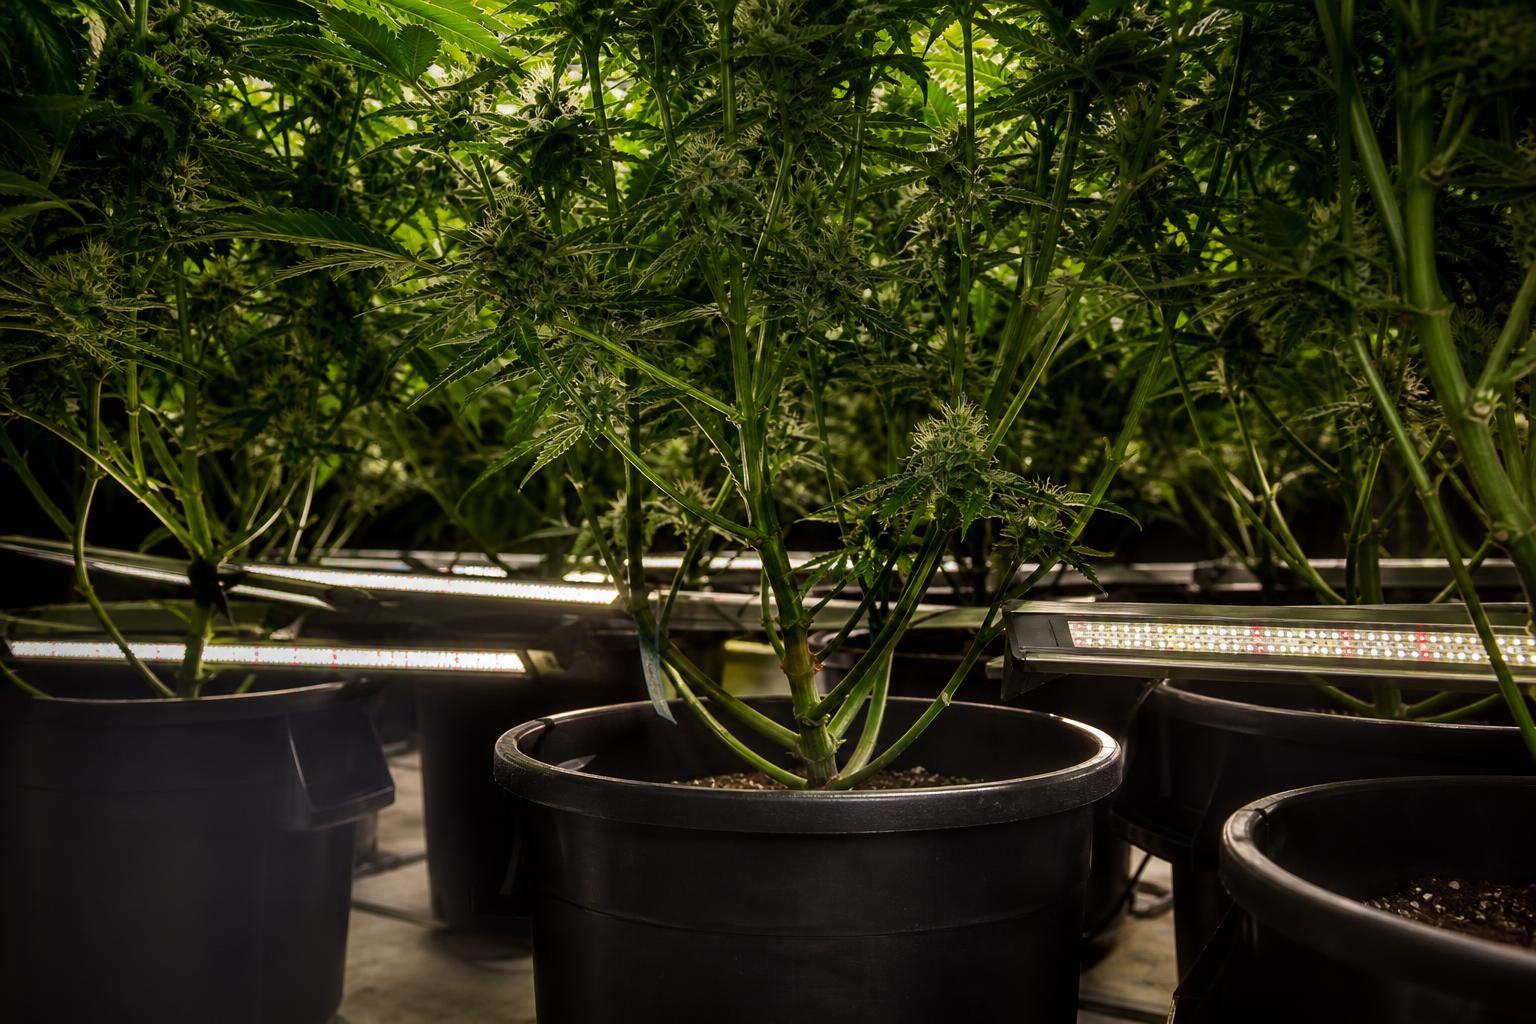
Under-canopy light placement is the positioning of supplemental LED bars below the plant canopy so they direct light upward into shaded lower foliage and bud sites. Correct placement targets productive lower tissue, not the floor or bare stems. Fixtures are typically mounted 8 to 18 inches above the substrate and adjusted based on canopy depth, PPFD readings, and environmental capacity. A 2025 peer-reviewed study found that subcanopy lighting increased dried cannabis yield by 24.58% versus top lighting alone.
What Is Under-Canopy Light Placement?
Under-canopy light placement refers to installing supplemental LED grow light bars below the crop canopy and aiming them upward or inward toward lower leaves and flower sites that overhead lighting cannot reach. In dense crops like cannabis, upper leaf layers absorb the majority of photons from top lights, leaving lower bud sites starved for light. The result is underdeveloped lower flower, reduced grade quality, and wasted plant potential.
The concept is simple: put light where the canopy blocks it. The execution is not. Correct under-canopy placement is a design decision that involves fixture height, beam angle, spacing, dimming, timing, airflow, irrigation adjustments, and measurement, not just screwing a bar to a bench leg.
Direct Answer: How Should Under-Canopy Grow Lights Be Positioned?
Under-canopy grow lights should be positioned beneath the crop canopy and aimed upward or inward toward shaded lower leaves and productive bud sites. A practical starting point is 8–18 inches above the growing medium, but the correct height depends on canopy depth, fixture optics, and plant structure. Measure lower-canopy PPFD to confirm coverage, minimize light wasted on the floor, and adjust intensity to suit the crop and growing environment.
Explore under-canopy lighting approaches built for commercial cultivation.
Why Placement Matters
Placing a light bar under the canopy and turning it on does not guarantee results. Photons must actually land on productive plant tissue. If fixtures sit too low, they light the substrate. If they sit too high or too close to stripped stems, they waste energy on surfaces that cannot photosynthesize.
A 2025 peer-reviewed study in medicinal cannabis found that subcanopy lighting increased dried inflorescence yield by 24.58% and THC yield by 18.67% compared to top lighting only. Inter-canopy lighting (fixtures placed within the plant structure) pushed those numbers to 29.95% and 24.42%, respectively. But those gains came under controlled conditions with specific placement, timing, and environmental management. Poor placement produces none of that.
The core principle is straightforward: aim at the lowest productive bud sites, not the substrate. This makes under-canopy light placement a question of plant architecture as much as hardware positioning. For deeper context on how under-canopy lighting evidence has evolved, Thrive’s field summary is worth reading.
What Does Research Say About Under-Canopy Lighting?
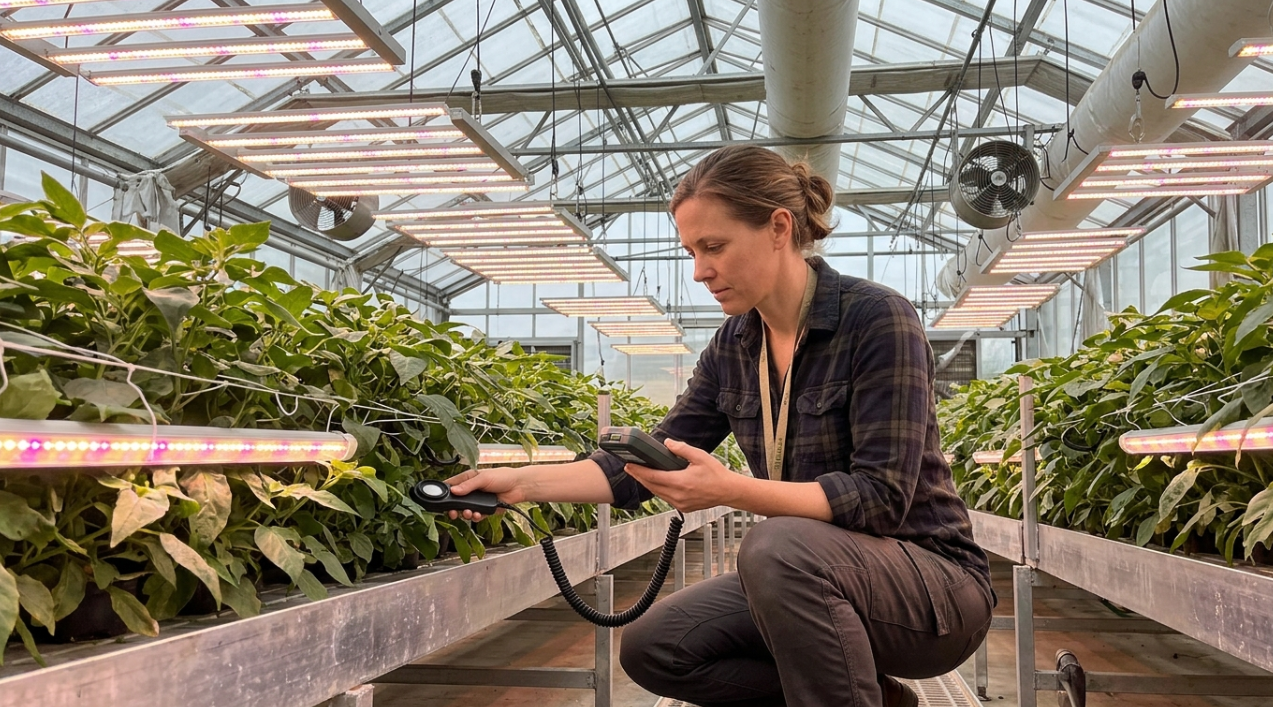
Research on supplemental lighting in medicinal cannabis suggests that delivering light to shaded canopy zones can improve dried flower yield under certain experimental conditions. However, the size of the benefit depends on the lighting configuration, crop structure, environmental management, and experimental design.
A 2025 study, Subcanopy and Inter-Canopy Supplemental Light Enhances and Standardizes Yields in Medicinal Cannabis (Cannabis sativa L.), reported the following results compared with top lighting alone.
Lighting treatment | Reported increase in dried inflorescence yield | Reported increase in THC yield | Interpretation |
|---|---|---|---|
Subcanopy lighting | 24.58% | 18.67% | Supplemental light delivered from below the canopy improved the measured outcomes in the study. |
Inter-canopy lighting | 29.95% | 24.42% | Supplemental light delivered within the plant structure produced larger reported increases under the study conditions. |
Top lighting alone | Reference treatment | Reference treatment | Used as the comparison baseline. |
Source: 2025 peer-reviewed study on subcanopy and inter-canopy supplemental lighting.
How Should Growers Interpret These Results?
The reported percentages describe the outcomes of a particular experiment. They should not be treated as guaranteed yield improvements for every commercial facility.
Before applying the findings to a new growing environment, consider:
Canopy structure: Dense canopies may benefit differently from open canopies.
Lighting configuration: Fixture output, spectrum, placement, and operating schedule influence the results.
Energy consumption: Additional lighting increases electricity use, so yield improvements should be evaluated alongside operating costs.
Environmental capacity: Changes in transpiration can affect irrigation, airflow, and humidity management.
Product quality: Total yield and the distribution of product grades are separate outcomes and should be measured independently.
The practical conclusion is that under-canopy lighting can improve the distribution of supplemental light to shaded plant tissue, but its commercial value must be validated under the conditions of the intended facility.
Typical Under-Canopy Light Height and Spacing
There is no universal height number. But published placement guides, commercial install reports, and research trials converge on practical starting ranges that should be validated with a PAR meter before scaling.
Variable | Practical starting point | What to check |
|---|---|---|
Fixture height | Test a position near the lowest productive canopy zone; 8–18 inches above the growing medium is one possible starting range. | Target foliage, fixture clearance requirements, and light distribution. |
Bar spacing | Determine spacing from the fixture's distribution data and the dimensions of the target canopy. | PPFD uniformity between bars and along the row. |
Lower-canopy PPFD | Establish a baseline and determine an appropriate supplemental contribution for the crop. | Existing top-light contribution, growth stage, and total light exposure. |
Initial output | Begin conservatively and increase output based on measurements and plant response. | Combined light exposure and environmental conditions. |
Mounting angle | Aim upward or inward toward productive foliage, depending on canopy structure. | Light reaching plants rather than bare stems, growing media, or aisles. |
Environmental monitoring | Monitor temperature, relative humidity, and irrigation demand after installation. | Whether cooling, airflow, and dehumidification can handle the additional load. |
These values should be treated as practical starting points rather than universal design specifications. Fixture height, spacing, and output depend on the crop's architecture, the supplemental fixture's optical distribution, the existing top-light system, and the environmental conditions inside the growing facility. Published experimental results can inform a layout, but growers should validate the final configuration through PPFD measurements and controlled trials.
For growers ready to spec a layout, the Boost XE under-canopy bar is a 120W fixture designed specifically for this application.
How to Position Under-Canopy Grow Lights: Step-by-Step
Correct under-canopy light placement starts with identifying shaded, productive plant tissue and measuring how supplemental light changes the distribution of photons throughout the canopy. Fixture height alone does not determine whether a lighting layout will work.
Step 1: Identify the Target Canopy Zone
Inspect the lower plant structure and identify areas containing healthy leaves and productive growth sites that receive insufficient light from overhead fixtures.
Avoid positioning supplemental lights primarily toward bare stems, empty spaces, or areas where lower growth has been removed. The goal is to illuminate tissue that can make productive use of the additional light.
Step 2: Choose an Initial Mounting Position
Position the fixtures below the canopy, close enough to illuminate the intended target zone without obstructing workers, irrigation equipment, or plant maintenance.
An initial mounting position of 8–18 inches above the growing medium may be worth testing, but this is not a universal specification. Adjust the position according to the distance between the fixture and the target foliage, the fixture's beam distribution, and the depth of the canopy.
Always follow the manufacturer's mounting and clearance instructions.
Step 3: Measure Baseline PPFD
Before switching on supplemental lighting, measure photosynthetic photon flux density (PPFD) at representative points throughout the lower canopy.
Record readings from several locations, including areas near the fixtures' planned positions and the spaces between them. These measurements establish the baseline for evaluating coverage.
Step 4: Check Coverage and Adjust Fixture Spacing
After installation, measure PPFD again using the same locations and sensor orientation.
Look for areas receiving substantially different amounts of light. Bright spots directly above individual bars may indicate uneven coverage, while low readings between fixtures may suggest that spacing, aiming, or mounting height needs adjustment.
Use the fixture manufacturer's distribution data as a starting point rather than assuming one spacing pattern will work for every room.
Step 5: Adjust Output and Monitor Plant Response
Begin at a conservative output level and increase intensity gradually according to measured PPFD, the crop's total light exposure, and observed plant response.
Evaluate the combined contribution of top and supplemental lighting rather than treating under-canopy PPFD as an independent target. The appropriate additional light depends on the crop, growth stage, existing lighting, and environmental conditions.
Step 6: Recheck Environmental Conditions
Additional lighting can increase photosynthesis and transpiration, changing irrigation demand and moisture released into the growing environment.
Monitor temperature and relative humidity around the lower canopy. Check whether irrigation delivery, airflow, and dehumidification remain appropriate after the lighting schedule changes.
Step 7: Evaluate Results Before Expanding
Test the placement in a representative section before installing the same layout throughout the facility.
Where practical, compare treated and untreated sections under otherwise comparable conditions. Record light measurements, energy consumption, environmental conditions, yield, and product grade.
Use the results to determine whether the additional lighting produces enough improvement to justify its electricity and installation costs.
Under-Canopy Lighting Troubleshooting: Common Placement Problems
Problem | Possible cause | What to check or adjust |
|---|---|---|
Light reaches the floor instead of the canopy | Fixture is too low or aimed away from productive foliage. | Check the beam direction and reposition the fixture toward the intended target zone. |
Bright spots directly above light bars | Fixture spacing or beam distribution creates uneven coverage. | Measure PPFD between fixtures and adjust spacing, height, or aiming. |
Lower leaves receive little additional light | The fixture is poorly aligned with the target foliage or its output is insufficient. | Measure PPFD before and after installation and reassess the layout. |
Some lower canopy zones receive much more light than others | Canopy depth, fixture spacing, or plant structure varies across the room. | Map several representative locations and adjust the layout to improve uniformity. |
Humidity rises after supplemental lighting is introduced | Additional light may increase transpiration and moisture entering the room. | Check airflow, irrigation, dehumidification capacity, and environmental readings. |
Energy consumption increases without a clear yield benefit | Light may be reaching unproductive surfaces, or the crop may not respond enough to justify the additional input. | Compare energy use, measured light distribution, yield, and product grade. |
Fixtures interfere with irrigation or crop maintenance | Mounting locations do not account for access and equipment movement. | Review cable routing, fixture clearance, irrigation access, and maintenance procedures. |
Under-Canopy vs. Inter-Canopy vs. Side Lighting
These terms overlap in casual conversation but describe different fixture positions and goals.
Term | Fixture Location | Primary Target |
|---|---|---|
Top lighting | Above the canopy | Main photosynthetic driver for upper and mid-canopy |
Under-canopy / subcanopy | Below the canopy, aimed upward | Shaded lower foliage and lower bud sites |
Inter-canopy | Within the plant structure, often at multiple vertical levels | Middle and lower canopy zones in tall or deep canopies |
Side lighting | Around the crop perimeter | Lateral bud zones and edge plants |
The 2025 study defined subcanopy lighting as supplemental light delivered from below the canopy, and inter-canopy lighting as fixtures positioned at basal and middle vertical levels within the plant. Both outperformed top-light-only controls, but inter-canopy lighting required 23.21% more energy compared to 13.13% for subcanopy. That energy trade-off matters for ROI calculations.
Reddit discussions capture the operator-level distinction well: side lighting is often compared against under-canopy lighting in smaller grows, but the two solve different problems. Side lighting helps perimeter buds; under-canopy placement targets the vertical light gradient inside a dense canopy.
How to Measure Whether Placement Is Working
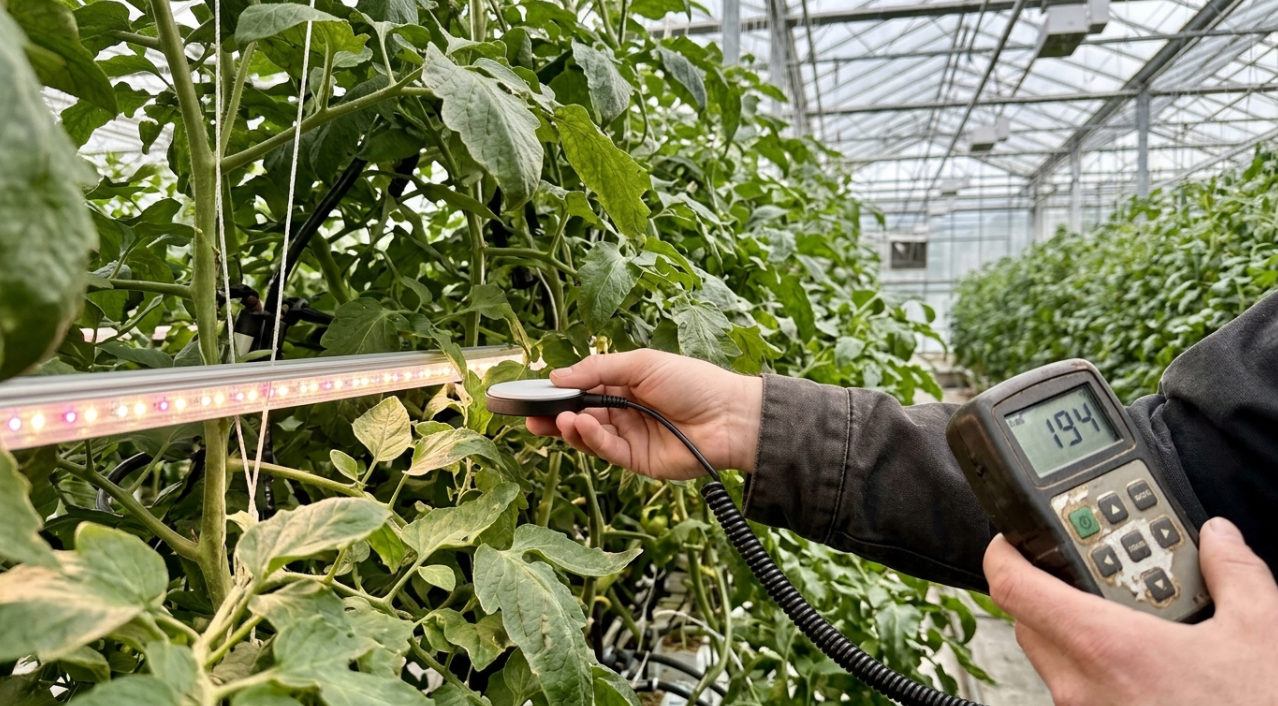
Wattage tells you how much power a fixture draws. It says nothing about how much usable light reaches the lower canopy. The right metrics are PPFD (instantaneous photon flux at a surface) and DLI (total daily light dose). The standard DLI formula is:
DLI = PPFD x hours of light x 0.0036
This formula, outlined by Iowa State University Extension, converts instantaneous readings into a daily total. For a deeper guide on PPFD targets by growth stage, that resource covers the full range.
A simple measurement protocol for validating under-canopy light placement:
Map lower-canopy PPFD before installing any fixtures. This is your baseline.
Install bars in a test zone and keep an unlit control section for comparison.
Start at 25 to 50% intensity to acclimate shaded tissue.
Re-map lower-canopy PPFD after installation. Look for even coverage, not hot spots.
Record temperature and relative humidity at the lower canopy.
Track irrigation demand, which will likely increase.
Compare yield and grade (not just total weight) between lit and unlit sections.
When selecting fixtures, look for verified photosynthetic photon efficacy (PPE), not just wattage. The DLC V4.0 standard sets a minimum PPE threshold of 2.5 µmol/J for qualified horticultural LED products.
When to Turn On Under-Canopy Lights
Timing matters as much as positioning. Running under-canopy bars before the canopy closes wastes electricity because top light is still reaching lower sites. The 2025 study activated supplemental lighting on day 22 of the flowering cycle, when measurements showed a fivefold PPFD difference between the top and lower canopy.
The practical principle: turn on under-canopy lights after canopy closure, when lower bud sites become meaningfully shaded. In most flowering cannabis crops, this happens after stretch, roughly week 3 to 4. The exact day depends on cultivar, density, and training method. Do not copy a fixed day count from another facility.
Common Under-Canopy Light Placement Mistakes
Getting placement wrong does not just waste money. It can create new problems.
Lighting the floor instead of the plant. If the fixture sits too low with too wide a beam, photons hit the substrate and aisles. Aim the bar so the beam reaches lower leaves and bud sites.
Using a fixed height without checking canopy depth. An 8-inch mount height works for some cultivars but misses entirely on others. Final placement depends on where productive lower buds actually are.
Running full power immediately. Lower canopy tissue that developed in shade needs time to acclimate. A common mistakes guide recommends starting at roughly 50% intensity and ramping over days. Thrive covers additional under-canopy mistakes worth reviewing before installation.
Over-defoliating the lower canopy. Heavy bottom stripping removes the exact plant tissue under-canopy lights are supposed to activate. Under-canopy placement changes pruning strategy: leave enough lower sites to justify the photons.
Ignoring climate load. The 2025 study documented increased water consumption from supplemental-light treatments starting at week 4. Practitioners on LinkedIn recommend increasing irrigation volume by 10 to 15% and confirming that the facility has enough dehumidification and cooling capacity. Managing VPD in cannabis becomes even more important when lower-canopy transpiration rises.
Ignoring safety and access. Reddit users consistently raise the concern of electronics sitting near wet substrates. Under-canopy placement must account for sealed connectors, cable management, IP-rated fixtures, and the ability for workers to move through the canopy without snagging cables or dislodging bars.
When Under-Canopy Placement May Not Pay
Under-canopy lighting is not a universal upgrade. Returns shrink or disappear when:
The canopy is already open enough that top light reaches lower sites adequately.
Lower growth has been aggressively stripped, leaving nothing to illuminate.
The room lacks HVAC and dehumidification headroom to handle added heat and moisture.
Electrical infrastructure cannot support additional circuits without expensive upgrades.
The grade spread between premium and lower-tier flower is too narrow to justify the cost.
Practitioners on Reddit are blunt about this: under-canopy lights make sense after the room is already dialed. If VPD, irrigation, CO2, root-zone management, and top-light PPFD are not optimized, supplemental lower lighting is the wrong next investment.
An earlier 2018 study demonstrated that subcanopy lighting increased yield by 19.8 to 24.5% depending on spectrum, but it also showed the gains came from specific, controlled conditions. The takeaway is consistent: under-canopy light placement produces real returns when the rest of the room supports it.
Frequently Asked Questions
How high should under-canopy lights be placed?
Start with 8 to 18 inches above the substrate or medium, or 20 to 35 cm below the lower target bud zone. These are starting points. Final height should be set relative to the lowest productive bud sites and verified with a PAR/PPFD meter. A tall cultivar with stripped lower branches needs the fixture higher than a bushy plant with bud sites near the pot.
Should under-canopy lights point straight up or at an angle?
Whichever direction sends uniform light into productive lower foliage. If the bench is wide and lower buds are spread, angling bars inward can push photons into foliage rather than empty aisle space. The goal is coverage of living tissue, not maximum lux on a sensor pointed at the ceiling.
When should under-canopy lights be turned on during the grow cycle?
After canopy closure creates meaningful lower shading. In flowering cannabis, this typically happens around week 3 to 4 after the stretch phase. The principle is canopy closure, not a calendar date. Measure lower-canopy PPFD to confirm that top light is no longer reaching lower sites before activating supplemental bars.
Can under-canopy lights replace top lights?
No. Under-canopy lighting is supplemental. It improves light distribution to lower zones but does not replace the main photosynthetic driver overhead. Think of it as filling in what top lights miss, not as a standalone strategy.
What is the biggest under-canopy placement mistake?
Lighting the wrong target. If photons land on the floor, bare stems, aisles, or over-pruned lower sections instead of productive foliage and flower sites, the investment adds cost without adding yield. The second biggest mistake is skipping measurement and assuming placement is correct because the bar is mounted.
Does under-canopy lighting increase water use?
Yes. Research and practitioner experience both confirm that adding light to the lower canopy increases transpiration and water consumption. The 2025 study observed this effect from week 4 onward. Plan for a 10 to 15% increase in irrigation volume and verify that dehumidification can handle the extra moisture.
How do I know if under-canopy placement is working?
Compare grade distribution and total yield between lit and unlit sections of the same room, grown under the same conditions. The clearest signal is not just more total weight but more premium-grade flower from lower plant positions that previously produced small or underdeveloped buds.
Is under-canopy lighting worth the cost?
It can be, in rooms where the canopy is dense enough to block lower light, the HVAC system has headroom, the grade spread between premium and lower-tier flower is meaningful, and the facility’s electrical infrastructure supports the added load. In those conditions, peer-reviewed data and commercial reports suggest yield gains in the 20 to 30% range are realistic, not guaranteed.
For facility-specific guidance on under-canopy light placement and layout design, contact Thrive’s lighting team to discuss your room dimensions, canopy goals, and PPFD targets.