Under-Canopy Lighting Heat: 2026 Guide for Grow Rooms
Learn how to manage under-canopy lighting heat with LED selection, BTU calculations, airflow, HVAC planning, and canopy monitoring.
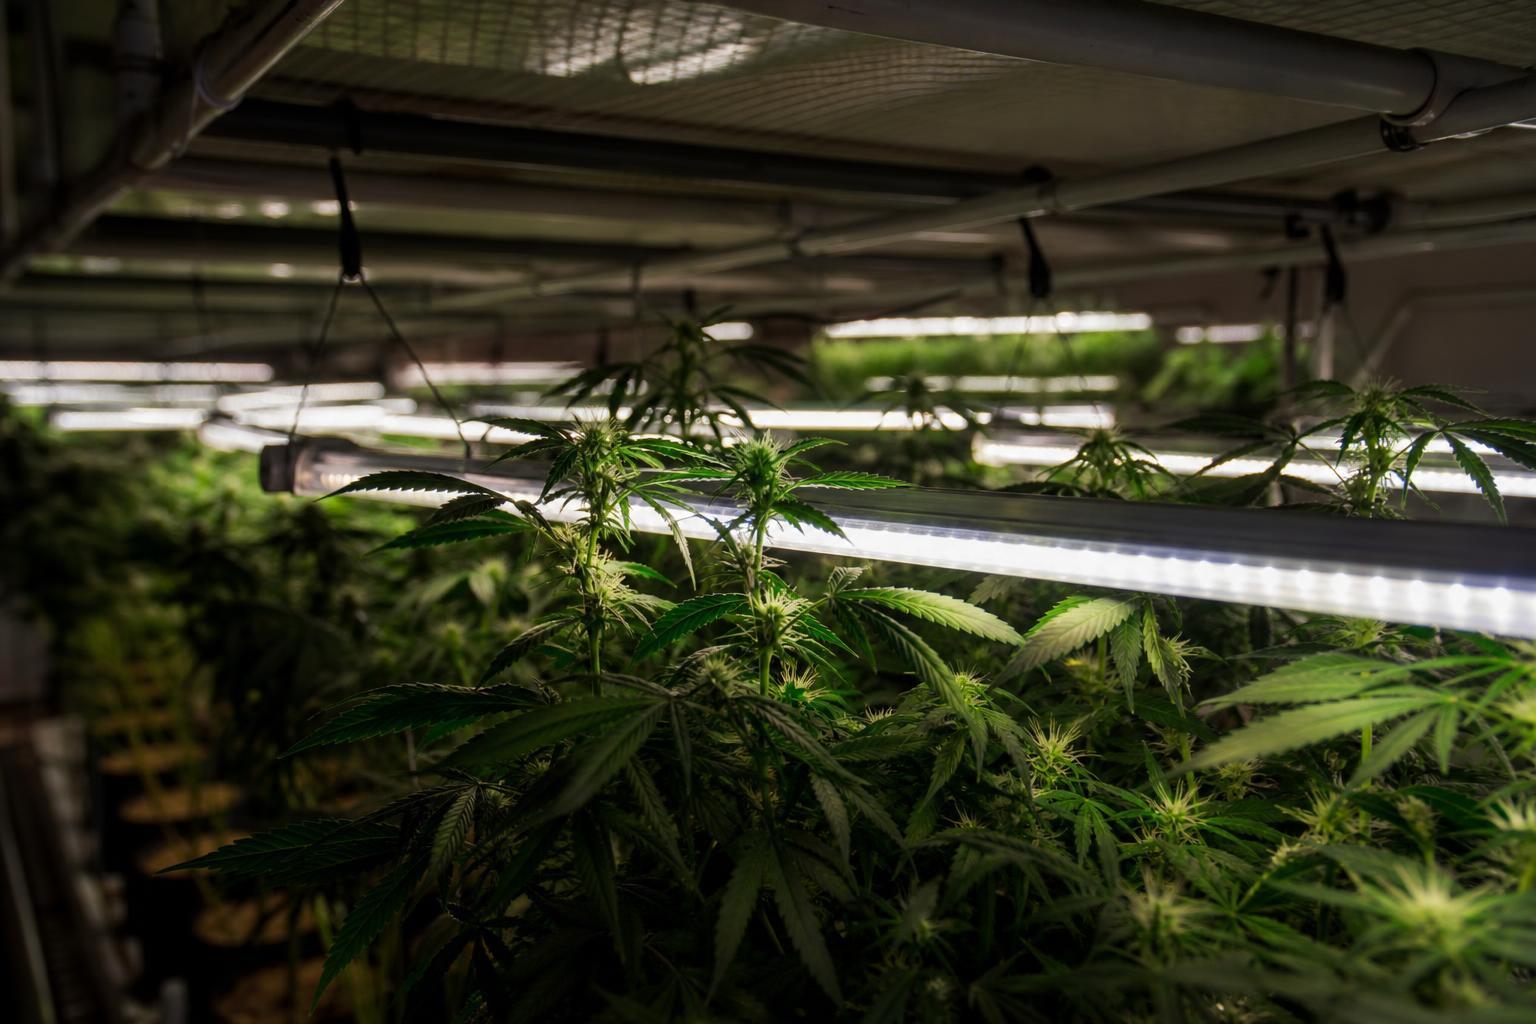
TL;DR
Under-canopy lighting heat is the thermal energy released by supplemental light fixtures positioned below or within the plant canopy. Unlike overhead lighting heat, it enters a zone where airflow is restricted and microclimate pockets form easily. LEDs produce far less radiant heat than HPS (roughly 15% vs. 55% of total energy), making them the standard for close-canopy placement. With proper fixture selection, remote driver architecture, airflow management, and thoughtful intensity planning, under-canopy lighting heat is a solved engineering problem, not a barrier to the 20 to 30% yield gains that subcanopy lighting delivers.
Every watt of electricity that enters a grow light exits as either photons or heat. There is no third option. When that light fixture sits overhead, the math is straightforward: convective heat rises toward the ceiling and into the HVAC return path. But move that fixture below or inside the canopy, and the thermal dynamics change in ways that catch growers off guard.
Under-canopy lighting heat is the specific thermal load introduced by supplemental fixtures positioned beneath the primary canopy layer. It differs from overhead lighting heat in direction, proximity, and how easily your climate control system can handle it. Understanding this distinction is the difference between a well-engineered installation and a room full of stressed plants.
What Is the Best Way to Manage Under-Canopy Lighting Heat?
Under-canopy lighting heat is best managed by using low-radiant-heat LED fixtures, positioning drivers outside the growing environment, maintaining horizontal airflow through the lower canopy, and monitoring leaf-level temperature and humidity. Growers should also calculate the combined electrical heat load of all lighting fixtures before installation to confirm that the HVAC system can handle the additional thermal energy. Unlike overhead lighting, under-canopy fixtures operate in areas where dense foliage can restrict airflow, making localized temperature monitoring and ventilation especially important.
Explore under-canopy lighting to understand the broader benefits and strategy behind subcanopy supplemental light.
Why Under-Canopy Heat Behaves Differently Than Overhead Heat
The core issue is architecture, not wattage. An overhead fixture’s waste heat rises naturally, mixing with room air and reaching ceiling-mounted HVAC returns within seconds. Under-canopy bars release heat inside a dense thicket of stems, leaves, and lower buds. Foliage blocks airflow. The heat has nowhere obvious to go.
This creates microclimate pockets: small zones of elevated temperature and humidity that your room-level sensors never detect. Your controller might read 78°F at the canopy top while lower leaves sit in a stagnant 85°F pocket with relative humidity climbing toward condensation. That’s how you get localized heat stress, increased transpiration demand, and conditions ripe for pathogen pressure, all while the dashboard looks fine.
The anchor number every grower should know: 3,412 BTU per hour for every kilowatt of electrical input. A 120W under-canopy bar produces roughly 409 BTU/h of total thermal load. One bar is trivial. Forty bars across a commercial flower room add over 16,000 BTU/h to a zone your HVAC system wasn’t originally designed to cool. For a deeper look at how different heat types interact in controlled environments, read about latent vs. sensible heat in CEA facilities.
Practitioners on Reddit have echoed this concern directly. In a BuildASoil community thread, a grower’s primary worry was cumulative heat from running under-canopy bars alongside overhead fixtures. The question wasn’t whether one bar would cause problems, but whether the combined load across a full room would overwhelm the cooling system. It’s the right question, and the answer depends entirely on how the installation is designed.
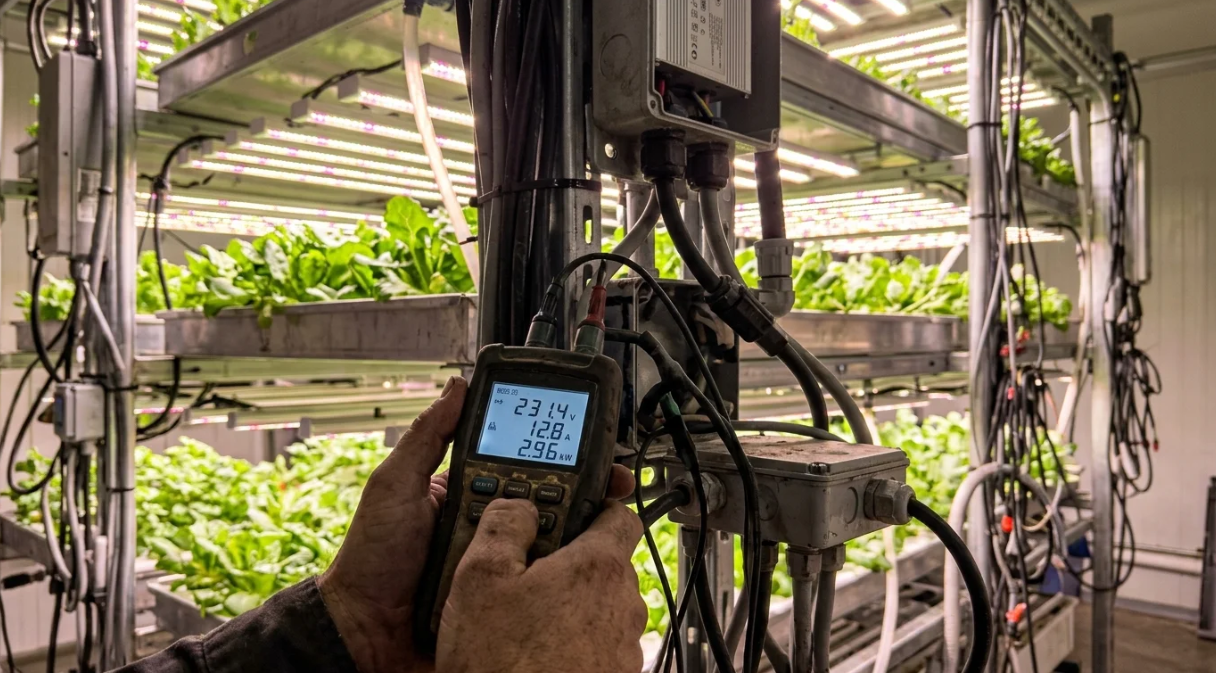
How to Calculate Under-Canopy Lighting Heat Load
Calculating under-canopy lighting heat load helps growers determine whether their existing HVAC system can handle additional fixtures before installation.
The simplest starting point is to convert the total electrical power consumed by the fixtures into British Thermal Units per hour (BTU/h).
Electrical heat load formula:
BTU/h = Total Fixture Wattage × 3.412
This calculation represents the full electrical energy input as an upper-bound thermal load for the growing environment. If some optical energy escapes the conditioned space or is otherwise accounted for separately, the actual room cooling requirement may differ.
Under-Canopy LED Heat Load Examples
| Number of fixtures | Wattage per fixture | Total electrical load | BTU/h |
|---|---|---|---|
| 10 | 120W | 1,200W | 4,094 |
| 20 | 120W | 2,400W | 8,189 |
| 40 | 120W | 4,800W | 16,378 |
| 80 | 120W | 9,600W | 32,755 |
| 100 | 120W | 12,000W | 40,944 |
For example, a commercial growing room using 40 under-canopy LED fixtures rated at 120W each adds approximately 16,378 BTU/h of electrical energy to the facility’s total energy balance.
This figure should be considered alongside overhead lighting, pumps, dehumidifiers, fans, equipment, and other internal heat sources when assessing HVAC capacity. For detailed calculations, see this guide on HVAC sizing for LED grow lights.
Does Every Watt of LED Power Become Heat?
For HVAC planning, the safest starting assumption is that nearly all electrical energy consumed by lighting eventually becomes heat within the conditioned space.
Although LEDs convert a portion of their electrical input into photosynthetically active radiation (PAR), much of that optical energy is eventually absorbed by plants, growing media, walls, and other surfaces and converted into heat.
Therefore, growers should avoid subtracting the LED’s photon output from the cooling calculation without a detailed facility energy balance.
The distinction between radiant and convective heat remains important because it determines where and how that energy is transferred, not whether the energy exists.
Radiant Heat vs. Convective Heat: The Distinction That Matters Most
Not all heat reaches your plants the same way, and this is where the physics of under-canopy lighting heat gets practical.
Radiant heat travels as infrared radiation directly from the light source to the leaf surface. It heats tissue on contact, regardless of air temperature. An HPS fixture sends roughly 55% of its energy toward the crop as radiant heat, while an LED sends about 15%. This gap explains why LEDs can sit inches from leaf tissue without causing burns.
Convective heat warms the surrounding air, which then circulates through the room. LEDs dump most of their waste energy this way. It’s less dangerous to plants because your ventilation and HVAC systems can capture and remove it, provided you’ve designed adequate airflow into the under-canopy zone.
Here’s a point that confuses many growers: a 600W LED and a 600W HPS add the same total energy to the room. A watt is a watt. The difference is delivery method. The LED puts far less of that energy directly into leaf tissue and far more into the air stream. For under-canopy applications, where fixtures sit 12 to 24 inches from foliage, that difference is everything.
LED Fixture Heat Dissipation: What Happens Inside the Bar
Understanding how an LED fixture handles its own heat clarifies why some bars run cooler than others at identical wattages. The LED chips themselves generate heat at the junction, the point where electrical energy converts to light. That junction temperature must be managed, or the diodes degrade faster, shift spectrum, and lose efficiency.
Well-designed under-canopy bars move heat away from the junction through a combination of aluminum heat sinks, thermal interface materials, and the fixture housing itself. The housing acts as a passive radiator, transferring heat to the surrounding air through convection. Slim, bar-style form factors actually help here because the high surface-area-to-volume ratio improves passive cooling compared to compact, block-shaped fixtures that trap heat internally.
Fixture surface temperature is a useful proxy for thermal design quality. A bar that runs warm to the touch (around 40 to 50°C on the housing) is typically dissipating heat effectively. A fixture that feels hot (above 60°C on the surface) may indicate undersized heat sinking or poor thermal path design.
Practitioners on cannabis growing forums have noted that cheaper under-canopy bars sometimes feel noticeably hotter than name-brand alternatives at the same wattage. That difference isn’t about total energy output (same wattage, same BTU) but about how well the fixture spreads and releases its thermal load. Poor thermal management shortens LED lifespan and concentrates heat in a small area near sensitive plant tissue.
For operations scaling to dozens or hundreds of bars, fixture thermal design directly affects both maintenance costs and the microclimate around lower buds. A purpose-built under-canopy LED bar with proper heat sinking and a slim profile keeps surface temperatures manageable without requiring active cooling fans on the fixture itself.
LED vs. HPS: Which Lighting Technology Produces Less Canopy Heat?
LED fixtures are generally better suited to under-canopy lighting than traditional high-pressure sodium (HPS) fixtures because they offer higher electrical efficiency and typically transfer less infrared radiation directly to nearby plant surfaces.
However, the difference between these technologies involves more than total heat production.
Both LED and HPS fixtures convert electrical energy into a combination of optical radiation and thermal energy. The important distinction is how efficiently they produce usable photosynthetic light and how their radiation and heat affect the surrounding canopy.
LED vs. HPS Heat Characteristics
| Characteristic | LED lighting | HPS lighting |
|---|---|---|
| Electrical efficiency | Generally higher | Generally lower |
| Infrared radiation toward plants | Typically lower | Typically higher |
| Direct radiant heating | Generally lower | Generally higher |
| Fixture surface temperature | Depends on thermal design | Often higher near the lamp |
| Heat transfer | Primarily through fixture cooling and convection, with some radiation | Greater radiant heat contribution |
| Under-canopy suitability | Generally preferred | Usually less suitable for close-canopy placement |
A peer-reviewed study published in PLOS ONE in 2015 examined how different radiation sources influence leaf temperature. Its model estimated that LED lighting could produce leaf temperatures approximately 1.3°C lower than HPS under typical indoor growing conditions.
However, the study also highlighted the importance of water status, transpiration, and airflow. A plant experiencing water stress or inadequate air movement can develop elevated leaf temperatures even when grown under LED lighting.
Why LEDs Are Preferred for Under-Canopy Applications
Under-canopy fixtures operate close to leaves, stems, and developing flowers. Reducing direct radiant heating can therefore make it easier to manage the thermal environment around the lower canopy.
LED fixtures also offer several practical advantages:
- Slim bar designs that minimize airflow obstruction.
- Lower radiant heating compared with many traditional HPS configurations.
- Flexible fixture placement between growing rows.
- Better electrical efficiency for delivering supplemental photosynthetic light.
- Compatibility with remote driver and centralized power architectures.
For commercial facilities, LED technology offers a more manageable starting point for supplemental lighting beneath dense plant canopies. Explore the benefits of transitioning from HPS to LED when evaluating the broader energy and thermal implications of a lighting upgrade.
The Driver Problem: A Hidden Heat Concentrator
Every LED fixture needs a driver to convert AC power to the DC current that LEDs require. Drivers are typically between 89% and 95% efficient, meaning 5 to 11% of total input power becomes waste heat inside the driver housing itself. At the fixture level, the driver contributes only about 8% of total heat output for a 1,000W fixture, with LED modules producing the rest.
That sounds minor. It isn’t, for two reasons.
First, driver heat is concentrated in a single, compact component rather than spread across a long bar of LEDs. That hot spot sits right inside the canopy zone, radiating heat into a small area where airflow is already poor.
Second, the problem scales. A commercial room might run 40, 80, or 200 under-canopy bars. Each driver adds its concentrated heat load. Collectively, driver heat across a large installation becomes a meaningful HVAC burden and, more critically, a reliability concern. Drivers with active electrical components like capacitors fail faster in warm, humid environments, exactly the conditions found inside a dense plant canopy.
The solution is straightforward: move the drivers out of the grow room entirely. A centralized remote power system relocates the driver layer to a dry electrical room where heat is easier to manage and components last longer. The fixtures themselves become lighter, simpler, and cooler. One patent for intra-canopy LED lighting specifically notes that locating the electronics outside of the canopy keeps excess heat away from the plants.
Learn more about how centralized LED drivers change the cost and reliability math for large facilities.
Remote Drivers vs. Integrated Drivers for Under-Canopy LED Lighting
The location of an LED driver can influence how heat is distributed throughout a growing facility.
Integrated-driver fixtures contain their power electronics within the fixture assembly. This simplifies installation but places the driver near the growing environment.
Remote-driver systems separate the driver from the LED fixture, allowing power electronics to be installed in a different location.
Centralized driver architecture takes this concept further by supplying multiple fixtures through a shared power distribution system.
| Feature | Integrated drivers | Remote drivers | Centralized drivers |
|---|---|---|---|
| Driver location | Inside fixture assembly | Separate from fixture | Central electrical location |
| Heat near canopy | Includes driver heat | Reduced driver heat near plants | Driver heat relocated away from canopy |
| Fixture weight | Typically higher | Lower fixture weight | Lower fixture weight |
| Installation complexity | Generally simpler | Requires additional wiring | Requires coordinated electrical infrastructure |
| Maintenance access | May require fixture access | Driver accessible separately | Drivers accessible in a dedicated location |
| Commercial scalability | Depends on fixture design | Depends on system architecture | Suitable for appropriately designed multi-fixture installations |
For commercial growing facilities, centralized driver systems can simplify electrical infrastructure and reduce the number of heat-producing electronic components positioned near the canopy.
However, relocating drivers does not eliminate the total electrical heat load. The electrical losses still occur somewhere in the facility, and the LED modules continue to generate heat.
The primary advantage is controlling where that heat is released, making it easier to manage the growing environment.
Under-Canopy Thermal and Fire Risk
Heat management isn’t just about plant health. It’s also a safety question. Under-canopy fixtures sit inside a dense mass of organic material: leaves, stems, stakes, trellising, and sometimes irrigation tubing. A fixture malfunction, wiring fault, or overheating driver in that environment creates real fire risk.
Several factors compound the danger. Humidity accelerates corrosion on electrical connections. Plant growth can physically contact fixture housings over the course of a flower cycle. Dust and organic debris accumulate on warm surfaces. In one widely discussed incident on cannabis industry forums, a grower reported a fixture wire connection overheating where a zip tie held it too close to the bar housing, creating a scorch mark on nearby plant material.
Practical steps to reduce thermal and fire risk:
- Use only UL-listed or equivalent certified fixtures rated for the intended environment.
- Maintain minimum clearance between fixture surfaces and plant tissue, trellising, and irrigation lines.
- Inspect wiring connections and fixture housings at least once per cycle for signs of heat damage, discoloration, or corrosion.
- Avoid daisy-chaining fixtures beyond the manufacturer’s specified limit, as this concentrates current and increases heat at junction points.
- Choose fixtures with integrated thermal protection (automatic dimming or shutoff if junction temperatures exceed safe limits).
Remote driver architecture also reduces fire risk inside the canopy by removing the highest-heat electrical component from the growing space entirely. For a thorough treatment of electrical and fire safety considerations, see the guide on under-canopy lighting safety.
Managing Under-Canopy Lighting Heat in Practice
The goal is not to eliminate heat. That’s impossible. The goal is to manage it so the yield benefits of under-canopy lighting (documented at 20 to 30% increases per square foot in multiple trials) aren’t undermined by thermal stress.
Choose the Right Fixtures
Low-wattage, bar-style LEDs designed for close-canopy placement are the starting point. Slim form factors minimize airflow obstruction. A purpose-built under-canopy LED bar at 120W produces roughly 409 BTU/h, a manageable load per unit that can be planned for accurately.
On the GrowWeedEasy forum, a grower running low-wattage LED tubes reported negligible temperature impact in their canopy zone. This matches expectations: when individual fixture wattage stays modest and form factor stays slim, per-bar heat contribution remains small enough for standard ventilation to handle.
Manage Airflow at Canopy Height
Room-level ventilation isn’t enough. Oscillating fans positioned at canopy height break up the stagnant air pockets that form around under-canopy bars. Without this horizontal air movement, heat and humidity accumulate in the exact spots where your lower buds are developing.
This isn’t optional. It’s the single most common failure point in under-canopy installations. CannaCribs has identified airflow management as critical when adding under-canopy bars, noting that wattage drives heat load and operating cost.
Lower-Canopy PPFD and Diminishing Heat Return
More light does not always mean more yield, and understanding where the returns flatten out is critical for heat management.
Research on cannabis photosynthesis shows that leaf-level light saturation typically occurs between 600 and 900 µmol/m²/s PPFD, depending on cultivar, CO₂ concentration, and temperature. Lower-canopy leaves that have acclimated to shade often saturate at even lower intensities, sometimes around 200 to 400 µmol/m²/s. Pushing under-canopy PPFD beyond that point adds heat without proportional photosynthetic gain.
A 2025 study published in Plants found that subcanopy supplemental lighting increased yields by nearly 25% with only a 13% increase in total lighting energy. That ratio worked because the supplemental intensity was matched to what the lower canopy could actually use. Doubling the under-canopy fixture density would have roughly doubled the BTU load without doubling the yield response.
The practical takeaway: measure PPFD at the lower canopy level with a quantum sensor before deciding how many bars to install. If the lower canopy is already receiving 200+ µmol/m²/s from overhead spill, fewer supplemental bars may be needed than expected. Every unnecessary bar is pure heat with no production payoff. For guidance on light targets and placement strategy, see the under-canopy light placement guide.
Under-Canopy Intensity Ramping and Dimming
Running under-canopy bars at full intensity for the entire light cycle is one of the most common heat management mistakes, and one of the easiest to fix.
Dimmable LED fixtures allow growers to ramp intensity up gradually at the start of the light period and reduce it before lights-off. This approach smooths the thermal load curve, avoiding the sharp spike in BTU output that occurs when dozens of fixtures switch from zero to full power simultaneously. HVAC systems handle gradual load changes far more efficiently than sudden surges.
Beyond thermal benefits, intensity ramping aligns with plant physiology. Stomata open gradually in response to light. Hitting lower-canopy leaves with full-intensity light immediately can cause a brief period of excessive transpiration before the plant’s hydraulic system adjusts. Ramping intensity over 15 to 30 minutes gives the plant time to respond.
Several commercial growers in YouTube facility walkthroughs have described running their under-canopy bars at 60 to 80% of maximum output rather than 100%, reporting nearly identical yield results with noticeably easier climate control. The logic is simple: if lower-canopy leaves saturate at moderate PPFD levels, the last 20 to 40% of fixture output adds mostly heat.
Dimming also extends fixture and driver lifespan. LED junction temperature drops with reduced current, and cooler-running diodes degrade more slowly. For facilities using centralized power systems, dimming can often be controlled from a single interface rather than adjusting each fixture individually.
Irrigation and Dehumidification Load
Under-canopy lighting doesn’t just add heat. It increases the water cycling rate of the entire grow room, a factor many growers overlook during planning.
Warmer lower-canopy air and higher leaf temperatures accelerate transpiration. Plants pull more water from the root zone and release more moisture into the air around the lower canopy. This creates two downstream effects.
First, irrigation demand increases. Plants under supplemental lighting can transpire measurably more per day than plants receiving only overhead light. If fertigation schedules aren’t adjusted, the result is dry-back that occurs too quickly, inconsistent EC in the root zone, and potential nutrient uptake problems. Growers adding under-canopy lighting should monitor substrate moisture content more closely during the first few cycles after installation and adjust irrigation frequency accordingly.
Second, the additional transpiration increases latent heat load, the energy contained in water vapor that your HVAC and dehumidification systems must remove. This is separate from, and additive to, the sensible heat load (the temperature increase) from the fixtures themselves. A room that was running near its dehumidification capacity before adding under-canopy bars may tip over into humidity control problems when the fixtures turn on. For a detailed explanation of how these loads interact, see the guide on humidity control in cannabis facilities.
The combined effect means that under-canopy lighting changes the facility’s water balance, not just its thermal balance. HVAC assessments that only account for sensible heat (BTU from fixtures) and ignore the additional latent load from increased transpiration will undersize the dehumidification requirement.
How to Monitor Temperature Around Under-Canopy LED Fixtures
Monitoring temperature at multiple canopy levels helps growers identify localized heat buildup that room-level environmental sensors may miss.
A reliable monitoring strategy should include air temperature, leaf surface temperature, relative humidity, and vapor pressure deficit (VPD).
Recommended monitoring locations:
- Upper canopy: Measure temperature near the top leaves to establish the primary growing-zone baseline.
- Middle canopy: Check the area surrounding inter-canopy or under-canopy LED bars.
- Lower canopy: Monitor leaves and developing flowers closest to the supplemental fixtures.
- Fixture zone: Measure ambient air near the LED bars and driver housings to identify concentrated heat sources.
- HVAC return area: Compare canopy measurements with the temperature of air returning to the cooling system.
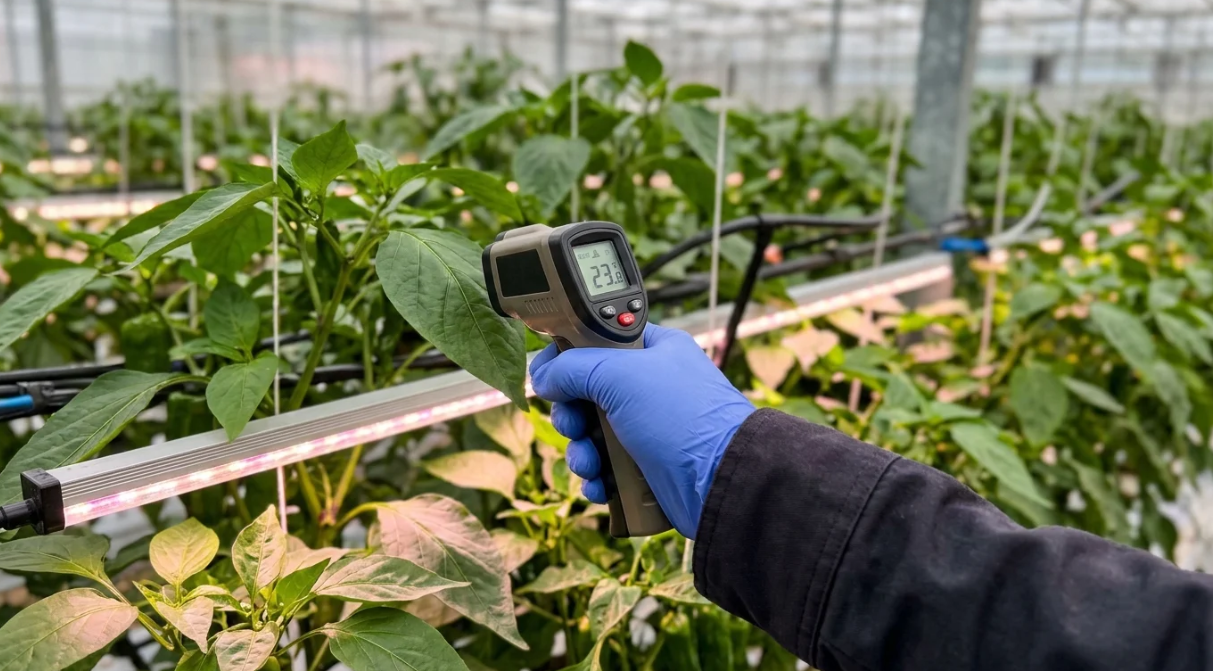
An infrared thermometer or thermal camera can help identify leaf surface temperature differences. Air temperature and humidity sensors should be positioned at representative canopy heights, away from direct fixture exposure and direct fan discharge.
How Often Should Growers Check Under-Canopy Temperature?
| Monitoring activity | Suggested frequency | Purpose |
|---|---|---|
| Air temperature | Continuous | Identify temperature fluctuations |
| Relative humidity | Continuous | Detect humidity accumulation |
| VPD | Continuous or calculated from sensor readings | Track changes in transpiration conditions |
| Leaf surface temperature | Daily during initial commissioning | Identify localized heating |
| Thermal imaging | Weekly or when problems appear | Locate uneven temperature distribution |
| HVAC performance | Before and after installation | Confirm cooling capacity |
During the first several days after installation, compare measurements with the lights off and after the fixtures have reached normal operating conditions.
If lower-canopy temperatures rise disproportionately, inspect fixture spacing, airflow direction, fan placement, and nearby driver locations before increasing overall room cooling.
The goal is to maintain a consistent plant environment throughout the canopy rather than relying on a single temperature reading from the room controller.
Validate HVAC Before Installation
Calculate your total under-canopy BTU load before ordering fixtures, not after. Multiply fixture count by individual BTU output (3,412 BTU/h per kW of input power, minus photon conversion). Add this to your existing overhead lighting load. If your HVAC system can’t handle the total, you’ll discover it the hard way during flower.
Monitor Leaf Temperature, Not Just Air Temperature
An IR thermometer pointed at lower-canopy leaves tells you what’s actually happening at the plant level. Room air temperature can read 75°F while leaf surfaces near a fixture run several degrees warmer. Under LEDs, the opposite can also occur: leaf temperatures running cooler than ambient air due to reduced radiant heat. Either way, leaf-level data is the measurement that matters.
Temperature shifts from added under-canopy lighting also affect vapor pressure deficit, which directly influences transpiration rates and nutrient uptake. Understanding how VPD shifts with temperature is essential for dialing in your environment after adding subcanopy fixtures.
How Under-Canopy Heat Affects Humidity and VPD
Under-canopy lighting can influence the temperature and humidity conditions surrounding lower plant growth.
Dense foliage restricts air movement, while plant transpiration continuously releases water vapor into the surrounding environment. When airflow is insufficient, moisture can accumulate within the canopy and create localized humidity differences.
Vapor pressure deficit (VPD) describes the difference between the amount of moisture the air can hold at saturation and the moisture it currently contains. Temperature and relative humidity both influence VPD.
When temperature increases without a corresponding change in moisture content, VPD generally increases. However, if humidity rises at the same time, the resulting VPD change may be smaller or may move in the opposite direction.
This is why growers should monitor temperature and relative humidity together rather than treating temperature as an isolated measurement.
Three factors to monitor:
- Leaf temperature: Helps determine the thermal conditions experienced by the plant.
- Relative humidity: Identifies moisture accumulation around lower foliage.
- VPD: Provides additional information about the relationship between temperature and atmospheric moisture.
Use representative measurements from the lower canopy when evaluating environmental changes after installing supplemental lighting.
Canopy Management for Localized Heat Buildup
Plant architecture directly affects how heat accumulates around under-canopy fixtures, yet most growers think about canopy management only in terms of light penetration, not thermal dynamics.
Dense, unpruned lower canopies create the worst conditions for heat buildup. Tightly packed fan leaves block horizontal airflow, trap transpired moisture, and create dead zones where warm air stagnates. The problem compounds during late flower when foliage is at its densest and the lower buds that under-canopy lighting is supposed to improve are most vulnerable to heat and humidity stress.
Strategic defoliation of the lower canopy serves a dual purpose: it improves light penetration to target bud sites and simultaneously opens airflow corridors that allow convective heat to escape. Removing select fan leaves around under-canopy fixture locations can drop localized temperature by several degrees without additional fans or HVAC adjustments.
Trellising and training methods matter too. A flat, SCROG-style canopy with minimal vertical variation creates a thick horizontal barrier that traps heat below it. Slight vertical variation or strategic gaps in the trellis allow warm air to rise out of the under-canopy zone. Some commercial growers deliberately leave narrow corridors between plant rows specifically to maintain airflow around their supplemental bars.
The timing of defoliation also interacts with heat management. Aggressive defoliation early in flower opens airflow but temporarily reduces the plant’s transpirational cooling capacity. A staged approach, removing a moderate number of lower fan leaves at flip and again around week three, tends to balance light access, airflow, and the plant’s ability to self-regulate temperature.
For additional guidance on plant training and canopy structure around supplemental fixtures, see the under-canopy lighting workflow guide.
Respect the Coverage Ceiling
Industry guidance suggests that covering above 75% of the canopy with under-canopy lighting yields diminishing marginal returns while increasing heat management complexity. More bars don’t always mean more production. Past a certain density, you’re adding thermal load without proportional yield benefit.
Common Under-Canopy Lighting Heat Problems and How to Fix Them
Under-canopy lighting problems are not always caused by excessive fixture wattage. Poor airflow, incorrect sensor placement, concentrated driver heat, and insufficient HVAC capacity can all contribute to localized temperature increases.
| Problem | Possible cause | Recommended solution |
|---|---|---|
| Lower leaves become unusually warm | Localized radiant heating or inadequate airflow | Check fixture distance, leaf temperature, and air movement |
| Temperature increases after lights turn on | Additional electrical heat load | Recalculate total lighting BTU/h and verify HVAC performance |
| Hot spots around individual fixtures | Concentrated driver or fixture heat | Inspect component placement and consider remote drivers |
| High humidity beneath the canopy | Restricted airflow and plant transpiration | Improve horizontal air circulation and humidity removal |
| Uneven temperature across growing rows | Inconsistent fixture spacing or airflow distribution | Review fixture layout and fan positioning |
| HVAC runs continuously after installation | Cooling capacity is insufficient for the revised load | Reassess the complete room heat balance |
| Leaf temperature differs significantly from air temperature | Changes in radiation, transpiration, or air movement | Compare leaf temperature, VPD, and environmental conditions |
| Substrate drying faster than expected | Increased transpiration from supplemental lighting | Adjust irrigation frequency and monitor dry-back patterns |
A useful troubleshooting approach is to compare temperature measurements at the upper, middle, and lower canopy levels before changing fixture settings or increasing HVAC output.
This helps identify whether the problem originates from the lighting system, restricted airflow, plant water status, or the room’s overall cooling capacity.
How Under-Canopy Lighting Affects Heat, Energy Consumption, and Yield
The additional heat generated by under-canopy lighting should be evaluated alongside its potential contribution to crop production and lighting efficiency.
Supplemental lighting increases electrical consumption and adds thermal energy to the growing environment. However, it can also improve light distribution by delivering photons to lower plant sections that receive less illumination from overhead fixtures.
A 2025 peer-reviewed study published in Plants investigated subcanopy and inter-canopy supplemental lighting in medicinal cannabis cultivation.
Results From a 2025 Under-Canopy Lighting Study
| Measurement | Subcanopy lighting | Inter-canopy lighting |
|---|---|---|
| Dry inflorescence yield increase | 24.58% | 29.95% |
| THC yield increase | 18.67% | 24.42% |
| Total lighting energy increase | 13.13% | 23.21% |
| Total terpene concentration increase | Not reported as a treatment-specific percentage in the abstract | 12.5% |
The results demonstrate that supplemental lighting can improve lower-canopy light distribution and increase harvestable production under controlled growing conditions.
However, the additional lighting also increased electrical consumption. Growers therefore need to consider the relationship between fixture efficiency, electricity costs, HVAC requirements, and the value of additional production. For a full financial analysis framework, see the under-canopy lighting ROI guide.
Why Thermal Management Matters for Yield
Adding under-canopy fixtures without evaluating the growing environment can create localized heat and humidity problems.
Excessive leaf temperature, inadequate airflow, and plant water stress can interfere with normal physiological processes. These factors should be monitored alongside light intensity and photoperiod.
The most effective approach is to treat under-canopy lighting as part of an integrated environmental control system. Fixture placement, cooling capacity, air movement, and plant-level monitoring should be evaluated together.
For additional research, see the peer-reviewed study, Subcanopy and Inter-Canopy Supplemental Light Enhances and Standardizes Yields in Medicinal Cannabis, published in 2025.
Frequently Asked Questions
How much heat does a single under-canopy LED bar produce?
A 120W LED bar produces approximately 409 BTU/h. The universal conversion is 3,412 BTU/h per kilowatt of electrical input, minus whatever fraction becomes photons (roughly 40 to 45% for efficient LEDs). This per-bar load is manageable, but it compounds across a commercial room with dozens or hundreds of fixtures.
Will under-canopy lighting overheat my grow room?
Not if you plan for it. Calculate total BTU output from all under-canopy fixtures and add it to your existing lighting heat load. Validate that your HVAC system can handle the combined total before installation. Most issues arise when growers add bars without recalculating their cooling capacity.
Do LED under-canopy bars produce less heat than HPS?
LEDs and HPS produce the same total heat per watt of input power. The critical difference is how that heat is delivered. LEDs emit roughly 15% as radiant heat (which directly warms leaf tissue) compared to about 55% for HPS. This lower radiant fraction allows LEDs to sit much closer to foliage without causing heat stress.
What is the ideal distance for under-canopy LED bars from plant tissue?
Most LED under-canopy bars can be placed 12 to 24 inches from the canopy. Their low radiant heat output allows closer placement than any HID option. Always check the manufacturer’s recommended distances and monitor leaf surface temperatures during the first few days after installation.
How do remote drivers reduce under-canopy lighting heat?
LED drivers convert 5 to 11% of input power into concentrated waste heat in a single component. Remote or centralized driver architecture moves that heat source out of the grow room entirely, relocating it to a dry electrical space where cooling is simpler and components last longer. This removes the hottest point of the fixture from the canopy zone.
Should I add fans specifically for under-canopy lighting?
Yes. Oscillating fans at canopy height are strongly recommended. Dense foliage restricts natural airflow around under-canopy bars, creating microclimate pockets of elevated temperature and humidity that room-level HVAC sensors miss. Horizontal air movement through the canopy breaks up these stagnant zones.
Does under-canopy lighting heat affect VPD?
It does. Any temperature increase in the canopy zone shifts vapor pressure deficit, which influences transpiration rate, nutrient uptake, and disease pressure. Growers should monitor VPD at the lower canopy level after adding subcanopy fixtures, not just at the top of the plant.
Should I dim my under-canopy bars or run them at full power?
In most cases, running at 60 to 80% intensity produces nearly the same yield benefit as 100% while significantly reducing heat load and extending fixture lifespan. Lower-canopy leaves saturate at moderate PPFD levels, so the last increment of intensity often adds heat without meaningful production gain. Dimming also smooths the thermal load curve for your HVAC system.
Does under-canopy lighting increase my irrigation needs?
Yes. Higher leaf temperatures and increased light exposure in the lower canopy accelerate transpiration, which means plants pull more water from the root zone. Monitor substrate moisture levels closely during the first cycles after installing supplemental bars and adjust fertigation frequency as needed.
Is the yield gain from under-canopy lighting worth the added heat load?
Documented yield gains from under-canopy lighting range from 20% to 35% per square foot. The incremental HVAC cost of managing the added heat is a fraction of that production increase. When properly engineered, the return on investment from under-canopy lighting far exceeds the cost of thermal management.
How do I get started with under-canopy lighting for my facility?
The first step is a heat load assessment of your current grow room, followed by fixture selection and HVAC validation. Contact Thrive Agritech for a free consultation with a lighting expert who can help plan fixture count, placement, and power architecture for your specific facility.