Under-Canopy Lighting Trial 2026: ROI, Yield & Design
Run an under-canopy lighting trial and measure yield, PPFD, DLI, energy use, and ROI. Learn how to design a repeatable 2026 grow test.
TL;DR
An under-canopy lighting trial is a controlled growing experiment that evaluates whether supplemental LED fixtures placed below or within a plant canopy improve crop yield, quality, and light distribution compared with overhead lighting alone. A successful trial uses genetically consistent plants, control and treatment groups, standardized growing conditions, and measurements of yield, PPFD, DLI, electricity consumption, and operating costs. Commercial growers should evaluate results across multiple crop cycles before investing in facility-wide installation.
The main purpose is to determine whether additional or redistributed light produces enough measurable improvements in crop production and quality to justify the equipment, electricity, cooling, and installation costs.
Explore under-canopy LED lighting to see how purpose-built fixtures fit into trial designs.
What Is an Under-Canopy Lighting Trial?
An under-canopy lighting trial is a structured experiment in which supplemental LED light bars are installed below or within the plant canopy, alongside standard overhead lighting, and measured against a control group receiving top lighting only. The trial tracks specific outcomes (yield, flower quality, cannabinoid and terpene uniformity, energy consumption, and economic return) over one or more crop cycles to determine whether redistributing photons to shaded lower bud sites produces a measurable, repeatable benefit.
This is not the same as simply adding lights. The word “trial” is the operative term. It means controls, defined variables, consistent measurement protocols, and enough data to make a confident investment decision.
You will see the same concept referred to by several names in academic and trade literature: subcanopy lighting (SCL), intercanopy lighting (ICL), and intracanopy lighting all describe the practice of delivering photons to plant tissue that overhead fixtures cannot reach.
Why Growers Run Under-Canopy Lighting Trials
The physics of light through a plant canopy are unforgiving. Irradiance drops exponentially as you move from the top of the canopy downward. Lower bud sites may receive only a fraction of the PPFD that upper colas get, sometimes as little as 10 to 20% of what hits the top.
This light gradient triggers a well-documented biological response. Within a canopy receiving only top lighting, the decrease in irradiance is coupled with a shift in the red-to-far-red ratio, which causes phytochrome-mediated shade-avoidance responses: elongated internodes, thinner leaves, reduced branching, and loose, low-potency flower structures. Under-canopy lighting reverses this response by delivering photons directly to shaded tissue, encouraging tighter node spacing and more productive lower branches.
The reason growers run trials rather than simply installing lights everywhere is that the magnitude of the benefit depends on their specific environment, genetics, plant architecture, and existing light levels. A trial quantifies the actual gain in their facility before they commit to a full buildout. For cannabis cultivators weighing this decision, understanding your cannabis light intensity targets at each canopy level is a critical starting point.
Chlorophyll and Photosystem Response to Under-Canopy Light
Understanding why under-canopy lighting works requires a quick look at what happens inside the leaf. Plants contain two photosystems, PSI and PSII, each with different peak absorption characteristics. PSII absorbs strongly in the red range (around 680 nm) while PSI peaks further into deep red (around 700 nm). Under a dense canopy receiving only overhead light, the spectral quality shifts as photons filter through upper leaves. Blue and red wavelengths are absorbed preferentially by upper foliage, leaving lower leaves with a higher proportion of far-red and green light.
This spectral shift matters. Lower canopy leaves acclimate to shade by increasing their chlorophyll b to chlorophyll a ratio, which expands the range of wavelengths they can capture but reduces their maximum photosynthetic rate. These shade-adapted leaves have thinner palisade mesophyll, fewer chloroplasts per unit area, and lower Rubisco content. They are physically less capable of converting light into sugars, even when light is suddenly made available.
Under-canopy lighting counteracts this acclimation. When supplemental photons reach lower leaves consistently from early in the growth cycle, those leaves develop sun-type characteristics: higher chlorophyll a concentrations, thicker lamina, and greater photosynthetic capacity. Practitioners on Reddit’s cannabis growing communities have observed this directly, noting that lower leaves under supplemental bars stay greener and thicker rather than yellowing and dropping off mid-flower.
The practical takeaway for trial design is that timing matters. Leaves that have already fully acclimated to shade cannot be quickly converted back to sun-type tissue. Starting supplemental lighting early enough in the cycle (or at least within the first two to three weeks of flower for cannabis) gives lower tissue the best chance to develop the photosynthetic machinery needed to convert those extra photons into yield.
What a Proper Trial Measures
A credible under-canopy lighting trial isolates a single variable (the presence or absence of under-canopy light) and holds everything else constant. Here is what that looks like in practice.
Control Design
The gold standard is a split-room or side-by-side setup where treatment and control groups share identical genetics, nutrients, irrigation, environment, and overhead lighting. The 2025 MDPI Plants study used 72 genetically identical cannabis plants split across treatments, which is the kind of rigor that produces trustworthy data.
Key Metrics
A thorough trial tracks more than just weight. The metrics that matter:
- Total dry flower weight (grams per square foot or per plant)
- Premium-to-small-bud ratio
- Cannabinoid uniformity between top and bottom flower sites
- Terpene profiles at multiple canopy heights
- Daily Light Integral (DLI) at several canopy positions
- Energy consumption in kWh
- HVAC load changes
- Labor hours for lollipopping and defoliation
How to Measure PPFD and DLI During an Under-Canopy Trial
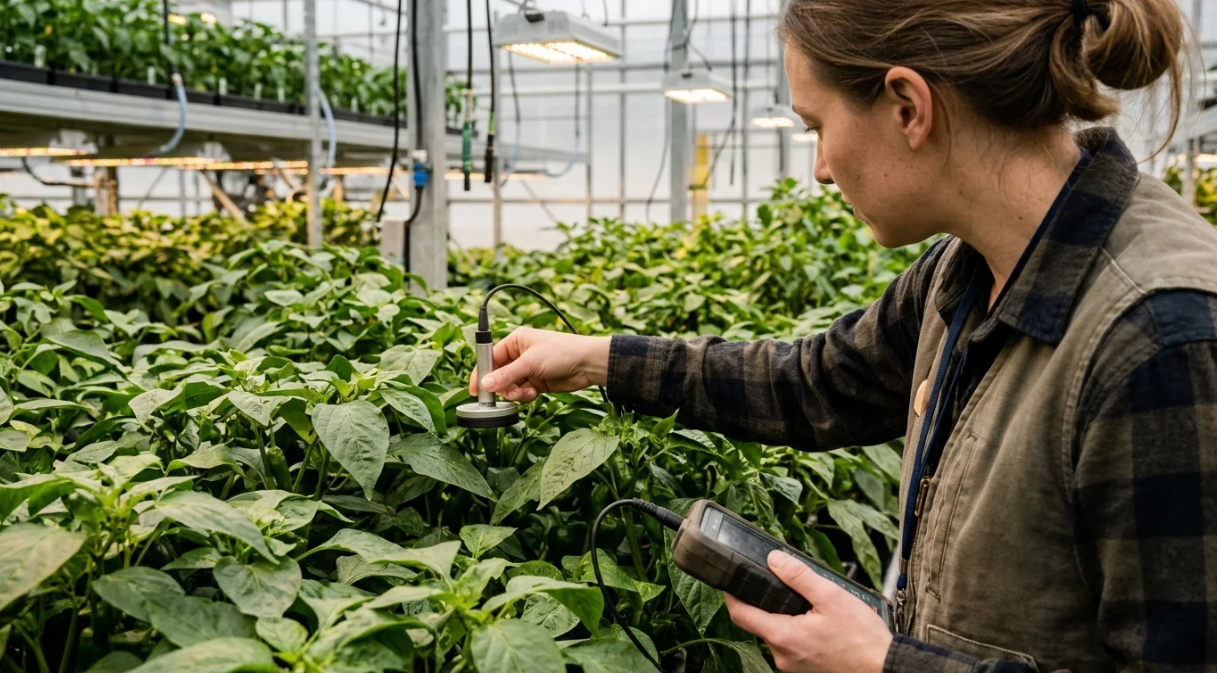
PPFD and DLI are two of the most important measurements in an under-canopy lighting trial.
Photosynthetic Photon Flux Density (PPFD) measures the amount of photosynthetically active photons reaching a surface each second. It is expressed in micromoles per square meter per second (µmol/m²/s).
Daily Light Integral (DLI) measures the total amount of photosynthetically active light received over an entire day. It is expressed in moles per square meter per day (mol/m²/day).
Growers should measure both values at multiple canopy positions because overhead lighting and supplemental under-canopy fixtures create different light distribution patterns. For a full breakdown of these metrics and their relationship, see this guide on PPFD vs DLI.
PPFD Measurement Locations
| Measurement location | What it reveals |
|---|---|
| Top canopy | Baseline overhead light intensity |
| Middle canopy | Light penetration into the central plant structure |
| Lower canopy | Whether supplemental lighting reaches shaded growth areas |
| Below the canopy | Additional light delivered upward by under-canopy fixtures |
Use a calibrated quantum sensor or suitable PAR meter. Take measurements at consistent locations, heights, and times to make the control and treatment groups comparable.
DLI Calculation Formula
DLI can be calculated from average PPFD and the number of hours the lights operate.
DLI = PPFD × Photoperiod (hours) × 3,600 ÷ 1,000,000
For example, a growing area receiving an average PPFD of 500 µmol/m²/s over a 12-hour photoperiod has a DLI of:
500 × 12 × 3,600 ÷ 1,000,000 = 21.6 mol/m²/day.
When measuring under-canopy lighting, account for the light received from all active fixtures rather than treating the supplemental bars as an isolated light source.
For natural-light greenhouses, use integrated daily measurements where possible because sunlight intensity changes throughout the day.
Why Light Distribution Matters
Two growing areas can receive a similar total DLI while having very different light distributions.
One may concentrate most of its photons at the top of the canopy, while another distributes more photons across middle and lower plant layers.
This is why a trial should measure light at several heights instead of relying on a single canopy-level PPFD reading.
Duration
One crop cycle gives you directional data. Two to three cycles give you statistical confidence. A single run can be misleading because of normal variation in plant performance, environmental fluctuations, and seasonal shifts in baseline conditions.
How to Design an Under-Canopy Lighting Trial: Step by Step
A successful under-canopy lighting trial starts with a repeatable experimental design. The objective is to determine whether supplemental lighting improves crop performance while minimizing the influence of genetics, environmental conditions, irrigation, and cultivation practices.
Commercial growers can use the following process to structure a controlled trial.
Step 1: Establish a Baseline
Before installing under-canopy fixtures, measure the existing growing environment.
Record:
- Average overhead PPFD at canopy level
- PPFD at middle and lower canopy positions
- Daily Light Integral (DLI)
- Photoperiod
- Temperature and relative humidity
- Air circulation and ventilation
- Existing fixture wattage and electricity consumption
- Current yield per plant or growing area
These baseline measurements establish how much light reaches different parts of the plant before the trial begins.
Step 2: Select Consistent Plants
Choose plants with matching genetics, age, size, and growing history.
Clones from the same mother plant are preferable for controlled cannabis experiments because they reduce genetic variation between treatment groups.
Avoid selecting unusually large or small plants for only one group. Distribute plants as evenly as possible across the experimental areas.
Step 3: Create Control and Treatment Groups
Divide the growing area into at least two groups:
- Control group: Receives the facility’s standard overhead lighting without under-canopy supplementation.
- Treatment group: Receives the same baseline growing conditions with under-canopy or intercanopy LED lighting.
Keep nutrients, irrigation, temperature, humidity, CO₂, plant density, and cultivation practices consistent.
Whenever possible, use multiple independently replicated growing zones rather than relying on one control area and one treatment area.
Control Group vs. Under-Canopy Treatment Group
A controlled comparison helps growers determine whether the lighting intervention produces measurable improvements.
| Trial variable | Control group | Treatment group |
|---|---|---|
| Plant genetics | Same genetics | Same genetics |
| Plant age | Identical starting age | Identical starting age |
| Overhead lighting | Standard lighting | Same baseline or adjusted lighting, depending on trial design |
| Under-canopy lighting | None | Supplemental LED fixtures |
| Nutrients | Standardized feeding program | Same feeding program |
| Irrigation | Same irrigation schedule | Same irrigation schedule |
| Temperature | Same environmental targets | Same environmental targets |
| Humidity | Same environmental targets | Same environmental targets |
| PPFD measurements | Top, middle, and lower canopy | Top, middle, and lower canopy |
| DLI measurements | Total daily light exposure | Total daily light exposure |
| Electricity consumption | Baseline lighting energy | Total lighting energy |
| Harvest measurements | Dry yield and product quality | Dry yield and product quality |
Important experimental consideration: If the objective is to measure the benefit of adding supplemental photons, keep the overhead lighting unchanged in both groups. If the objective is to measure the benefit of redistributing photons, adjust the overhead lighting in the treatment group so that the total photon budget is comparable.
These are two different experiments and should not be confused when interpreting yield improvements.
Step 4: Select and Install the Right LED Fixtures
Fixture selection can make or break a trial. Not all LED bars are designed for under-canopy use, and the wrong hardware introduces variables that confuse results.
Form factor. Under-canopy bars need to be slim enough to fit between plants without blocking airflow or creating shadow. Bulky fixtures that crowd the canopy defeat the purpose. The Boost XE is purpose-built for this application at 120W in a compact form factor.
Photon efficacy. Compare fixtures on µmol/J (micromoles of photons per joule of electricity). Higher efficacy means more light per watt, which directly affects your ROI calculation. If a bar is 30% less efficient than your overhead LEDs, you need a proportionally larger yield gain to break even.
Dimming capability. Dimmable fixtures are not optional for a good trial. You need the ability to fine-tune output to avoid overshooting DLI targets, especially when combined with high-output overhead lights. Look for 0 to 10V dimming or digital control compatibility. In a redistribution trial where you are lowering overhead output and adding below-canopy output, precise dimming on both layers is what keeps the total photon budget honest. Practitioners on cannabis growing forums frequently mention that running under-canopy bars at full power from day one causes light stress on lower leaves that have not yet adapted, and recommend starting at 50 to 60% intensity before ramping up over the first week.
Thermal output. Modern LED bars add minimal heat compared to HPS, but placement within the canopy means even small amounts of heat are close to plant tissue. Check the fixture’s operating temperature specification. Passive-cooled bars with aluminum heat sinks are standard for under-canopy use.
Record the following for every fixture in the trial:
- Fixture model and manufacturer
- Electrical wattage
- Photon efficacy (µmol/J)
- Spectral distribution
- Mounting height
- Fixture spacing
- Beam direction
- Operating schedule
- Dimming setting
The goal is to make the setup repeatable so another cultivation team can reproduce the experiment. For a detailed walkthrough of physical installation, see the under-canopy lighting installation checklist.
Step 5: Monitor Light Distribution
Measure PPFD at the top, middle, and lower canopy positions.
Take measurements at consistent locations and times. Record both the supplemental contribution and the total light reaching the plants.
For trials involving redistributed lighting, document how much overhead light is reduced and how much light is delivered below the canopy.
Step 6: Track Plant Development
Throughout the crop cycle, record changes in:
- Plant height and canopy density
- Branch development
- Leaf condition
- Flower development
- Environmental conditions
- Water and nutrient requirements
- Labor hours
Use standardized photographs from the same positions to document visual differences between treatment and control groups.
Step 7: Harvest and Compare Results
Harvest both groups using the same procedures.
Measure dry yield after consistent drying and curing conditions. Where relevant, separate premium-grade flowers from smaller or lower-grade material.
For higher-quality analysis, submit representative samples from different canopy positions for laboratory testing.
Step 8: Calculate Financial Performance
Compare the additional revenue generated against the cost of fixtures, electricity, cooling, installation, and maintenance.
Do not make a facility-wide investment decision based solely on an increase in total dry weight. Evaluate saleable yield, product quality, and operating expenses together.
Step 9: Repeat the Trial
Repeat the experiment across additional crop cycles to determine whether the results are consistent.
A repeatable improvement across multiple cycles provides a stronger basis for an investment decision than a single successful harvest.
Light Spectrum and Spectral Correction in Under-Canopy Trials
Spectrum is one of the most underappreciated variables in under-canopy lighting trials. Two bars delivering identical PPFD can produce different plant responses if their spectral output differs significantly.
Why Spectrum Matters Below the Canopy
The light environment at the bottom of a dense canopy is already spectrally altered. Upper leaves absorb most of the blue (400 to 500 nm) and red (600 to 700 nm) photons while transmitting and reflecting more green (500 to 600 nm) and far-red (700 to 750 nm). This means lower leaves are already bathed in a spectrum that favors shade-avoidance responses.
Under-canopy fixtures can either reinforce or correct this imbalance. A bar emitting primarily red wavelengths will boost photosynthetic photon delivery efficiently (red photons are cheap to produce per µmol/J), but it does little to counteract the far-red-heavy environment that drives stem elongation and loose flower structures. A full-spectrum white bar provides blue wavelengths that promote compact growth and can partially suppress shade avoidance signaling, even though its raw photon efficacy number may be slightly lower.
This tradeoff is real. Red-heavy under-canopy bars tend to produce marginally more biomass per watt, while full-spectrum white bars tend to produce denser, more compact flowers with better visual quality. One YouTube walkthrough from a commercial cannabis consultant demonstrated side-by-side results showing that red-only under-canopy bars produced slightly heavier lower buds, but the full-spectrum treatment produced buds that graded higher in visual and density assessments during quality control.
How to Handle Spectrum in Your Trial
For a clean experiment, use the same spectral output across all under-canopy fixtures in the treatment group. If you want to compare spectra, that is a separate trial with its own control group. Mixing spectra within a single treatment group makes the data uninterpretable.
Document the spectral power distribution (SPD) of every fixture. Manufacturers should provide this data. If they do not, that is a red flag about the fixture’s suitability for research-grade trials. For more on how spectrum affects plant growth across wavelengths, see this summary of light spectra impact.
Airflow and Lower-Canopy Microclimate
Adding fixtures inside the canopy changes the microclimate. This is unavoidable, and ignoring it is one of the fastest ways to ruin an otherwise well-designed trial.
The Microclimate Problem
Dense canopies already have poor air circulation at their base. Humidity tends to be higher, temperature slightly lower (in the absence of lighting), and CO₂ concentration lower because photosynthetic demand from upper leaves draws down the supply before it diffuses downward.
Under-canopy LED bars change two things at once. First, they add a small amount of radiant heat directly within the canopy. Second, and more importantly, they stimulate increased photosynthetic activity in lower leaves, which increases transpiration and water vapor release in an area that already has limited air exchange.
The result can be a pocket of elevated humidity directly around the lower bud sites. For cannabis specifically, this is a mold and botrytis risk that must be actively managed. For detailed strategies on managing humidity in these situations, the guide on humidity control in cannabis facilities provides useful protocols.
Practical Solutions
- Oscillating fans or floor-level circulation: Position airflow to move across the lower canopy, not just above it. The goal is gentle but consistent air movement at the height of the under-canopy fixtures.
- Dehumidification monitoring: Place humidity sensors at mid-canopy and lower-canopy positions, not just at the room-level controller height. A room reading of 55% RH can mask 70%+ RH in the stagnant lower canopy.
- Fixture positioning for airflow: Mount bars with enough clearance that air can move around them rather than creating dead zones. Slim, low-profile fixtures are better here than bulky alternatives.
During the trial, record temperature and humidity at the same canopy heights where you record PPFD. If the treatment group shows elevated humidity at lower canopy positions while the control does not, that difference is confounding your yield data.
Transpiration and Irrigation Adjustment
More light means more transpiration. This is basic plant physiology, but it catches many growers off guard during their first under-canopy lighting trial.
When lower leaves receive enough light to run photosynthesis at meaningful rates, their stomata open wider and stay open longer. Water loss through transpiration increases. In a well-designed growing system, this means the treatment group may require more water than the control group, potentially starting within the first week of supplemental lighting.
If irrigation schedules remain identical between groups, the treatment plants can experience mild water stress. This stress may not be visually obvious, but it limits the photosynthetic gains the trial is trying to measure. You end up attributing a smaller yield improvement to the lighting when the real bottleneck was water delivery.
What to Do About It
Monitor substrate moisture or runoff volume in both groups. If the treatment group consistently shows lower substrate moisture or higher runoff EC (indicating concentrated nutrients from less water uptake relative to feed volume), adjust irrigation frequency or volume for the treatment group.
Yes, this means the irrigation schedule is no longer identical between groups. That is acceptable, because maintaining identical irrigation when the plants have different water demands would itself introduce a confounding variable. The goal is to meet each group’s actual water needs, not to force identical inputs. Document the adjustment and the data that triggered it.
For cannabis growers, the interplay between light, transpiration, and VPD is particularly important. Higher transpiration rates change the leaf-level vapor pressure deficit, which affects nutrient uptake and calcium mobility. Understanding VPD in cannabis cultivation helps prevent deficiency symptoms that might otherwise be misattributed to the lighting treatment itself.
Chemical Profile Standardization in Trial Results
A 20% yield increase means little if the additional flower has a significantly different chemical profile than what the facility normally produces. For cannabis operations, chemical consistency is increasingly a market requirement, not just a nice-to-have.
What to Test
At minimum, submit samples from three canopy positions (top, middle, lower) in both control and treatment groups for:
- Total THC and CBD (or other target cannabinoids)
- Individual terpene concentrations (at least the top five by volume)
- Moisture content at time of testing
How Under-Canopy Light Affects Chemistry
The 2025 MDPI Plants study found that intercanopy lighting increased total THC accumulation by approximately 24% and total terpene concentration by 12.5%. But this needs careful interpretation. Total accumulation (milligrams per plant) increased because there was more flower mass, and the flower that developed was more chemically productive. The concentration (percentage by weight) at individual bud sites does not always change uniformly.
Growers on r/CannabisGrowers have reported that under-canopy lighting tends to “bring the lowers up to match the tops” in terms of cannabinoid percentage, rather than pushing all sites higher. This aligns with the published data: the primary chemical benefit is uniformity across the plant, not a blanket increase in potency at every site.
Standardization Protocol for Trials
For trial data to be useful across multiple cycles and potentially across facilities, standardize the testing process:
- Use the same laboratory for all samples within a trial
- Harvest samples at the same maturity indicator (trichome color for cannabis, days after flower initiation, or other consistent marker)
- Dry and cure samples identically before submission
- Report results as both concentration (%) and total yield (mg or g per plant)
Reporting only concentration or only total yield gives an incomplete picture. A facility that cares about premium shelf product needs high concentration. A facility selling to extraction may care more about total cannabinoid mass. The trial should serve both analyses.
High-Density Canopy Management During Trials
Under-canopy lighting has the biggest impact in dense canopies where upper foliage blocks most overhead light from reaching lower sites. But dense canopies also present the most challenges for getting supplemental light where it needs to go.
The Density Paradox
The denser the canopy, the more potential benefit from under-canopy lighting, and the harder it is to deliver that light effectively. In sea-of-green cannabis setups with 4 to 6 plants per square foot, the lower canopy can be nearly impenetrable by the third week of flower. Fixture bars placed early in the cycle may end up completely engulfed by foliage, with leaves pressed directly against the LED surface.
Managing the Canopy Around the Fixtures
Practitioners take several approaches. The most common in commercial cannabis is a modified defoliation strategy that clears a “light lane” around the fixture position while leaving productive fan leaves elsewhere. This is different from standard lollipopping, which removes lower growth entirely. The goal is to maintain enough leaf area below the canopy to capture supplemental light while keeping airflow paths open.
Some growers on cannabis cultivation forums describe using adjustable mounting hardware that lets them raise under-canopy bars as the canopy fills in. This keeps a consistent distance between the LED surface and the nearest leaf tissue, typically 6 to 12 inches. Fixed mounting works fine for shorter crop cycles or less vigorous genetics, but adjustable mounts add flexibility for trial conditions where you are still learning how the specific cultivar responds.
For a broader look at how under-canopy lighting fits into daily cultivation operations, the under-canopy lighting workflow guide covers scheduling, defoliation timing, and integration with existing cultivation SOPs.
Vertical Light Penetration vs. Lateral Distribution
When designing fixture placement for a trial, consider both vertical and lateral light distribution. A single bar aimed straight up delivers photons to a narrow column of tissue directly above it. Angled bars or multiple bars per row can spread light laterally across a wider section of the lower canopy.
Measure PPFD at multiple lateral positions (not just directly above the bar) to understand the actual footprint of each fixture. This data is essential for calculating how many bars per square foot are needed when scaling from trial to facility-wide deployment.
What Published Trials Show
Published research provides evidence that under-canopy and intercanopy lighting can improve crop yield, light distribution, and product uniformity. However, results vary depending on crop species, genetics, fixture placement, light intensity, spectrum, and whether supplemental lighting increases total photon delivery or redistributes an existing light budget.
The strongest evidence comes from peer-reviewed studies with controlled growing conditions and documented measurement methods. Commercial cultivation trials provide additional real-world insights, but their results should be evaluated separately because facility conditions, cultivars, and experimental designs can differ.
The following studies illustrate both the potential benefits and the limitations of under-canopy lighting.
Under-Canopy Lighting Research: Results at a Glance
| Research or trial | Crop | Reported result | Important consideration |
|---|---|---|---|
| Hawley et al. (2018), University of Guelph | Cannabis | Under-canopy lighting research evaluated flower yield and quality across canopy positions | Do not assume all cannabinoid concentrations increase |
| 2025 Plants study | Cannabis | Intercanopy treatment increased dry inflorescence yield by approximately 29.95% | Controlled study using a specific cultivar and growing environment |
| StateHouse Holdings commercial validation | Cannabis | Reported approximately 20% average flower-yield improvement and 27% improvement in premium-to-small-flower ratio | Commercial trial using light redistribution |
| Wageningen University research | Cucumber | Improved lower-canopy photosynthesis without increasing total biomass or fruit production in the studied conditions | Demonstrates that improved light distribution does not always translate into higher yield |
| Wageningen/Fluence research | Cucumber and tomato | Reported yield increases of up to 110% in cucumber and 62% in tomato in higher-intensity combined-light treatments | Results involved differences in total lighting intensity, not just fixture position |
Important: These figures represent different experiments, crops, and treatment conditions. They should not be interpreted as directly comparable or as guaranteed commercial outcomes.
Cannabis
The University of Guelph study (Hawley et al., HortScience, 2018) found that under-canopy lighting increased total dry bud mass by 20 to 24%. The benefits extend beyond total dry flower weight. Research has found that supplemental lighting can improve the distribution of harvestable inflorescences and increase overall cannabinoid and terpene production.
However, chemical concentration and total chemical yield are different measurements. A higher total THC yield does not necessarily mean every individual flower has a higher THC percentage. Growers should therefore measure both flower weight and laboratory-tested chemical composition at different canopy positions.
The 2025 MDPI Plants study confirmed these findings under tightly controlled conditions. The intercanopy treatment produced the largest absolute increases: approximately 30% in dry inflorescence yield, 24% in THC accumulation, and 12.5% in total terpene concentration. The authors were careful to note that these figures do not mean every facility will see the same gains automatically.
On the commercial side, StateHouse Holdings tested whether redistributing the same total photon budget (rather than adding more wattage) could drive improvement. Results showed an average 20% increase in flower yield alongside a 27% increase in the premium-to-small-flower ratio. This is a critical finding: the gain came from better photon placement, not simply more electricity.
Research at the Cannabis Research Tech Center in the Netherlands, working with Signify, reported that intercanopy lighting achieved an average yield increase of 30% across multiple varieties and crop cycles.
For a deeper look at the ROI math behind these numbers, see the under-canopy lighting ROI guide.
Vegetable and Berry Crops
The evidence extends well beyond cannabis. Wageningen University trials found that adding intercanopy lighting increased cumulative cucumber yield by up to 110% compared to top-light-only treatment, with tomato yields rising up to 62%. Both cucumber cultivars also showed decreased plant height and more compact morphology.
A blackberry intercanopy study (Rivas et al., Frontiers in Plant Science, 2021) documented spring fruit yield increases of 79% and 122% at two different supplemental intensities. Perhaps more interesting, autumn yield was 36% higher for plants that received intercanopy lighting during spring, demonstrating a meaningful carryover effect. For greenhouse growers running supplemental lighting programs, these findings connect directly to greenhouse supplemental lighting strategies.
Practitioner Perspectives
Practitioners on Reddit report that commercial operations consistently see the 20% yield boost cited in the literature, though community discussion on r/CocoGrows notes that home-grow results tend to be more variable depending on canopy density and setup. On r/CannabisGrowers, growers actively seek trial outcome data, with threads from October 2024 asking directly for personal experience reports, a signal that there is strong demand for real-world validation.
On the GrowWeedEasy forum, one home grower documented a multi-week under-canopy experiment with side-by-side photos, noting that heat output from LED tubes was negligible and temperature and humidity stayed near ambient. This is a practical detail that matters for trial design: modern LED bars add minimal thermal load to the grow space.
Added Light vs. Photon Redistribution: Which Trial Should You Run?
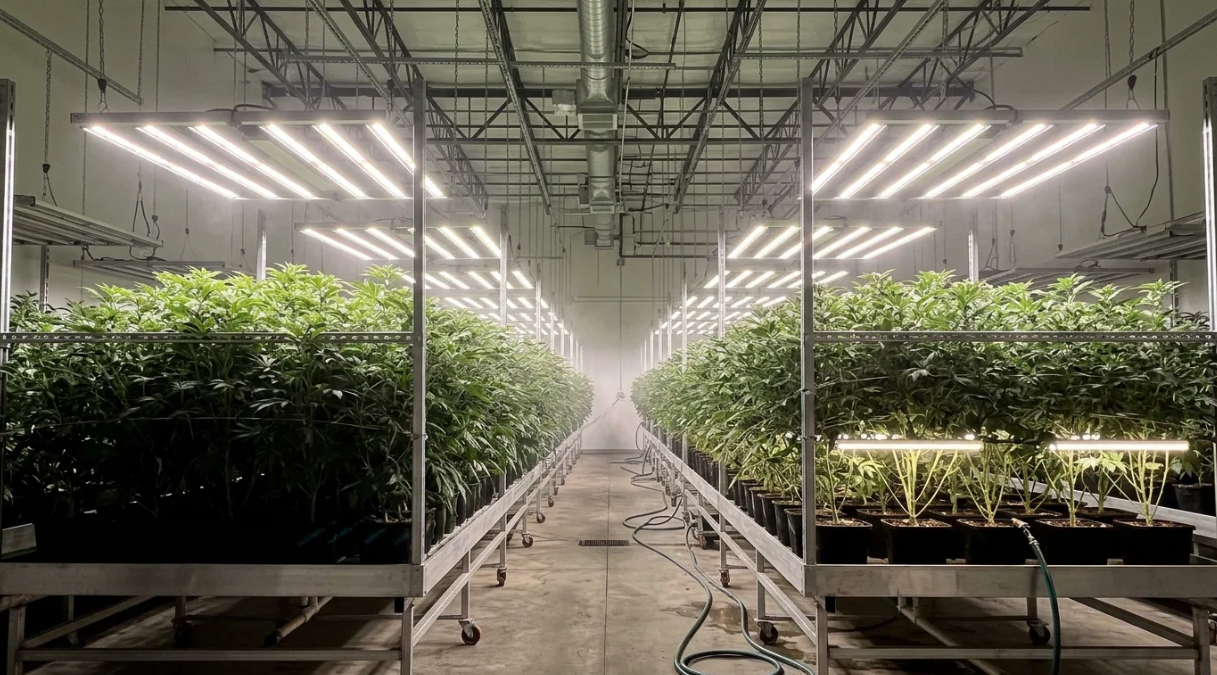
One of the most important decisions when designing an under-canopy lighting trial is determining whether to add more photons to the growing environment or redistribute the existing light budget.
These approaches answer different questions and produce different energy and ROI implications.
Approach 1: Adding Supplemental Under-Canopy Light
In this approach, the existing overhead lighting remains unchanged while additional LED bars are installed below or within the canopy.
The objective is to increase the total amount of light available to shaded plant tissue.
Potential benefits include:
- Higher light availability in lower canopy positions
- Increased photosynthetic activity in previously shaded leaves
- More opportunities for lower flower sites to develop
- Greater total biomass production when other growth factors are not limiting
However, this approach increases electrical consumption and may increase cooling requirements.
Approach 2: Redistributing the Existing Photon Budget
Photon redistribution involves moving a portion of the existing overhead light output to lower canopy positions.
Instead of simply adding more lighting capacity, growers change where photons are delivered throughout the plant canopy.
Potential benefits include:
- Better light distribution across different plant heights
- Reduced concentration of light at the upper canopy
- Potentially improved utilization of the existing lighting budget
- Lower incremental electricity costs compared with adding entirely new lighting capacity
However, reducing overhead light too aggressively can limit the productivity of upper canopy leaves.
Comparison: Added Light vs. Redistribution
| Factor | Additional under-canopy light | Photon redistribution |
|---|---|---|
| Total photon delivery | Increases | Designed to remain comparable |
| Overhead lighting | Usually unchanged | Adjusted or reduced |
| Electricity use | Generally increases | May remain similar, depending on system efficiency |
| Lower canopy PPFD | Increases | Increases |
| Upper canopy PPFD | Usually unchanged | May decrease |
| Cooling requirements | May increase | May remain similar |
| Main objective | Increase total light availability | Improve light distribution |
| Main financial consideration | Additional energy and equipment costs | Fixture and control-system costs |
Which Approach Should Growers Test First?
The answer depends on the facility’s existing light distribution.
If the upper canopy already receives high light intensity while lower sections remain heavily shaded, a redistribution trial may be worth evaluating.
If the entire plant canopy is light-limited, adding supplemental lighting may be more appropriate.
In either case, measure PPFD at multiple canopy heights and calculate the total DLI before deciding which strategy offers the better financial return.
A useful trial can also compare both approaches against a standard top-lighting control to identify which configuration produces the best balance of yield, quality, and energy efficiency.
Common Pitfalls in Under-Canopy Lighting Trials
Running a trial sounds straightforward. Getting useful data out of one requires avoiding several common mistakes.
Exceeding optimal DLI. Under-canopy light must be carefully managed to avoid pushing total DLI past the plant’s saturation point, which leads to light stress and reduced growth rather than gains. Always monitor total DLI at multiple canopy heights, not just at the top. A solid understanding of DLI targets by growth stage prevents this.
Ignoring HVAC load. Any light source adds heat. Under-canopy lighting adds roughly 39% of the energy use of above-canopy lighting, and a proper trial monitors room temperature and HVAC energy draw alongside yield. Without this data, your ROI calculation will be wrong. For more on this, review HVAC requirements for LED lighting.
Running only one cycle. A single crop cycle is not enough to draw reliable conclusions. Plant-to-plant variation, environmental drift, and seasonal changes can all skew a one-off result. Two to three cycles is the minimum for confidence.
Ignoring spectrum. Red-heavy under-canopy bars and full-spectrum white bars can produce different quality outcomes even at similar PPFD levels. A trial should document the spectrum used, because it affects both the plant response and the validity of comparing your results to published studies.
Neglecting lower-canopy microclimate. Adding light to the lower canopy without monitoring humidity and airflow at that height is asking for trouble. Increased transpiration in a poorly ventilated zone creates conditions for mold. This pitfall is especially dangerous because it can destroy the very flower the trial is supposed to produce.
Overlooking the redistribution question. The most sophisticated insight in recent trial literature is whether you need to add total photons or simply redistribute them. StateHouse’s trial demonstrated that repositioning light (not adding wattage) still produced a 20% yield gain. If your trial adds total watts without testing redistribution, you may be overestimating the electricity cost of the intervention.
Not adjusting irrigation. Treatment plants with more active lower-canopy photosynthesis transpire more water. Keeping irrigation identical between groups when the treatment group needs more water introduces a hidden variable that suppresses the apparent benefit of the lighting.
As one practitioner blog put it: “More lights mean more power; if you’re running a commercial operation, that can quickly add up. If the boost in yield outweighs the cost, it’s worth it, otherwise, you’re just throwing money at extra lights with no real return.”
For a full breakdown of mistakes to avoid, the under-canopy lighting mistakes guide covers additional scenarios.
How to Interpret Under-Canopy Lighting Trial Results
Completing an under-canopy lighting trial is only the first step. Growers must determine whether the observed improvements are meaningful, repeatable, and financially worthwhile.
A successful trial should demonstrate more than an increase in total plant weight. It should show improvements in saleable production, product consistency, light utilization, or operating efficiency.
1. Compare Saleable Yield, Not Just Total Biomass
Total dry biomass does not always translate into additional revenue.
Separate the harvest into commercially relevant categories, such as premium-grade flowers, smaller flowers, and material that cannot be sold as flower.
Compare the amount and percentage of saleable product from the treatment and control groups.
2. Evaluate Product Quality and Uniformity
Examine whether under-canopy lighting improves consistency between upper, middle, and lower canopy positions.
Depending on the crop, this may include:
- Flower size and density
- Cannabinoid and terpene composition
- Fruit size and quality
- Marketable product percentage
- Variation between plants
A more uniform harvest can create financial value even when the total yield improvement is modest.
3. Calculate Additional Energy per Unit of Production
Measure the electricity consumed by the entire lighting system, not just the under-canopy fixtures.
A useful metric is lighting energy intensity:
Lighting energy intensity = Total lighting kWh ÷ Saleable yield (kg)
This shows how much electricity is required to produce each kilogram of saleable crop.
A successful lighting configuration should ideally improve production efficiency or generate enough additional revenue to justify any increase in energy consumption.
4. Check Whether Results Are Repeatable
Compare the treatment and control groups across multiple crop cycles.
Look for consistent improvements rather than relying on one unusually successful harvest.
Record environmental conditions, genetics, planting density, and cultivation practices so that differences between cycles can be explained.
5. Decide Whether to Scale Up
Before expanding the system throughout the facility, evaluate the following:
- Did saleable yield increase?
- Did product quality remain consistent?
- Did the improvement justify additional electricity costs?
- Were cooling requirements manageable?
- Did labor requirements decrease or remain stable?
- Was the improvement repeated across trials?
- Does the projected payback period meet the facility’s investment requirements?
If the treatment produces a repeatable financial improvement without creating unacceptable operational costs, the facility may be ready for a larger deployment.
If results are inconsistent, adjust fixture placement, light intensity, operating schedules, or spectrum and run another controlled trial before expanding.
How Trials Inform Investment Decisions
A well-executed under-canopy lighting trial gives a cultivation team the numbers they need for a defensible capital request: incremental yield multiplied by price per gram, minus energy and equipment costs.
Labor savings are often the overlooked line item. Under-canopy lighting reduces the need for aggressive lollipopping and defoliation because lower bud sites develop into harvestable flower rather than waste. It also improves plant structure, potentially reducing staking and support labor. Industry guidance from CannaCribs frames under-canopy lighting as “increasingly a competitive necessity, not a trend,” and recommends activating bars 14 to 21 days into flower, placing them 8 to 12 inches below the canopy and pointing upward.
Successful trial results typically lead to facility-wide deployment. Growers who confirm the gains in their environment move quickly, because every cycle without under-canopy light represents yield left on the table. Utility rebate programs can further improve the payback timeline, and centralized power architectures like OptiDrive simplify scaling from a trial-room setup to a full facility.
How to Calculate Under-Canopy Lighting ROI
Under-canopy lighting ROI measures whether the additional saleable crop production generates enough revenue to cover the cost of fixtures, electricity, cooling, installation, and maintenance.
A yield increase alone does not prove that an investment is profitable. Growers must calculate the additional revenue and compare it against the complete operating and equipment costs.
The Under-Canopy Lighting ROI Formula
Net incremental profit = Additional revenue − Additional operating costs − Allocated equipment costs
ROI (%) = Net incremental profit ÷ Total investment cost × 100
For a more complete analysis, separate the initial equipment investment from recurring operating expenses.
Example: Calculating Under-Canopy Lighting ROI
Consider a hypothetical commercial growing facility that produces 1,000 lb of saleable dry flower per harvest.
Assume an under-canopy lighting trial produces 10% more saleable flower.
| Financial metric | Example value |
|---|---|
| Baseline saleable yield | 1,000 lb |
| Yield improvement | 10% |
| Additional saleable yield | 100 lb |
| Assumed selling price | $500/lb |
| Additional gross revenue | $50,000 |
| Additional electricity and cooling | $4,000 |
| Additional labor and maintenance | $1,000 |
| Additional equipment investment | $25,000 |
| First-harvest incremental profit after costs | $20,000 |
Under these assumptions:
Additional revenue = 100 lb × $500 = $50,000.
Net incremental profit = $50,000 − $4,000 − $1,000 − $25,000 = $20,000.
ROI = $20,000 ÷ $25,000 × 100 = 80%.
This hypothetical example produces an 80% first-harvest ROI on the equipment investment, after accounting for the stated operating expenses.
Calculate the Payback Period
Payback period measures how long it takes for incremental operating profit to recover the initial equipment investment.
Payback period = Initial equipment investment ÷ Incremental operating profit per harvest
Using the example:
$25,000 ÷ $45,000 = 0.56 harvests.
The initial investment would therefore be recovered within the first harvest under these assumptions.
Actual results will vary based on product pricing, marketable yield, electricity tariffs, operating schedules, cooling requirements, and equipment costs.
Financial Metrics Growers Should Track
| Metric | Why it matters |
|---|---|
| Additional saleable yield | Measures the increase in marketable production |
| Revenue per additional gram or pound | Converts yield gains into financial value |
| Electricity cost | Captures additional lighting consumption |
| HVAC cost | Accounts for additional cooling and ventilation |
| Labor cost | Measures changes in pruning, harvesting, and processing |
| Equipment cost | Includes LED bars, drivers, controls, and installation |
| Maintenance cost | Accounts for repairs and replacement components |
| Payback period | Estimates how quickly the investment is recovered |
| ROI | Measures financial return relative to investment |
For the most accurate analysis, use actual facility electricity bills, realized product prices, and measured saleable yield rather than manufacturer projections.
Under-Canopy Lighting Trial: Quick-Reference Checklist
Use this checklist when planning a commercial under-canopy lighting experiment.
| Trial parameter | Recommended approach |
|---|---|
| Trial objective | Define whether the experiment measures added light or photon redistribution |
| Control group | Standard overhead lighting without supplemental under-canopy fixtures |
| Treatment group | Identical growing conditions with the selected under-canopy lighting configuration |
| Plant genetics | Use consistent genetics and comparable starting plant sizes |
| Experimental design | Use independently replicated treatment areas and randomized assignments where practical |
| Trial duration | Complete one full crop cycle for preliminary results; repeat across additional cycles |
| PPFD measurements | Measure top, middle, and lower canopy positions |
| DLI measurements | Record total daily light exposure at consistent canopy positions |
| Yield measurements | Record dry yield and commercially saleable product |
| Quality measurements | Compare product quality and chemical composition where relevant |
| Energy monitoring | Track total lighting consumption in kWh |
| HVAC monitoring | Record temperature, cooling demand, and operating costs |
| Microclimate monitoring | Track humidity and temperature at lower canopy height in both groups |
| Irrigation tracking | Monitor substrate moisture and adjust watering for treatment group as needed |
| Fixture documentation | Record wattage, efficacy, spectrum, spacing, dimming settings, and mounting position |
| Financial analysis | Calculate additional revenue, incremental costs, ROI, and payback period |
| Final evaluation | Confirm repeatability before facility-wide deployment |
Trial success should be measured by repeatable improvements in saleable yield, product quality, energy efficiency, and financial return, not simply by the amount of additional light installed.
Ready to design a trial for your facility? Schedule a free consultation with a lighting specialist to discuss placement, fixture selection, and measurement protocols.
Frequently Asked Questions
What is an under-canopy lighting trial?
It is a controlled experiment where supplemental LED bars are placed below or within the plant canopy and compared against a control group receiving only top lighting. The trial measures yield, quality, energy use, and economic return over one or more crop cycles to determine whether the investment produces a measurable, repeatable benefit.
How much yield increase can I expect from an under-canopy lighting trial?
Published trials consistently report 20 to 30% yield increases in cannabis, with some intercanopy configurations producing up to 30% gains in dry flower weight. Vegetable crop trials have shown even larger improvements, up to 110% in cucumbers. However, results are facility-specific and depend on genetics, plant architecture, existing light levels, and grow technique.
How long should an under-canopy lighting trial run?
A minimum of one full crop cycle is needed for directional data, but two to three cycles are recommended for statistical confidence. Single-cycle results can be misleading due to normal variation in plant performance and environmental conditions.
What is the difference between subcanopy, intercanopy, and intracanopy lighting?
These terms all describe supplemental lighting delivered below or within the plant canopy rather than from above. “Subcanopy” tends to appear in academic literature, “intercanopy” is common in greenhouse research (especially from Wageningen University), and “intracanopy” is used interchangeably in trade publications. They refer to the same fundamental approach.
Does under-canopy lighting just add more electricity cost?
Not necessarily. The StateHouse Holdings trial demonstrated that redistributing the same total photon budget (moving light from above to below) produced a 20% yield gain without additional energy use. That said, most setups do add some wattage, roughly 39% of above-canopy energy use, so tracking electricity cost alongside yield is essential for an accurate ROI calculation.
What are the biggest mistakes growers make in under-canopy lighting trials?
The most common pitfalls are exceeding optimal DLI (causing light stress), running only one crop cycle, failing to track energy and HVAC costs, not controlling for spectrum differences between overhead and under-canopy fixtures, ignoring lower-canopy humidity buildup, and not adjusting irrigation for increased transpiration. Any of these can produce misleading results that lead to poor investment decisions.
When should under-canopy lights be turned on during cannabis flower?
Practitioner guidance and commercial trial protocols recommend activating under-canopy bars 14 to 21 days into the flowering stage. This allows the canopy to develop enough density that lower sites are shaded before introducing supplemental light from below. Starting earlier, during late veg or the first days of flower, can help lower leaves develop sun-type photosynthetic tissue before they are shaded.
Do I need different genetics for the trial and control groups?
No, you need the same genetics. Genetic consistency is critical for isolating the effect of the lighting variable. The 2025 MDPI Plants study used 72 genetically identical clones specifically to eliminate genetic variation as a confounding factor.
How many plants do you need for an under-canopy lighting trial?
The number of plants depends on the crop, growing area, expected variation, and experimental design. Using genetically consistent plants helps reduce biological variation, but the number of plants alone does not determine statistical reliability. Growers should use independently replicated treatment areas and an appropriate sample size rather than treating every plant in one lighting zone as an independent experimental replicate.
Does under-canopy lighting increase DLI?
Yes, when supplemental fixtures are operated without reducing the output of existing lights, they generally increase the total light delivered to the growing environment. However, under-canopy lighting can also be used to redistribute an existing photon budget. Growers should measure PPFD and DLI at multiple canopy positions to determine how the lighting configuration changes total and spatial light exposure.
Is under-canopy lighting better than overhead LED lighting?
Neither approach is universally better. Overhead lighting provides the primary illumination for the upper canopy, while under-canopy lighting delivers supplemental photons to shaded middle and lower plant sections. Many commercial growing systems use a combination of both to improve light distribution. The most effective configuration depends on crop architecture, canopy density, light intensity, and operating costs.
How do you measure the success of an under-canopy lighting trial?
Measure dry saleable yield, product quality, PPFD, DLI, electricity consumption, cooling requirements, and labor costs. Compare these measurements against a control group receiving the standard lighting configuration. Calculate additional revenue, operating expenses, ROI, and payback period to determine whether the treatment is commercially worthwhile.
Should I adjust irrigation during an under-canopy lighting trial?
Yes. Plants receiving more light at lower canopy positions transpire more water. Monitor substrate moisture in both groups and adjust irrigation frequency or volume for the treatment group if needed. Document the change and the data behind it. Forcing identical irrigation on groups with different water demands introduces a confounding variable that can mask the true effect of the lighting treatment.
Is under-canopy lighting suitable for greenhouse vegetables?
Yes. Under-canopy and intercanopy lighting have been investigated in greenhouse crops such as cucumbers, tomatoes, and berries. However, yield improvements depend on crop architecture, existing light availability, supplemental light intensity, and cultivation conditions. Results from one crop or facility should not automatically be applied to another.
What spectrum works best for under-canopy LED bars?
Full-spectrum white bars provide a balanced mix of wavelengths that promotes compact growth and counteracts shade-avoidance responses in lower canopy leaves. Red-heavy bars deliver slightly more photons per watt but may produce less dense flower structures. The best choice depends on the crop, the quality metrics that matter to the operation, and whether the facility values efficacy or morphological control more. Always document and standardize spectrum within a trial.