Greenhouse Light Spacing: 2026 Guide to Ratios & Uniformity
Greenhouse light spacing in 2026: use 1:1.2 to 1:1.5 height-to-spacing ratios, match beam angles, and verify PPFD uniformity with maps. See how.
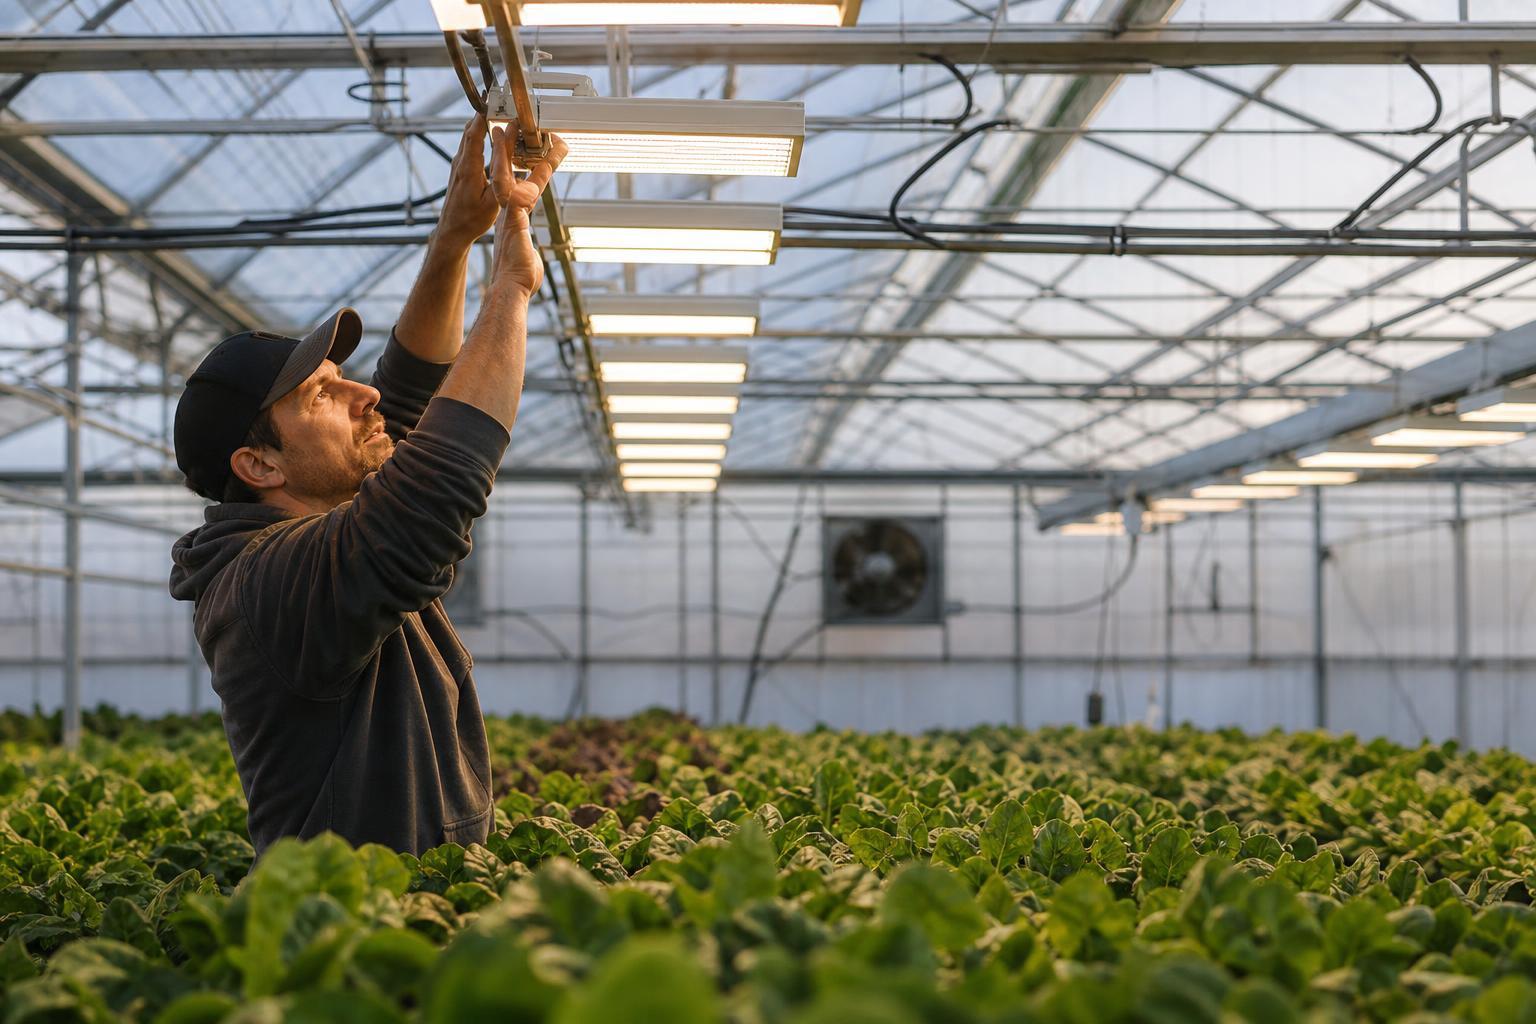
TL;DR
Greenhouse grow lights should be spaced according to mounting height, fixture optics, photon output, crop requirements, and the desired PPFD uniformity. A height to spacing ratio can provide a useful starting point, but there is no single spacing distance that works for every greenhouse. For commercial installations, use the manufacturer’s PPFD map and verify that the planned layout achieves the required average PPFD and uniformity across the crop canopy.
Quick answer: As a preliminary starting point, many toplight layouts use spacing roughly comparable to mounting height, but the final center to center distance should be determined from the fixture’s photometric data and validated with a PPFD map.
Greenhouse light spacing sounds simple. Put lights up, space them out, grow plants. But the gap between “lights installed” and “lights installed correctly” is where growers lose money, yield, and crop uniformity. Every extra day a harvest cycle takes because the outer rows are underlit compounds across a full production year.
This guide breaks down the physics, the math, and the practical decisions behind proper greenhouse light spacing, from the inverse square law to crop specific targets to mistakes that even experienced growers make.
Talk to a lighting specialist about your greenhouse layout before finalizing a design.
What Determines Greenhouse Light Spacing?
Greenhouse light spacing is determined by several variables rather than fixture wattage alone.
| Factor | What changes | Effect on spacing |
|---|---|---|
| Mounting height | Distance between fixture and canopy | Higher mounting generally increases coverage area |
| Fixture optics | Beam angle and light distribution | Wider distribution can support wider spacing |
| Photon output | Total photons produced by the fixture | Higher output fixtures can cover more area |
| Crop PPFD target | Required canopy level light intensity | Higher targets generally require greater fixture density |
| Greenhouse geometry | Bay width, row layout, roof structure and perimeter | Changes where fixtures can physically be installed |
| Natural sunlight | Amount and distribution of daylight | Determines how much supplemental light is required |
| Uniformity target | How evenly PPFD must be distributed | Higher uniformity generally requires more careful spacing |
| Fixture form factor | Bars, panels or other geometries | Changes the shape and overlap of the light field |
How Far Apart Should Greenhouse Grow Lights Be?
There is no universal greenhouse grow light spacing distance. The correct center to center spacing depends primarily on mounting height, fixture optics, photon output, greenhouse geometry, and the PPFD uniformity required by the crop.
As a starting point, fixture spacing is often planned relative to mounting height, then adjusted using the manufacturer’s PPFD distribution map. For example, a fixture mounted 2 meters above the crop cannot automatically be assumed to belong 2.4 or 3 meters from the next fixture. The actual spacing should be checked against the fixture’s beam distribution and the desired canopy level PPFD.
For commercial greenhouses, the best practice is:
- Determine the required supplemental PPFD and DLI.
- Select a fixture with appropriate photon output and optics.
- Establish the mounting height.
- Use the manufacturer’s PPFD map to determine preliminary spacing.
- Model perimeter and row spacing separately.
- Verify average PPFD and uniformity across the crop canopy.
The goal is not to maximize light directly beneath each fixture. It is to deliver the required average PPFD with sufficiently uniform coverage across the entire growing area.
What Is Greenhouse Light Spacing?
Greenhouse light spacing refers to the distance between supplemental light fixtures, measured center to center, and the relationship of that distance to the mounting height above the crop canopy. It is one of the most important variables in any supplemental lighting installation because it directly controls how evenly photosynthetically active radiation reaches the plants below.
Poor spacing creates two problems. Fixtures too close together waste energy and create hotspots that can stress plants. Fixtures too far apart leave dark zones where crops grow slower, develop unevenly, and ultimately reduce marketable yield.
The goal is not maximum light at any single point. The goal is uniform light across the entire growing area.
How Greenhouse Light Spacing Works
Three variables form what you can think of as the height, spacing, coverage triangle. Change one and the other two shift.
Mounting Height Above the Canopy
Mounting height is one of the most important variables in greenhouse lighting design because it changes both the intensity and footprint of the light reaching the crop.
Raising a fixture generally spreads its output over a larger area, which can improve uniformity but reduce PPFD at the canopy. Lowering the fixture concentrates more light into a smaller footprint, which can increase peak PPFD but also increase the risk of hotspots and uneven coverage.
For commercial greenhouse toplighting, the correct mounting height should be determined from the fixture’s optical design, greenhouse structure, crop height and target PPFD rather than from a universal height recommendation. For a deeper treatment of this variable, see the full guide on greenhouse grow light height.
Always evaluate mounting height together with fixture spacing. Changing one without recalculating the other can significantly change the resulting PPFD map.
Fixture to Fixture Distance
Typical spacing for smaller LED fixtures runs 60 to 90 centimeters between units. For higher power commercial greenhouse toplights, spacing can stretch considerably wider. One documented installation achieved roughly 90% uniformity at an average of 188.9 µmol/m²/s with fixtures at 1.72 meters above the canopy and positioned about 6.2 feet apart.
The Height to Spacing Ratio
This is the single most useful rule of thumb for greenhouse light spacing, and surprisingly few resources quantify it clearly. For linear LED toplights, maintain a height to spacing ratio of 1:1.2 to 1:1.5. That means if your fixtures hang 2 meters above the canopy, space them 2.4 to 3.0 meters apart center to center. For bar style arrays at closer canopy distances, a practical starting point is center to center bar spacing of 0.8 to 1.2 times the mounting height.
These ratios ensure that the light cones from adjacent fixtures overlap enough to create smooth PPFD distribution across your canopy.
Beam Angle Matched to Row Spacing
One variable that growers frequently overlook is the relationship between a fixture’s beam angle and the physical spacing of crop rows. Beam angle defines the cone of light leaving a fixture, specifically the angle at which intensity drops to 50% of the peak value. A narrow beam (say, 60°) concentrates photons in a tight column. A wide beam (120°+) spreads them across a broader footprint.
The practical implication: when crop rows have a fixed spacing dictated by the greenhouse structure or production system, the beam angle of the chosen fixture needs to match that geometry. A narrow beam fixture mounted above widely spaced rows will create bright strips directly under each fixture with dark lanes between them. Practitioners on grower forums consistently report that mismatched beam angles are one of the hardest problems to fix after installation, because you cannot change the optics without changing the fixture.
Here is how to think about it:
| Beam angle | Best suited for | Watch out for |
|---|---|---|
| 60° to 90° (narrow) | Close row spacing, lower mounting heights | Dark zones between rows at wider spacing |
| 90° to 120° (medium) | Standard greenhouse bays, moderate heights | Balance between reach and intensity |
| 120°+ (wide) | Wide row spacing, high mounting heights | May reduce peak PPFD below target |
The right approach is to start with your row spacing and mounting height, then select a fixture whose beam angle covers the gap between rows at that height. If the fixture’s published PPFD map shows steep intensity drop off between rows, the beam angle is too narrow for that layout.
Some LED fixtures now offer interchangeable optics or adjustable beam widths. These can be useful in greenhouses where crop rotation changes row spacing seasonally, but they add cost and complexity.
Greenhouse Light Spacing Examples
The following examples illustrate how mounting height and center to center spacing can be evaluated during preliminary layout planning. They are not universal installation specifications.
| Mounting height | Example spacing to model | What to check |
|---|---|---|
| 1.0 m | 1.0 to 1.5 m | Hotspots and edge falloff |
| 1.5 m | 1.5 to 2.25 m | Canopy uniformity |
| 2.0 m | 2.0 to 3.0 m | Average PPFD and CV |
| 2.5 m | 2.5 to 3.75 m | Fixture optics and perimeter coverage |
| 3.0 m | 3.0 to 4.5 m | PPFD map across the complete bay |
These ranges should be treated as modeling starting points rather than installation rules. The manufacturer’s photometric data and a project specific lighting simulation should determine the final spacing.
The Inverse Square Law
The physics behind every spacing decision is the inverse square law. Light intensity drops with distance: doubling the distance between fixture and canopy reduces PPFD by approximately 75%, not 50%.
This creates the core tradeoff in greenhouse light spacing. Raise fixtures for wider, more uniform coverage at lower intensity. Lower them for higher peak PPFD but a tighter footprint, which means you need more fixtures to cover the same area.
Why Uniformity Matters More Than Peak PPFD
Most growers fixate on the peak PPFD number. It’s the wrong metric to optimize for.
Light uniformity, meaning how evenly light is distributed across the growing area, has a direct and large impact on crop uniformity. A greenhouse where the center reads 250 µmol/m²/s while the edges sit at 180 will produce outer rows that lag 5 to 7 days per harvest cycle. Over 12 cycles a year, that’s nearly two full turns lost.
What “Good” Uniformity Looks Like
The standard metric is the coefficient of variation (CV):
CV = (standard deviation of PPFD readings ÷ mean PPFD) × 100
Industry targets call for a CV below 15%. Runkle (2017) at Michigan State suggests 10 to 20% variation is acceptable, while other researchers argue that ±5% is a more appropriate target for precision greenhouse production. Commercial facilities in the United States typically target at least 85% uniformity over a 4×4 foot area, with less than 15% variance corner to center.
What Does Lighting Uniformity Mean?
Lighting uniformity describes how consistently PPFD is distributed across the crop canopy.
A common way to quantify uniformity is the coefficient of variation (CV):
CV = (standard deviation of PPFD ÷ average PPFD) × 100
Lower CV values indicate more uniform lighting.
For example:
| PPFD distribution | Interpretation |
|---|---|
| Low CV | Very uniform light distribution |
| Moderate CV | Some variation across the canopy |
| High CV | Greater risk of hotspots and underlit areas |
There is no single CV value that is appropriate for every crop, fixture or production system. The target should be established according to the crop, production objectives and lighting design requirements.
When comparing lighting layouts, evaluate the average PPFD, minimum PPFD, maximum PPFD and CV together rather than relying on a single peak PPFD measurement.
How to Verify Uniformity Before Installation

When evaluating supplemental lighting options, request a PPFD map from the lighting company. These maps show the expected variation in light intensity for your specific greenhouse dimensions and mounting configuration. They should report values in µmol/m²/s of photosynthetic light.
If a manufacturer won’t publish a PPFD map at a defined hanging height, that tells you something. Review product spec sheets and PPFD maps before committing to a layout.
How to Read a Greenhouse PPFD Map
A PPFD map shows how much photosynthetic light a lighting system is expected to deliver at different points across the crop canopy.
When reviewing one, check five things:
1. Average PPFD
This indicates the overall light level across the modeled area.
2. Minimum PPFD
Look for areas receiving substantially less light than the average. These areas often occur near walls, corners and the perimeter.
3. Maximum PPFD
Very high values directly below fixtures can indicate hotspots, especially when surrounding areas receive substantially less light.
4. Uniformity
Review the reported CV or other uniformity metric to understand how much PPFD varies across the measurement area.
5. Measurement Height
A PPFD map measured at the floor is not equivalent to one measured at crop canopy height. Always confirm where the measurement plane is located.
A useful lighting plan should show the actual greenhouse dimensions, fixture locations, mounting height, measurement plane and resulting PPFD distribution.
Average PPFD vs. Peak PPFD: Which Number Matters?
Peak PPFD tells you the highest light intensity measured at a particular point. Average PPFD tells you how much light is delivered across the defined measurement area.
For greenhouse lighting design, average PPFD is generally more useful than peak PPFD because plants occupy an area rather than a single point.
A fixture can produce a very high PPFD directly below its center while leaving large portions of the canopy underlit. Increasing fixture spacing may make the peak number look impressive while reducing the light available between fixtures.
When reviewing a greenhouse lighting plan, ask for:
- Average PPFD
- Minimum PPFD
- Maximum PPFD
- Uniformity or coefficient of variation
- Measurement height
- Measurement grid or calculation area
- Fixture mounting height
- Fixture spacing
Never compare PPFD numbers from two lighting plans unless the measurement conditions are equivalent.
How Crop Type Affects Spacing
Spacing requirements shift dramatically based on what you’re growing, because PPFD and DLI targets vary by crop:
| Crop Category | PPFD Target (µmol/m²/s) | DLI Target (mol/m²/d) | Spacing Implication |
|---|---|---|---|
| Leafy greens (lettuce, herbs) | 200 to 400 | ~17 | Wider spacing, fewer fixtures |
| Fruiting crops (tomato, cucumber, pepper) | 400 to 700 | ~35 | Tighter spacing, higher fixture density |
| Cannabis (flower) | 700 to 1,000+ | 40+ | Tightest spacing, highest fixture count |
Leafy greens generally perform well at 200 to 400 PPFD, while fruiting crops like tomatoes and peppers need 600+ PPFD.
Supplemental vs. Sole Source Spacing
A critical distinction that many guides skip: greenhouse supplemental lighting is not sole source lighting. Most commercial supplemental systems provide around 200 µmol/m²/s of additional light, designed to top up ambient solar contribution rather than replace it entirely. Spacing in a greenhouse context is calibrated to add a specific PPFD layer on top of what the sun delivers, which means fixture density is typically lower than in a windowless vertical farm running the same crop.
Supplemental vs. Sole Source Greenhouse Lighting
Greenhouse lighting design differs significantly from indoor or sole source lighting because sunlight remains an important source of photons.
| Factor | Supplemental greenhouse lighting | Sole source lighting |
|---|---|---|
| Primary light source | Sunlight + electric lighting | Electric lighting |
| Main design goal | Fill the natural light deficit | Deliver nearly all required light |
| Fixture density | Depends on seasonal DLI deficit | Generally higher |
| Controls | Often tied to sunlight and DLI | Primarily scheduled around crop requirements |
| Spacing objective | Add uniform supplemental PPFD | Provide the complete target PPFD |
| Seasonal adjustment | Often significant | Usually less dependent on weather |
For supplemental greenhouse systems, calculate the amount of light the crop is expected to receive naturally and determine how much additional PPFD or DLI the electrical system needs to provide. For a walkthrough of this calculation, see the guide on how much supplemental lighting a greenhouse needs.
This is why a greenhouse lighting plan should not simply copy the fixture density of an indoor growing facility.
Fixture Form Factor and Shadow Considerations

The shape of the fixture changes everything about spacing behavior.
Bar vs. Panel Fixtures
Bar style fixtures distribute photons over a wider linear area and tolerate closer spacing without creating hotspots. Practitioners on grower forums report that bar fixtures produce smoother light fields than square panel fixtures at equivalent spacing, which is why they dominate large commercial installations. Panel fixtures concentrate output in a smaller footprint, requiring more units spaced more carefully to hit the same uniformity.
Greenhouse optimized LED fixtures are specifically designed with open frame or single linear bar geometries. The gaps between parallel light bars allow diffuse sky radiation to pass through, so the upper canopy still receives uniform natural light at variable solar angles. This matters because, unlike indoor grows, greenhouses depend on sunlight as the primary light source for much of the year.
The Shadow Problem
Here’s a spacing consideration unique to greenhouses that indoor growers never face. With the shift from seasonal HPS fixtures (which were removed in summer) to year round LED installations, fixtures now occupy the greenhouse structure 365 days a year.
A HortiDaily analysis found that a typical tomato or cucumber greenhouse with four LED fixtures per 8 meter bay results in approximately 1,000 fixtures per hectare. With fixture dimensions of 100 × 21 × 12 cm, the total structural shadow footprint adds up to roughly 210 m² per hectare. That shadow reduces the solar radiation that reaches your crop during the months when you don’t need supplemental light at all.
Slimmer fixtures and remote driver architectures that move bulky power supplies out of the grow space reduce this shadow penalty. It’s a factor worth considering during the spacing and layout design phase.
For more context on the differences between LED and HPS fixture behavior, see this guide on comparing LEDs to HPS.
Layout Patterns: Staggered vs. Regular
An ASABE study on greenhouse luminaire placement produced a finding that contradicts common assumptions: staggered square layouts do not improve uniformity over regular square layouts. However, staggered rectangular layouts were measurably more uniform than regular rectangular layouts.
The practical takeaway: if your greenhouse bays are rectangular (as most are), a staggered layout is worth the extra planning effort. If your bays are square, don’t bother staggering.
Perimeter Spacing Deserves Its Own Attention
The same study found that light uniformity near the perimeter of a greenhouse improves as luminaires are added closer to the edges, with an optimum perimeter spacing that depends on mounting height and overall greenhouse spacing. Edge rows are almost always the weakest point in any lighting layout. Addressing perimeter spacing separately from center spacing can meaningfully tighten your overall CV.
How Should Greenhouse Lights Be Spaced in Rows?
Greenhouse lights should be laid out according to the crop rows, bay dimensions and the fixture’s light distribution rather than using identical distances throughout the structure.
Center to center spacing between fixtures is only one dimension. Designers should also consider:
- Distance between fixture rows
- Distance from fixtures to greenhouse walls
- Distance from fixtures to crop rows
- Bay width
- Gutter to gutter dimensions
- Roof structure
- Obstructions
- Fixture orientation
- Perimeter light loss
Why Perimeter Spacing Matters
The edges of a greenhouse often receive a different light distribution than the center of the growing area. If fixtures are positioned only according to the repeating center grid, perimeter crops may receive less supplemental light.
A professional lighting plan should therefore evaluate the perimeter separately rather than assuming that the center of greenhouse spacing automatically works at the walls.
The best layout is not necessarily the one with identical spacing everywhere. It is the one that produces the required canopy level PPFD distribution across the actual growing area.
Lighting Zone Design
Not every square meter of a greenhouse needs the same amount of supplemental light. Lighting zone design is the practice of dividing a greenhouse into distinct areas, each with its own PPFD target, fixture density, and control strategy.
There are several reasons to create zones rather than treating the entire greenhouse as one uniform lighting block:
Crop rotation and mixed production. A greenhouse growing lettuce in one section and tomatoes in another needs different PPFD levels in each area. Spacing fixtures identically throughout the structure means one crop gets too much light and the other not enough.
Seasonal variation across the structure. South facing bays in Northern Hemisphere greenhouses receive more natural light than north facing bays. Perimeter bays near tall adjacent structures may be partially shaded for hours each day. Zones allow the supplemental system to compensate where the deficit is greatest.
Energy cost management. Running every fixture at the same intensity all day wastes electricity. Zoning lets growers allocate power where the return on light is highest. Practitioners on Reddit’s commercial growing forums frequently note that zoned lighting with separate circuits or dimmable groups cut their energy bills by 15 to 25% compared to running the entire greenhouse at a single intensity.
A basic zone plan might look like this:
| Zone | Location | Typical supplemental need | Fixture density |
|---|---|---|---|
| Center bays | Middle of the greenhouse | Moderate | Standard spacing |
| Perimeter bays | Near walls and edges | Higher (less reflected/ambient light) | Tighter spacing or added edge fixtures |
| Propagation area | Dedicated benches or tables | Lower PPFD, longer photoperiod | Fewer fixtures, lower output |
| High value crop section | Premium or fast turn crops | Highest | Tightest spacing, potentially under canopy as well |
Each zone should have its own circuit or control group so fixtures can be turned on, off, or dimmed independently. This connects directly to the next topic.
Dimming vs. Raising to Manage Intensity
When a greenhouse fixture delivers more PPFD than the crop currently needs, growers have two options: dim the fixture or raise it higher above the canopy. Both reduce the light reaching the plants. They are not interchangeable.
Dimming
Dimming reduces the electrical power to the LEDs, which lowers photon output proportionally. A fixture dimmed to 50% power produces roughly 50% of its full PPFD output (the relationship is close to linear in most commercial LED drivers). The beam angle and footprint stay the same. Uniformity is preserved because the light distribution pattern doesn’t change, just its magnitude.
Dimming also saves energy in direct proportion to the reduction, which matters when electricity is priced by the kilowatt hour and supplemental light schedules run 16 to 20 hours. Growers running DLI based lighting schedules use dimming to fine tune the daily light integral based on how much sunlight has already accumulated.
Raising
Raising a fixture increases the distance to the canopy, which reduces PPFD through the inverse square law. But it also changes the footprint and the uniformity. A fixture raised 30 cm spreads its light over a larger area, potentially improving coverage between fixtures but also diluting intensity in ways that are harder to predict without recalculating the PPFD map.
More importantly, raising fixtures in a greenhouse is often impractical. Greenhouse roof structures, trusses, gutters, and retractable shade systems constrain vertical space. Moving fixtures up means moving them closer to the glazing, which can increase thermal stress on the fixture and, in some structures, obstruct ventilation openings.
When to Use Each
| Situation | Better approach | Why |
|---|---|---|
| Sunny day, DLI target nearly met | Dim | Saves energy, preserves uniformity |
| Crop change to lower PPFD target | Dim | Maintains same coverage pattern at lower intensity |
| Seedlings that need less light temporarily | Dim (or raise if possible) | Either works, but dimming is simpler |
| Chronic overshoot across all seasons | Reconsider fixture selection | The fixture may be oversized for the application |
The consensus among commercial greenhouse operators is clear: dimming is almost always preferable to raising. It is faster to implement, reversible in seconds via controls, and doesn’t require physical re rigging. Modern commercial fixtures with 0 to 10V dimming or MODBUS integration make this straightforward.
Fixtures connected to a centralized power system like OptiDrive can be dimmed per zone or per circuit from a single control point, which ties zoned lighting design and intensity management together into one operational layer.
Under Canopy Lighting as a Spacing Strategy
Most growers think of under canopy lighting as a yield booster. It is, but it’s also a spacing strategy for toplights.
A peer reviewed study on tomato production found that combining intra canopy lighting with top lighting yielded the lowest coefficient of variation (CV = 37%) compared to top lighting alone (CV = 43%) or intra canopy lighting alone (CV = 48%). The variation was minimal when the ratio of PPFD from intra canopy to top lighting was about 1:1. The combined approach also resulted in 8% higher total light absorption than top lighting alone.
What this means practically: adding under canopy fixtures lets you achieve better uniformity without tightening top light spacing or adding more overhead units. It fills in the lower canopy, where top lights simply cannot reach effectively regardless of how they’re spaced.
For a deeper look at the research behind this approach, read the full write up on under canopy lighting evidence. And for product specifics, the Boost XE is purpose built for this application.
Common Greenhouse Light Spacing Mistakes
Mistake 1: Sizing for Summer, Not Winter
Growers often assume their glass greenhouse delivers 80 to 90% natural light transmission year round. That figure is accurate at noon in summer when the sun is directly overhead. But in winter, when the sun angle drops, transmission at the plant canopy can fall to 50 or 60%. The resulting deficit in supplemental light design can leave crops 2 to 3 moles short of their daily target. Spacing designed for summer solar conditions will underperform when you need supplemental light the most.
Mistake 2: Spreading Insufficient Light Too Thin
If full supplementation proves too expensive, it’s better to concentrate lights on high value crops or smaller growing areas rather than spreading insufficient fixtures across the entire greenhouse. Thin coverage delivers mediocre light everywhere instead of adequate light somewhere.
Mistake 3: No Lighting Controls or Sensors
One of the most common pitfalls is the lack of proper lighting controls. The value of electric lighting is greatest when it is dark outside, the average DLI is low, and electricity is not at peak price. To optimize supplemental lighting, a grower needs at least a moderately sophisticated environmental control system and, ideally, at least one quantum sensor inside the greenhouse. Without feedback, you’re guessing. Learn more about how to measure PPFD in a greenhouse.
Mistake 4: Using Peak PPFD Instead of Mapped Uniformity
The number you actually need to focus on is uniformity, expressed as a ratio or percentage across a defined footprint. A light that delivers 500 µmol/m²/s directly below the fixture but 200 at the edges is not a 500 µmol light in any practical sense. Always evaluate greenhouse light spacing based on PPFD maps, not headline numbers.
Mistake 5: Ignoring Beam Angle When Switching Fixtures
Replacing an HPS or older LED fixture with a new model that has a different beam angle can wreck uniformity even if the new fixture produces more total photons. The light distribution changes, which means the spacing that worked before may no longer produce acceptable coverage. Always re map when changing fixture types.
How Do You Calculate Greenhouse Light Spacing?
Calculating greenhouse light spacing requires two separate calculations: determining how much supplemental light the crop needs and determining how fixtures should be arranged to deliver that light uniformly.
Step 1: Calculate the Supplemental DLI Requirement
Start with:
Supplemental DLI = Crop DLI target − Expected natural light DLI
If a crop requires 17 mol/m²/day and the greenhouse is expected to receive 11.4 mol/m²/day of natural light, the supplemental requirement is:
17 − 11.4 = 5.6 mol/m²/day
Step 2: Convert the DLI Gap to Supplemental PPFD
Use:
PPFD = DLI × 1,000,000 ÷ (hours × 3,600)
For example, supplying 5.6 mol/m²/day over 20 hours requires approximately:
5.6 × 1,000,000 ÷ (20 × 3,600) ≈ 78 µmol/m²/s
Step 3: Estimate Fixture Quantity
A simplified fixture count estimate is:
Fixture count ≈ (Target PPFD × Canopy Area) ÷ Fixture Photon Output
This is only a preliminary estimate because real installations are affected by fixture efficiency, mounting height, optical distribution, greenhouse structure and losses.
Step 4: Determine Fixture Spacing
Once the approximate fixture count and mounting height are known, create a layout using the fixture’s PPFD map.
Adjust:
- Center to center spacing
- Row spacing
- Perimeter spacing
- Fixture orientation
- Mounting height
until the modeled canopy achieves the required average PPFD and acceptable uniformity.
Step 5: Validate the Final Layout
The final design should be validated with a project specific lighting simulation or on site PPFD measurements after installation.
Do not use fixture count alone as proof that a greenhouse lighting design is adequate.
Need help running these calculations for your facility? Request a free consultation with a lighting specialist.
What Happens If Greenhouse Lights Are Too Close or Too Far Apart?
| Lighting layout | Typical problem |
|---|---|
| Lights too close | Higher peak PPFD, hotspots, unnecessary fixture density |
| Lights too far apart | Dark zones, lower minimum PPFD, greater canopy variation |
| Lights mounted too low | Narrower coverage and stronger intensity gradients |
| Lights mounted too high | Wider coverage but potentially insufficient PPFD |
| Poor perimeter layout | Underlit edge rows |
| Incorrect fixture orientation | Uneven distribution between crop rows |
The correct layout balances fixture density, mounting height, energy consumption and PPFD uniformity. The objective is not to minimize or maximize spacing. It is to achieve the required light level across the entire productive canopy.
Frequently Asked Questions
How far apart should greenhouse grow lights be?
The answer depends on mounting height and fixture power. A reliable starting point is the height to spacing ratio: space toplights 1.2 to 1.5 times the mounting height apart, center to center. For a fixture at 2 meters above the canopy, that means 2.4 to 3.0 meters between units. Always validate with a PPFD map.
What is a good uniformity target for greenhouse lighting?
Commercial growers should target a coefficient of variation (CV) below 15%, meaning PPFD readings across the canopy stay within ±10 to 15% of the mean. Tighter operations aim for ±5%.
Does fixture type affect greenhouse light spacing?
Yes. Bar style fixtures produce wider, smoother light fields and can be spaced differently than panel fixtures, which concentrate output in a smaller footprint. Open frame greenhouse fixtures also minimize shadow on the crop during unlit hours.
How does mounting height affect light uniformity?
Higher mounting spreads light over a larger area, improving uniformity but reducing peak PPFD at any single point. Lower mounting increases peak intensity but shrinks the coverage footprint, requiring more fixtures and tighter spacing to maintain uniformity.
Should I space lights differently for lettuce vs. tomatoes?
Yes. Lettuce needs roughly 200 to 400 µmol/m²/s PPFD (DLI around 17 mol/m²/d), which allows wider spacing and fewer fixtures. Tomatoes need 400 to 700 µmol/m²/s (DLI around 35 mol/m²/d), requiring tighter spacing and higher fixture density. See crop specific guides for lettuce and tomatoes.
Can under canopy lighting reduce the need for tighter top light spacing?
Research supports this. A peer reviewed tomato study found that combining top lighting with intra canopy lighting lowered the CV from 43% to 37% and increased total light absorption by 8%. Under canopy fixtures address lower canopy light gaps that no amount of top light spacing adjustment can fix.
What is the inverse square law and why does it matter for spacing?
The inverse square law states that doubling the distance between a light source and the target surface reduces intensity by approximately 75%. This is why small changes in mounting height have outsized effects on PPFD, and why getting the height to spacing ratio right is so critical.
How do I account for natural light when planning spacing?
Greenhouse supplemental lighting adds a PPFD layer on top of ambient solar contribution. Calculate the DLI gap between what your crop needs and what the sun provides during your lowest light months (usually winter), then size your supplemental system to fill that gap. Do not design for summer light levels.
Should I dim fixtures or raise them to reduce intensity?
Dimming is almost always the better choice. It reduces energy consumption proportionally, preserves the fixture’s light distribution pattern, and can be adjusted instantly through controls. Raising fixtures changes the beam footprint and uniformity in ways that require recalculation, and greenhouse structures often leave little room to move fixtures vertically.
What is lighting zone design and do I need it?
Lighting zone design divides a greenhouse into sections with independent control, allowing different PPFD targets and schedules per zone. It is worth implementing whenever a greenhouse grows multiple crops, has uneven natural light distribution, or needs to manage energy costs. Even a simple two zone setup (center vs. perimeter) can improve both uniformity and efficiency.