Cannabis Flower Room Layout: Complete 2026 Design Guide
Learn how to optimize a cannabis flower room layout for PPFD, uniformity, benches, HVAC, and CO2. Boost yield and consistency with this 2026 guide.
TL;DR
A cannabis flower room layout determines how plants, lights, benches, HVAC, and electrical systems are arranged in the space where cannabis produces its flowers. Flower rooms account for roughly 70% of a facility’s total indoor grow area, making them the single most important space to get right. This guide covers every layout decision, from PPFD targets and bench configurations to room sizing, under-canopy lighting, and the electrical infrastructure that ties it all together.
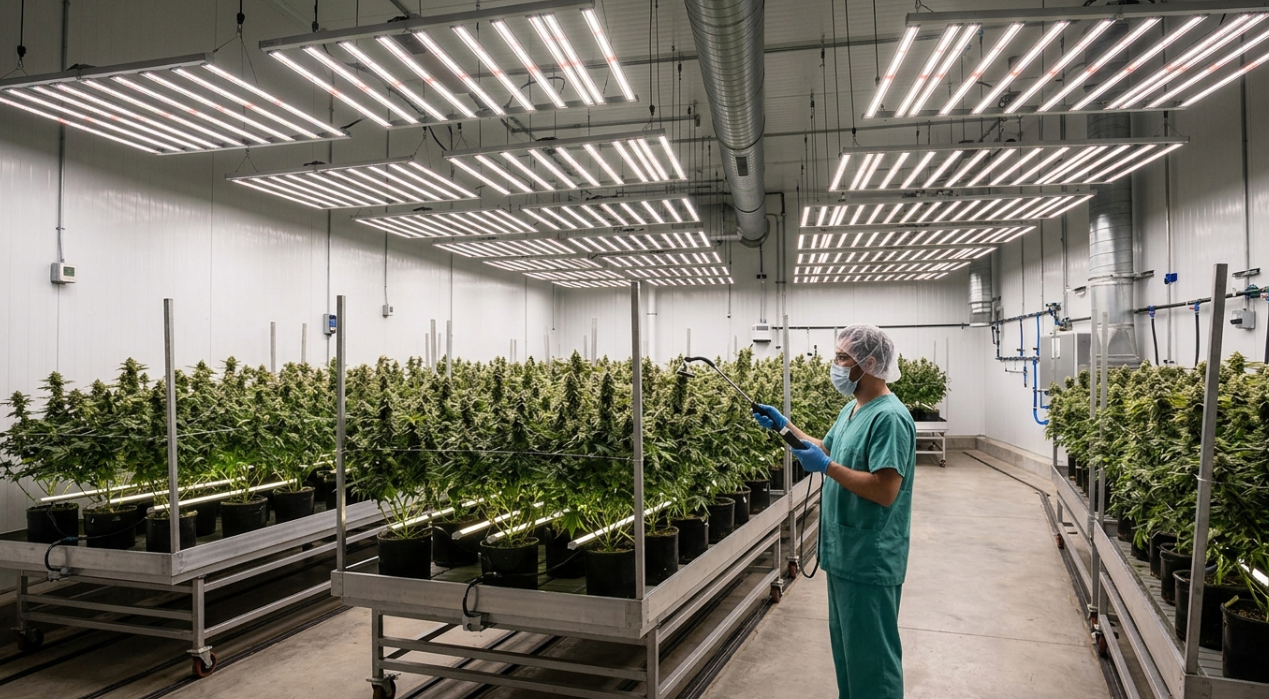
The flower room is the heart of any cannabis cultivation facility. It is where plants spend their final 8 to 10 weeks before harvest, where the photoperiod drops to 12 hours of light and 12 hours of darkness, and where the vast majority of your revenue is literally grown. Because flower rooms take up about 70% of the total indoor grow area, the layout choices you make here ripple through every other system in the building, from HVAC capacity to electrical panel sizing to daily labor costs.
A poorly planned cannabis flower room layout wastes square footage, creates uneven canopies, and forces expensive retrofits. A well-planned one maximizes yield per square foot, supports consistent harvests, and keeps operating costs predictable.
This guide covers every term, metric, and spatial decision involved in flower room design. It is a practical reference, not a product pitch.
Explore indoor cannabis lighting solutions to see how modern LED systems fit into these layout decisions.
What Is the Best Cannabis Flower Room Layout?
The best cannabis flower room layout organizes plant canopies, grow lights, benches, aisles, HVAC equipment, irrigation, and electrical systems to maximize usable growing space while maintaining consistent environmental conditions and safe access. A successful design starts with the canopy footprint, then coordinates lighting intensity and uniformity, airflow, humidity control, electrical capacity, and room access. The ideal configuration depends on the facility's dimensions, cultivation method, equipment specifications, local building and fire codes, and production goals.
What Is a Flower Room?
A flower room is the dedicated space within a cannabis cultivation facility where plants complete the flowering stage of growth. In the standard cultivation lifecycle (mother plant, clone, vegetative growth, flowering), the flower room is the final stop before harvest.
What makes the flower room distinct from other grow spaces is the photoperiod. Cannabis plants require a shift to 12 hours of light and 12 hours of uninterrupted darkness to trigger and sustain flower production. During the vegetative stage, plants typically receive 18 hours of light. That reduction to 12 hours is what signals the plant to stop growing vegetatively and start producing flowers.
The flowering phase lasts six to ten weeks depending on genetics, with nine weeks being a common average for commercial strains. Because this is the longest single phase and because flower rooms require the most controlled environment of any space in the facility, they dominate the building’s footprint.
This is not just an architectural fact. It is an economic one. The flower room is where the product that generates revenue is produced. Every layout decision, from how benches are arranged to how light fixtures are spaced, directly affects the quality and quantity of that product.
Key Metrics: PPFD, DLI, and Uniformity
Three numbers define whether a cannabis flower room layout is delivering enough light in the right pattern: PPFD, DLI, and uniformity.
PPFD (Photosynthetic Photon Flux Density)
PPFD measures the number of photosynthetically active photons hitting a square meter of canopy per second, expressed in µmol/m²/s. It is the most common metric for describing light intensity at the plant level.
Commercial cannabis flower rooms typically target 700 to 900 µmol/m²/s under ambient CO₂ levels. With CO₂ supplementation (usually to 1,200 to 1,500 ppm), growers push PPFD higher, often to 900 to 1,500 µmol/m²/s.
Research from the University of Guelph tested flowering cannabis at canopy-level PPFDs ranging from 120 to 1,800 µmol/m²/s and found that dry inflorescence yield increased linearly up to the highest level tested. Leaf-level photosynthesis saturated well below that, meaning the whole-plant response and the leaf-level response diverge. More light kept producing more flower even after individual leaves stopped responding proportionally.
That said, practitioners on growing forums like Overgrow regularly debate whether pushing past 900 µmol/m²/s is worthwhile without supplemental CO₂. The consensus among experienced growers is that 600 to 900 covers flowering effectively at ambient CO₂, and going higher without the gas enrichment just wastes electricity. For a deeper breakdown of these targets, see this guide to PPFD for cannabis flower stage.
DLI (Daily Light Integral)
DLI is the total number of photons delivered to a square meter of canopy over a full day, expressed in mol/m²/day. Think of PPFD as the flow rate and DLI as the total volume.
For flowering cannabis under a 12-hour photoperiod, the target DLI is 35 to 50 mol/m²/day. The math is straightforward: 1,000 µmol/m²/s multiplied by 12 hours equals 43.2 mol/m²/day, which sits right in the middle of the optimal range.
Here is why DLI matters for layout planning: because flowering plants only get 12 hours of light instead of 18, the flower room must deliver roughly 50% higher PPFD than a veg room to accumulate a comparable daily photon budget. That higher intensity requirement drives bigger fixtures, more watts per square foot, and greater HVAC loads. For the full formula and stage-by-stage targets, the cannabis DLI guide walks through the calculations.
Light Uniformity
This is the metric most facility designers undervalue. Peak PPFD under the center of a fixture is a marketing number. Canopy-wide uniformity is the operational number.
The target is to keep PPFD readings within plus or minus 10 to 15% across the entire flowering footprint, with a minimum-to-average PPFD ratio of 0.75 or higher. Over-lit centers and under-lit edges are the most common layout mistake in commercial rooms. Plants in the hot spots get light-stressed while plants on the perimeter underperform, and the average yield across the room suffers.
Canopy Footprint vs. Room Footprint
A common mistake, especially among first-time facility designers, is measuring the grow room footprint instead of the plant canopy footprint when calculating lighting needs. A 4-foot by 4-foot canopy in a 5-foot by 5-foot room requires lights sized and positioned to cover the canopy area, not the entire room. Oversizing to the room wastes energy and distorts uniformity calculations. Always plan the lighting layout to the canopy dimensions.
Spatial Configuration: Benches, Aisles, and Plant Density
The physical arrangement of plants within the flower room is where layout theory meets daily operations. Three variables interact: plant spacing, bench type, and aisle width.
Plant Spacing
For commercial grow room design, the standard guideline is to allocate 2 to 4 square feet per plant during the flowering stage. The exact number depends on strain morphology, training technique, and canopy management style. Sea-of-green methods pack more plants per square foot with shorter veg times. SCROG (screen of green) setups use fewer plants but give each one more horizontal space.
Whichever method you choose, the spacing must be consistent across the room. Inconsistent density creates inconsistent canopy height, which makes uniform light delivery nearly impossible.
Rolling Benches vs. Static Benches
Static benches are simpler and cheaper, but they require a permanent aisle between every row. Rolling benches consolidate walkways into one movable aisle that shifts across the room as workers need access. This pushes canopy coverage toward 75 to 90% of the floor area in rectangular rooms.
Manufacturers commonly cite gains of 40 to 50% more plant space versus static layouts, and this number is realistic for well-designed rectangular rooms. The trade-off is higher upfront bench cost and the need for a level, structurally sound floor.
Bench width matters for ergonomics. Four-foot-wide tables allow employees to reach every plant from either side without climbing on or leaning over the bench. Going wider saves a marginal amount of aisle space but creates labor bottlenecks and increases the risk of plant damage during maintenance.
Aisle Width
Most commercial cannabis facilities need a minimum aisle width of 36 inches. This satisfies the majority of workplace access standards, but the authority having jurisdiction (AHJ) in your municipality may require more, particularly for ADA compliance or fire egress. Verify local requirements before finalizing your aisle dimensions.
With rolling benches, you only need one aisle at a time, so the total floor area surrendered to walkways drops substantially compared to static layouts where every row needs its own permanent corridor.
Room Sizing and Room Count
Standard commercial flower rooms typically measure about 30 feet across and 50 to 100 feet long. The 30-foot width works well for bench layouts (multiple rows of 4-foot benches with aisles), and the length scales with the number of plants you need per room.
The “Multiples of Three” Rule
This is one of the most practical and least discussed operations insights in facility design. Most cannabis genetics take approximately nine weeks to complete the flowering phase. If your flower rooms are structured in multiples of three, you can stagger planting so that three rooms are always in early flower, three in mid-flower, and three in late flower (or approaching harvest). This creates a consistent, perpetual harvest schedule.
Ideally, a facility has nine flower rooms, each on a nine-week cycle, with one room harvested and replanted every week. Fewer rooms work in multiples of three as well (three rooms, six rooms), but the nine-room model is the gold standard for throughput predictability.
Veg-to-Flower Ratio
The common best practice for sizing total vegetative canopy is to allocate 20 to 30% of your total flowering canopy footprint to veg space. Undersizing your veg rooms is one of the most expensive mistakes in facility planning because it creates a bottleneck that leaves flower rooms sitting empty, burning electricity and HVAC capacity without producing revenue. For a broader look at how these ratios affect your budget, the startup costs guide provides useful context.
Consistent Room Sizing
All flower rooms in a facility should ideally be the same size with the same canopy space. This uniformity ensures a steady, predictable flow of biomass through post-harvest processing. When rooms vary in size, harvest volumes fluctuate, staffing becomes unpredictable, and drying and trimming bottlenecks emerge.
Sample Cannabis Flower Room Layout: Space Planning Example
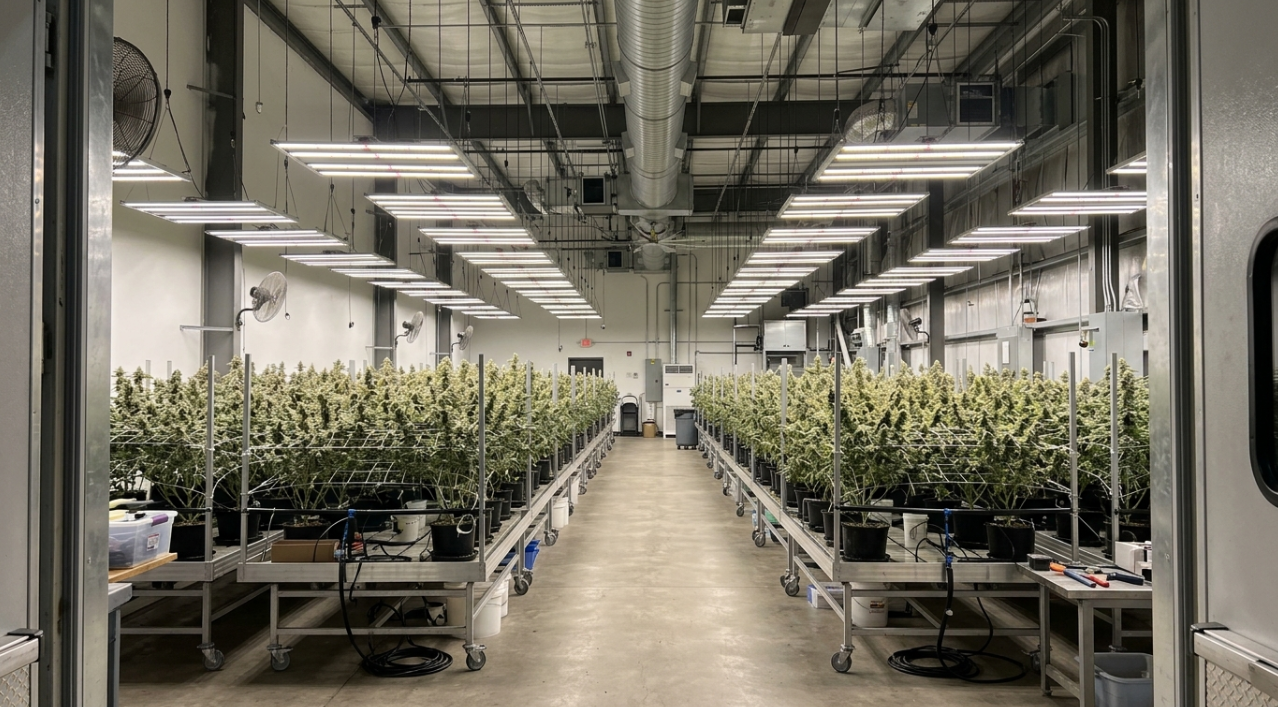
A practical cannabis flower room layout starts by separating the total room footprint from the area available for plant canopies. The remaining space must accommodate access aisles, bench movement, equipment clearances, irrigation components, and environmental systems.
Consider a hypothetical rectangular flower room measuring 30 feet by 60 feet. Its total floor area is 1,800 square feet, but the entire area cannot be used for plants. The final canopy footprint depends on bench dimensions, aisle placement, equipment access, and the clearances required by the selected systems.
Flower Room Space Allocation
Design component | What to account for | Planning consideration |
|---|---|---|
Plant canopy | Actual growing area | Size lighting to the intended canopy footprint |
Benches or tables | Bench width, length, and support structure | Maintain access for plant care and maintenance |
Main aisles | Worker access and equipment movement | Verify applicable accessibility and egress requirements |
Rolling bench clearance | Movement of benches and access to the operating aisle | Confirm travel limits and safe operating clearances |
Grow lights | Fixture dimensions, mounting height, and light distribution | Use manufacturer photometric data |
HVAC and dehumidification | Ductwork, supply air, returns, and equipment access | Coordinate with the lighting and bench plan |
Electrical infrastructure | Panels, circuits, conduit, and disconnects | Have a qualified electrical designer verify capacity and compliance |
Irrigation and drainage | Water distribution, drainage, and leak access | Avoid obstructing walkways or maintenance points |
Example: Room Footprint Versus Canopy Footprint
Measurement | Example value |
|---|---|
Room width | 30 ft |
Room length | 60 ft |
Total floor area | 1,800 sq ft |
Illustrative canopy area | 1,350 sq ft |
Remaining non-canopy floor area | 450 sq ft |
Canopy coverage | 75% |
These figures illustrate the difference between room area and canopy area; they are not a construction-ready layout or a universal design recommendation. The actual canopy footprint must be calculated from the proposed bench arrangement, operating aisles, required clearances, and equipment locations.
Before finalizing the layout, check that workers can safely access the canopy, maintain the equipment, service electrical components, and inspect irrigation and environmental systems without disrupting room operations.
Lighting Layout Fundamentals
Fixture placement is where the cannabis flower room layout converts from an architectural plan into a biological performance tool. The goal is to deliver the target PPFD and DLI with maximum uniformity across the canopy.
Fixture Spacing and PPFD Maps
Start with the manufacturer’s PPFD maps at the specified mounting height. Reputable manufacturers publish these maps showing intensity distribution at various heights and spacings. Overlap fixture footprints enough to eliminate dark spots between units, but not so much that center-line hot spots become excessive.
Bar-style fixtures generally produce a more uniform light pattern across wide benches than compact board-style fixtures, which concentrate output in a tighter cone. The choice affects both uniformity and the number of fixtures needed per room. Explore the commercial LED grow light lineup for examples of how different form factors map to various room configurations.
Mounting Height and Ceiling Requirements
A minimum ceiling height of 8 feet is recommended for commercial cannabis flower rooms, and taller is almost always better. Shorter ceilings and limited vertical space between the light source and the canopy are among the most common constraints that compromise a flower room layout. With insufficient height, lights cannot spread their beam wide enough, uniformity suffers, and heat concentration at the canopy increases.
The mounting height interacts with fixture beam angle to determine the effective coverage area. Higher mounts spread light over a wider footprint but reduce peak intensity at the canopy. Lower mounts increase intensity but shrink the coverage zone and create sharper intensity gradients.
Full-Spectrum Light and Work Environment
Full-spectrum white light provides a more natural work environment compared to narrow-spectrum red/blue fixtures. Beyond worker comfort, full-spectrum light makes it easier to visually inspect plants for pests, nutrient deficiencies, and disease. When your staff spends hours in the flower room every day, the quality of the light environment matters for both plant assessment accuracy and employee retention.
Vertical Racking: Multi-Tier Flower Rooms
Two-tiered flower room configurations are increasingly common in facilities where floor space is limited and ceiling height allows it. Some facilities accommodate three tiers, though this is less common in flower rooms than in veg or propagation spaces. Multi-tier layouts multiply the canopy area per square foot of floor but add complexity to HVAC distribution, lighting uniformity, and labor access. Each tier needs its own light plane, airflow path, and irrigation system.
Under-Canopy Lighting
Under-canopy lighting is one of the highest-impact layout decisions available, yet most facility designs treat it as an afterthought or product add-on rather than an integrated spatial choice.
What It Is
Under-canopy lighting places supplemental fixtures below or within the plant canopy to deliver light to the lower branches and bud sites that overhead fixtures cannot reach. In a dense flowering canopy, the top cola can block 90% or more of the overhead light from reaching the lower plant structure.
Why It Matters
Studies consistently show that under-canopy lights can boost cannabis yields by 20 to 30% compared to overhead lights alone. One particularly notable finding: supplemental side and bottom lighting produced a 20% increase in flower yield and a 27% improvement in the ratio of premium to small buds. The enhanced yield came from repositioning light energy, not adding total power. Moving photons under the canopy produced better results without increasing electricity consumption.
This means under-canopy lighting is not simply “more light.” It converts what would otherwise be popcorn buds and larf into sellable, often premium-grade flower. It also reduces the need for lollipopping (stripping lower branches), which saves labor hours.
Layout Implications
Adding under-canopy fixtures changes several elements of the room design. Bench height may need to increase to accommodate fixtures below the canopy. Clearance between the top of the under-canopy bar and the lowest branches needs to be sufficient for airflow and to prevent light burn. The total fixture count in the room goes up, which affects electrical circuit planning.
Purpose-built under-canopy LED fixtures are designed to address these constraints with slim profiles and mounting options that fit between bench legs or attach to racking.
The key concept here is “split lighting,” redistributing a portion of the room’s total wattage budget from overhead to under-canopy rather than simply adding more watts. When done correctly, this improves yield without proportionally increasing energy cost or HVAC load.
Environmental Integration: HVAC, Airflow, and CO₂
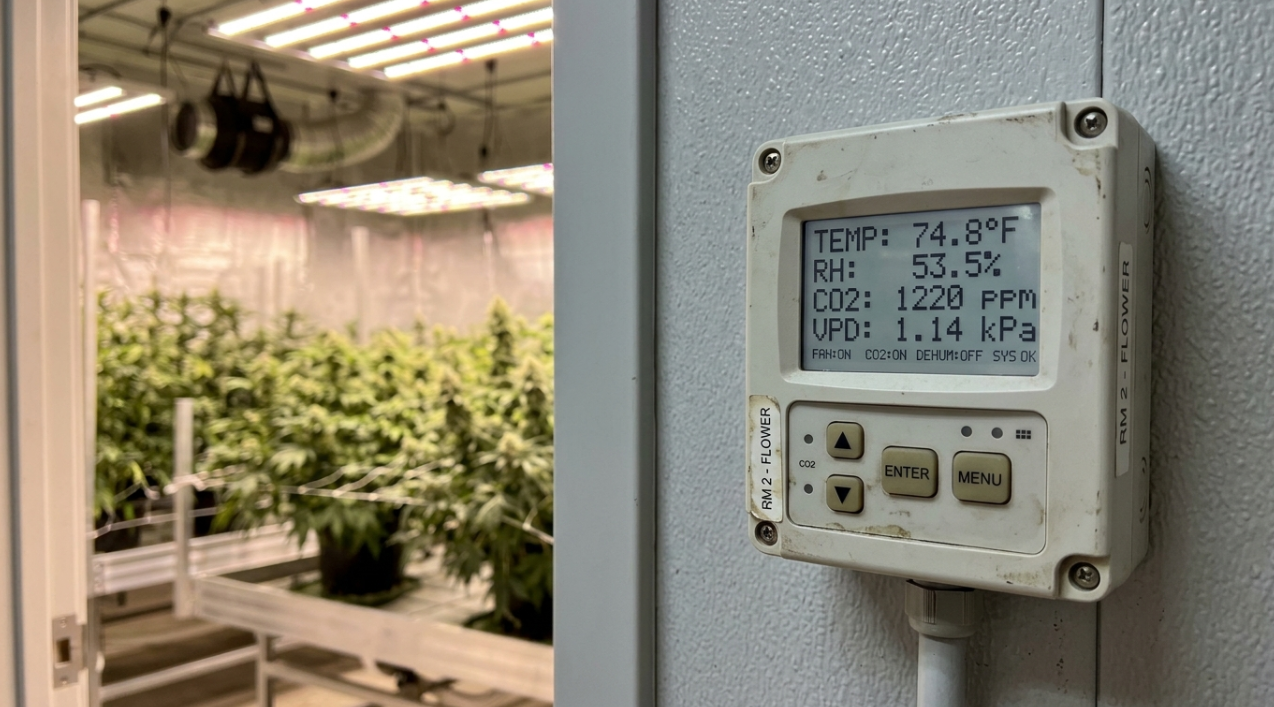
A cannabis flower room layout is incomplete if it stops at plants and lights. The environmental systems must be designed in parallel, not bolted on afterward.
Heat and Moisture Loads
Flower rooms carry the highest heat and moisture loads of any space in the facility. LED flower rooms typically need about 1 ton of cooling per 60 to 90 square feet, while HPS flower rooms require 1 ton per 40 to 55 square feet. That is roughly double the HVAC requirement for HPS versus LED, a difference that directly affects room size planning and operating cost.
In a high-density flower canopy, up to half of the total energy load is latent moisture transpired by the plants. This is not just heat; it is humidity. Flowering rooms need stronger dehumidification capacity than any other cultivation space, and undersizing dehumidification invites mold, botrytis, and powdery mildew. For a deeper explanation of how these loads interact, see the breakdown of latent vs. sensible heat in grow rooms.
CO₂ Supplementation
CO₂ enrichment unlocks higher PPFD targets. Without supplemental CO₂, pushing past 900 µmol/m²/s produces diminishing returns because the plant runs out of carbon dioxide to fix into sugars. With enrichment to 1,200 to 1,500 ppm, the photosynthetic machinery can use that extra light productively.
The layout implication is that CO₂ distribution must be planned alongside duct routing and airflow patterns. CO₂ is heavier than air and sinks, so injection points and circulation fans need to be positioned to maintain even concentration across the canopy, not just in the center of the room.
Airflow and Duct Routing
The duct layout must follow the room layout, not the other way around. Too many facilities finalize their bench configuration and fixture plan, then discover that the HVAC ducting doesn’t fit without creating dead zones or blocking light. Plan duct runs, diffuser placement, and return air paths at the same time you plan bench and fixture positions.
Managing VPD in cannabis cultivation depends on tight temperature and humidity control across the entire room, not just at the thermostat sensor location. Airflow design makes or breaks VPD consistency.
Electrical Infrastructure and Power Architecture
Lighting is the dominant electrical load in a cannabis flower room. How fixtures are arrayed directly dictates panel sizing, conduit runs, circuit counts, and installation cost.
A single flower room with 30 to 50 high-wattage top lights, plus under-canopy fixtures, can draw tens of kilowatts. Multiply that across eight or nine flower rooms and the electrical infrastructure becomes one of the largest capital expenses in the build.
Centralized Power Architecture
One approach gaining traction in commercial cannabis is moving LED drivers out of the grow space entirely. In a conventional setup, every fixture contains its own driver (the component that converts AC power to the DC current the LEDs need). Each driver generates heat, adds weight to the fixture, and represents a potential failure point in the humid, warm environment of a flower room.
A centralized power architecture for grow rooms relocates those drivers to a mechanical room or electrical closet. The benefits cascade through the layout: less heat above the canopy (reducing HVAC load), lighter and slimmer fixtures (easier to mount and position), fewer in-room electrical connections, and simplified maintenance. When a driver needs service, a technician works in a clean, accessible mechanical space rather than crawling between plants under a hot canopy.
This is not just an electrical decision. It is a layout decision. Centralized power changes conduit routing, fixture mounting hardware, and the thermal profile of the entire room.
Step-by-Step Cannabis Flower Room Design Process
Designing a cannabis flower room requires coordination between the building layout, lighting system, environmental controls, and electrical infrastructure. Following a defined planning sequence helps identify conflicts before construction and reduces the likelihood of expensive changes.
Step 1: Establish the Room Dimensions and Production Requirements
Document the room's length, width, ceiling height, structural limitations, and intended production schedule. Identify the cultivation method, proposed bench configuration, equipment requirements, and access needs before committing to a floor plan.
Step 2: Calculate the Usable Canopy Area
Separate the total floor footprint from the area that can accommodate plants. Account for aisles, bench supports, equipment clearances, and access routes. Use the resulting canopy dimensions as the basis for lighting calculations.
Step 3: Develop the Lighting Plan
Select fixtures based on their output, efficacy, mounting requirements, and light distribution. Review manufacturer PPFD maps and calculate expected canopy-level intensity and uniformity. Evaluate supplemental lighting separately so that its electrical and thermal implications are included in the design.
Step 4: Coordinate HVAC, Dehumidification, and Airflow
Estimate sensible cooling loads, plant transpiration, humidity-removal requirements, and the heat released by lighting and other equipment. Coordinate ductwork, air distribution, return paths, and service clearances with the bench and fixture layout.
Step 5: Plan Electrical Capacity and Distribution
Calculate the connected load of overhead lights, supplemental fixtures, HVAC equipment, pumps, controls, and other electrical systems. Have a qualified electrical professional verify circuit design, panel capacity, protection, conductor sizing, and applicable code requirements.
Step 6: Integrate Irrigation, Drainage, and Monitoring
Plan water delivery, drainage, leak detection, environmental sensors, and control equipment. Place sensors where they can represent actual growing conditions rather than relying exclusively on readings near a supply vent or other localized influence.
Step 7: Verify Safety, Compliance, and Maintenance Access
Review building, fire, electrical, occupational safety, and accessibility requirements applicable to the facility. Confirm that workers can service fixtures, clean equipment, inspect irrigation, and access required exits without obstruction.
Step 8: Validate the Design Before Construction
Review the coordinated floor plan with the relevant lighting, mechanical, electrical, and cultivation specialists. Verify equipment dimensions, expected loads, access clearances, and installation requirements. After installation, measure canopy-level lighting and environmental conditions to confirm that the completed room performs as intended.
A successful flower room design is not simply a layout that fits the equipment. It is a coordinated plan in which every system can operate, be maintained, and meet the facility's performance and safety requirements.
Common Flower Room Layout Mistakes
Even experienced cultivators make these errors. Catching them during the design phase is orders of magnitude cheaper than fixing them after construction.
Undersizing veg rooms. If veg space is too small relative to flower space, you cannot fill your flower rooms on schedule. Empty flower rooms burn electricity and HVAC capacity while producing nothing. Maintain the 20 to 30% veg-to-flower canopy ratio.
Measuring room footprint instead of canopy footprint. Lighting calculations should be based on the area where plants actually sit, not the total room dimensions including aisles, walkways, and mechanical clearances. Oversizing to the room wastes energy and distorts PPFD uniformity.
Chasing peak PPFD over uniformity. A room that hits 1,200 µmol/m²/s directly under each fixture but drops to 400 at the edges will underperform a room with a consistent 800 everywhere. Uniformity drives average yield. Peak numbers drive marketing claims.
Finalizing layout before HVAC design. If duct runs and diffuser locations are an afterthought, they will conflict with fixture positions, create airflow dead zones, or require expensive re-routing. Integrate environmental systems from the start.
Ignoring future expansion. Electrical panels, HVAC capacity, and structural elements should be sized with some headroom. Adding a tier of under-canopy lighting or upgrading to higher-output fixtures later is much easier if the infrastructure was designed with modularity in mind.
Skipping under-canopy lighting. Leaving 20 to 30% of potential yield on the table because under-canopy was not part of the original layout is a costly omission. It is far easier and cheaper to plan for under-canopy fixtures during design than to retrofit them into an existing room.
If you are planning a new build or retrofit and want to avoid these pitfalls, talk to a lighting design expert before finalizing your layout.
Quick-Reference Table
Parameter | Recommended Range |
|---|---|
Photoperiod | 12 hours on / 12 hours off |
PPFD (no CO₂) | 700 to 900 µmol/m²/s |
PPFD (with CO₂) | 900 to 1,500 µmol/m²/s |
DLI | 35 to 50 mol/m²/day |
Uniformity | Plus or minus 10 to 15% |
Min-to-avg PPFD ratio | 0.75 or higher |
Plant spacing | 2 to 4 sq ft per plant |
Bench width | 4 ft maximum |
Aisle width | 36 inches minimum |
Canopy coverage (rolling benches) | 75 to 90% of floor area |
Room share of facility | Approximately 70% of grow area |
Standard room dimensions | 30 ft wide, 50 to 100 ft long |
Ideal room count | Multiples of 3 |
Veg-to-flower ratio | 20 to 30% of flower canopy |
HVAC sizing (LED) | 1 ton per 60 to 90 sq ft |
HVAC sizing (HPS) | 1 ton per 40 to 55 sq ft |
Minimum ceiling height | 8 feet |
Flowering duration | 6 to 10 weeks |
Frequently Asked Questions
How much space should a flower room take up in a cannabis facility?
Flower rooms typically account for about 70% of the total indoor grow area. The remaining space is split among vegetative rooms (20 to 30% of the flower canopy area), mother and clone areas, drying and processing rooms, and mechanical spaces.
What PPFD should I target in a cannabis flower room?
Without CO₂ supplementation, target 700 to 900 µmol/m²/s at the canopy. With CO₂ enrichment to 1,200 to 1,500 ppm, you can push to 900 to 1,500 µmol/m²/s. The flower room lighting guide covers this in more detail.
Why do flower rooms need more HVAC than veg rooms?
Two reasons. First, flower rooms run higher light intensity, which generates more heat. Second, flowering cannabis transpires heavily, producing significant latent moisture that requires dehumidification capacity beyond what simple cooling provides. Up to 50% of the thermal load in a flower room can be latent heat from plant transpiration.
How many flower rooms should I build?
The ideal number is a multiple of three, aligned to the typical nine-week flowering cycle. With nine flower rooms, you can harvest one room per week on a perpetual schedule. Three or six rooms also work but with longer intervals between harvests.
What is the difference between canopy footprint and room footprint?
Canopy footprint is the area where plants actually sit. Room footprint includes aisles, walkways, and mechanical clearances. Lighting calculations should always be based on canopy footprint. Using room footprint leads to over-sizing the lighting system and wasting energy.
Do rolling benches really increase usable space by 40 to 50%?
Yes, in a rectangular room with a well-designed rolling bench system. By consolidating multiple permanent aisles into a single movable aisle, rolling benches can push canopy coverage to 75 to 90% of the floor area. The trade-off is higher bench cost and the need for a perfectly level floor.
How does under-canopy lighting affect flower room layout?
Under-canopy fixtures require clearance below the plant canopy, which can affect bench height and racking dimensions. They also increase the total fixture count and electrical circuit requirements in the room. The payoff is a documented 20 to 30% yield increase and a better ratio of premium to small buds, without necessarily increasing total power consumption.
Should I design the HVAC system before or after the room layout?
In parallel. HVAC duct routing, diffuser placement, and dehumidification capacity all depend on where benches, lights, and plants are positioned. Designing one without the other leads to conflicts, dead zones, and expensive change orders. The same applies to electrical infrastructure, which should also be planned alongside the fixture layout, not after it.