Lower Canopy Lighting Cannabis: 2026 Guide & ROI Gains
Lower Canopy Lighting Cannabis boosts yield 19–30% and bud grade. Learn timing, PPFD targets, spectrum picks, and ROI tips. See the 2026 guide.
TL;DR
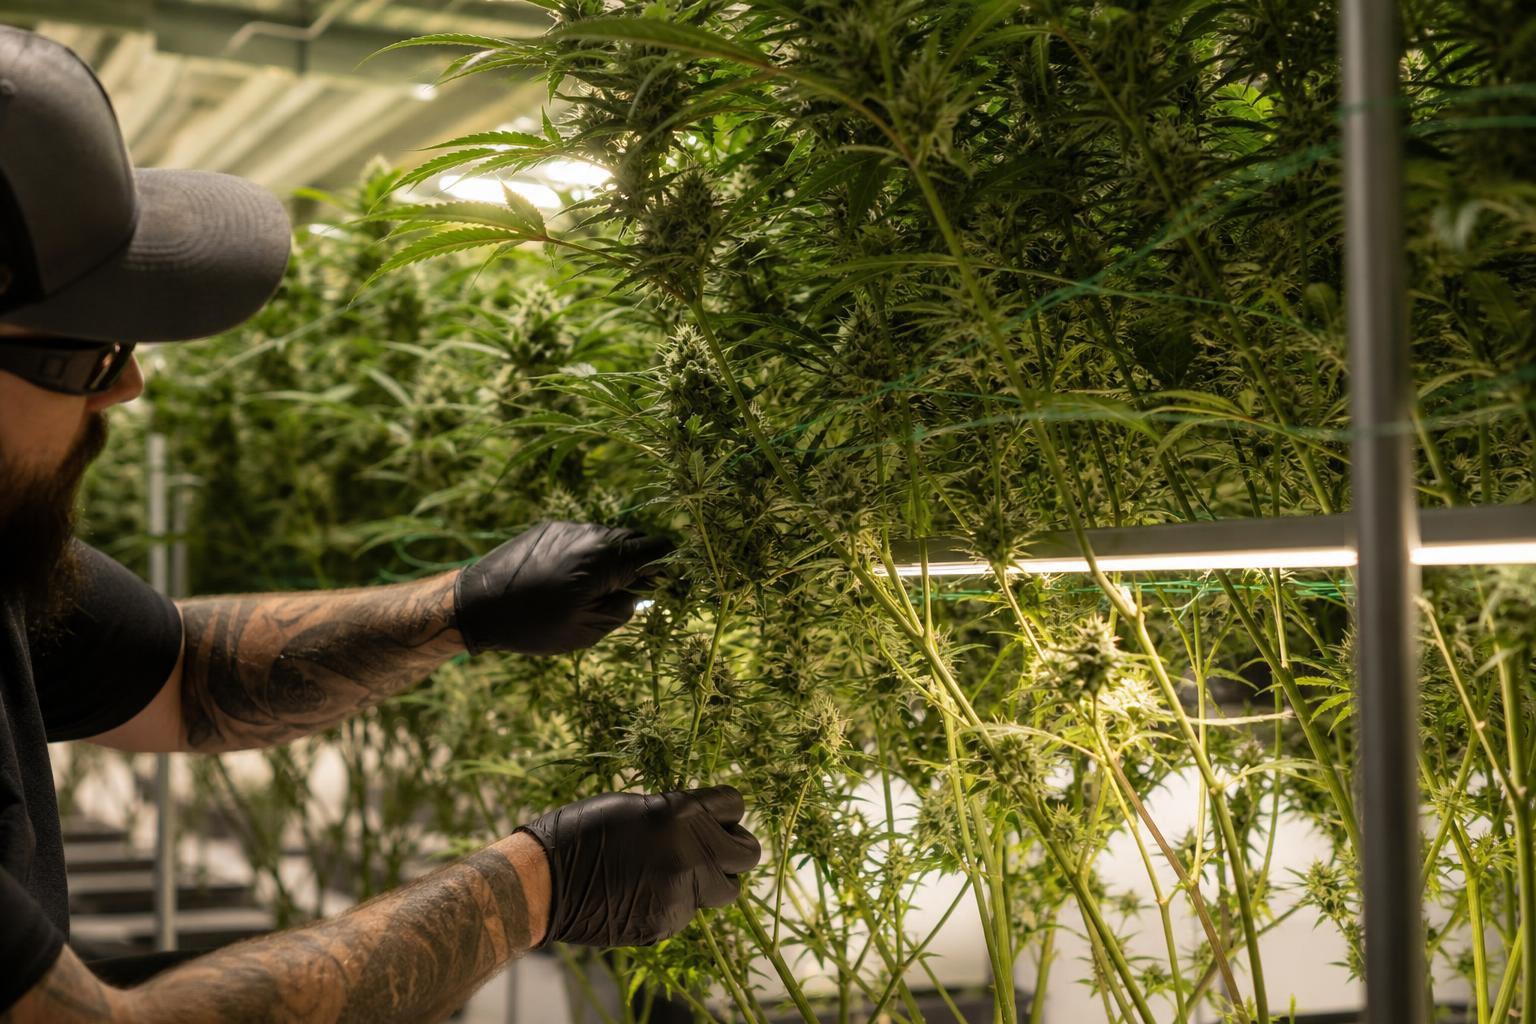
Lower canopy lighting in cannabis refers to placing supplemental LED bars beneath or within the plant canopy to illuminate shaded bud sites that top lights can’t reach. It directly addresses the “popcorn bud” problem, where lower flowers stay small and airy due to insufficient light. Peer-reviewed research shows yield increases of 19% to 30%, along with measurable gains in cannabinoid and terpene content. The technique works best when the rest of your environment is already dialed in.
What is lower canopy lighting in cannabis?
Lower canopy lighting is a supplemental lighting technique that uses LED fixtures beneath or within a cannabis plant canopy to deliver photosynthetic light to shaded flower sites. Research published in HortScience and Plants has reported increased flower yield under specific subcanopy and intracanopy lighting treatments. The actual benefit depends on cultivar, fixture design, light distribution, environmental conditions, and growing practices.
Key takeaway: Under-canopy lighting is most worth evaluating when dense foliage limits light penetration, lower flowers contribute meaningful potential revenue, and the facility can support the additional electrical and cooling load. Measure the results in a controlled trial before committing to a full installation.
Lower canopy lighting for cannabis uses supplemental LED fixtures beneath or within the plant canopy to deliver light to shaded lower flower sites that receive limited illumination from overhead fixtures. When properly designed, these systems can improve light distribution, increase usable flower production, and potentially improve the commercial value of lower-canopy harvests.
The technique is particularly relevant to dense indoor cannabis canopies, where upper foliage intercepts light before it reaches lower branches. Instead of relying entirely on overhead lighting or removing lower growth through lollipopping, growers can evaluate whether targeted supplemental lighting makes those shaded areas more productive.
However, under-canopy lighting does not guarantee a specific yield increase or payback period. Results depend on cultivar, canopy structure, lighting spectrum, photon distribution, environmental conditions, electricity prices, and the market value of the additional flower.
This guide examines the research behind under-canopy and intracanopy lighting, explains how to evaluate fixture performance, and provides a practical framework for calculating installation costs and potential return on investment.
Explore under-canopy lighting solutions
The Popcorn Bud Problem
To understand why lower canopy lighting matters for cannabis, you need to understand what happens inside a dense canopy when the only light source is overhead.
Upper leaves reduce both the amount and the spectral balance of light reaching the lower canopy. Green photons also contribute to photosynthesis, and far-red photons can contribute when combined with shorter wavelengths. Lower light availability and changes in spectrum must be evaluated separately. Westmoreland et al. (2021) explain these distinctions.
The plant responds rationally to this light gradient. Through auxin-driven apical dominance, it redirects energy toward the well-lit top colas and deprioritizes lower bud sites. Those lower sites develop into what growers call “popcorn buds,” small, airy, low-potency flowers that often end up as trim.
Measure PPFD at representative lower bud sites and at the top of the crop, recording sensor position and orientation. The sources discussed here do not establish a universal 500–600 µmol/m²/s boundary below which all cannabis cultivars lose flower quality. Use a controlled trial to connect measured light levels with your cultivar, environment and harvest results.
The traditional solution is lollipopping, stripping the lower branches entirely so the plant focuses its energy on top colas. It works, but it’s labor-intensive, stresses the plant, and accepts that a significant portion of potential canopy is simply sacrificed. Lower canopy lighting for cannabis offers an alternative: keep those bud sites and give them enough light to produce grade-A flower.
How Under-Canopy Lighting Works
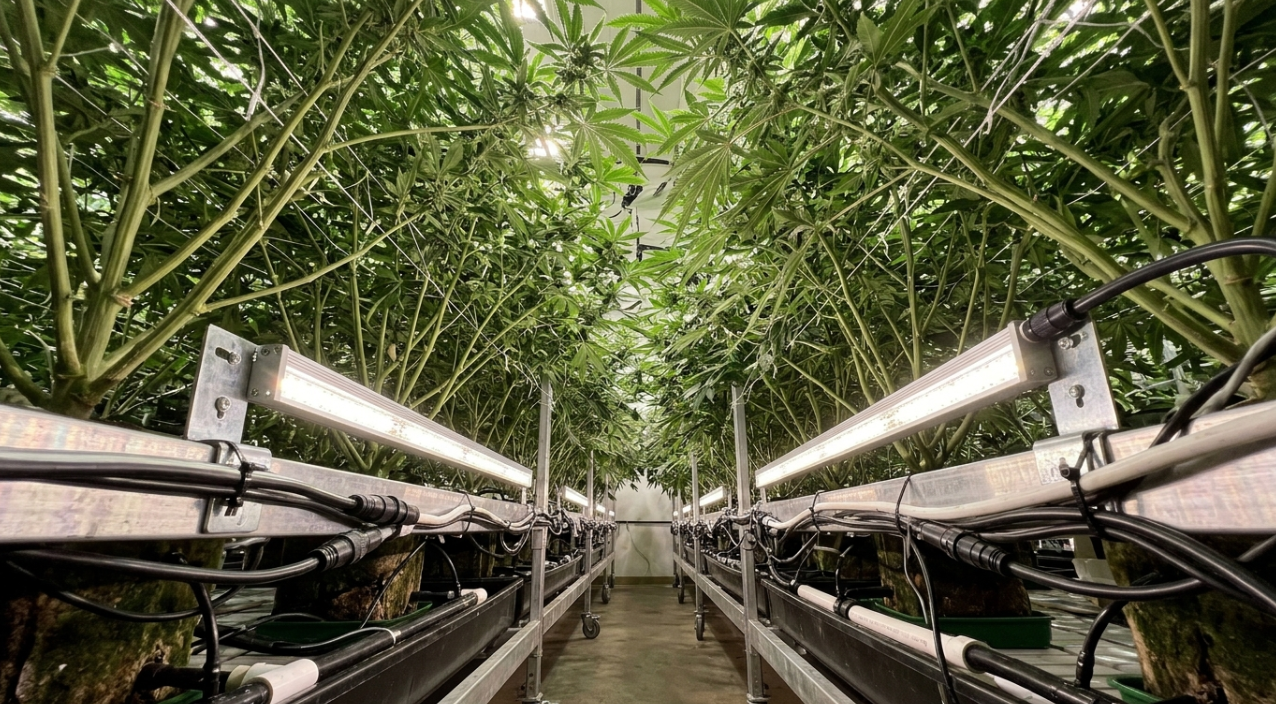
Under-canopy fixtures direct supplemental light toward shaded crop zones. Choose mounting height, spacing and orientation from the exact fixture installation instructions and a measured or modeled layout. An unqualified distance below the buds cannot establish electrical safety, crop clearance or an even light distribution.
A few things worth noting about the mechanics. The underside of cannabis leaves absorbs only about 50 to 60% of incident PAR, compared to the upper leaf surface. That’s still a substantial amount of usable light, especially in zones that would otherwise receive almost nothing.
Most commercial growers introduce under-canopy lighting 14 to 21 days into the flowering cycle. Starting earlier, during stretch, risks wasting energy on internodes that haven’t set flower yet. Starting later means bud sites have already been deprioritized by the plant’s internal resource allocation.
Supplemental lighting adds an electrical load whose size depends on fixture input power, fixture count, dimming and operating hours. Calculate lighting energy as total input watts ÷ 1,000 × operating hours, then apply the relevant electricity rate. Include incremental cooling, dehumidification and any demand charges when estimating total operating cost.
The Boost XE is one example of a fixture built specifically for this application, a 120W under-canopy bar designed to integrate with overhead lighting systems.
How to Measure Light in the Lower Cannabis Canopy
Before investing in under-canopy lighting, measure how much light reaches the lower flower sites and compare it with the light received by the upper canopy. This establishes a baseline for evaluating whether supplemental fixtures could improve light distribution.
1. Measure PPFD at Multiple Canopy Positions
Photosynthetic photon flux density (PPFD) measures the number of photosynthetically active photons reaching a surface per second, expressed in micromoles per square meter per second (µmol/m²/s).
Take measurements at representative positions, including:
Upper-canopy flower sites receiving direct overhead light.
Middle-canopy flower sites receiving partially filtered light.
Lower-canopy flower sites in visibly shaded areas.
Locations near the edges and center of the growing area.
Keep sensor orientation consistent with the surface or direction being evaluated. Record the measurement height, fixture settings, operating conditions, and time of measurement.
2. Compare Light Distribution Across the Canopy
Calculate the lower-canopy-to-upper-canopy PPFD ratio:
Lower-to-upper PPFD ratio = Lower-canopy PPFD ÷ Upper-canopy PPFD × 100
For example, if a representative upper-canopy measurement is 800 µmol/m²/s and the corresponding lower-canopy measurement is 160 µmol/m²/s:
160 ÷ 800 × 100 = 20%
The lower-canopy measurement is 20% of the upper-canopy measurement in this example.
This ratio describes light distribution, not an established threshold for flower quality. There is no universal ratio that independently determines whether under-canopy lighting will be profitable.
3. Evaluate Daily Light Integral
Daily light integral (DLI) measures the total photosynthetically active photons received per square meter over a day. It accounts for both light intensity and exposure duration.
For a constant PPFD maintained over a known photoperiod:
DLI = PPFD × lighting hours × 3,600 ÷ 1,000,000
For example, a constant PPFD of 200 µmol/m²/s over 12 hours provides:
200 × 12 × 3,600 ÷ 1,000,000 = 8.64 mol/m²/day.
This is an illustrative calculation, not a recommended cannabis lighting target. If PPFD varies during the photoperiod, use logged measurements or an appropriate time-weighted average.
4. Map the Results Before Selecting Fixtures
Use your measurements to identify persistent shaded zones and estimate how much crop area could benefit from supplemental illumination.
Consider the following before choosing a fixture:
The dimensions and density of the canopy.
The amount of light already supplied by overhead fixtures.
The supplemental fixture's photon output and distribution.
The expected light overlap between adjacent fixtures.
Electrical capacity, mounting constraints, and access for crop maintenance.
5. Repeat the Measurements After Installation
Once supplemental fixtures are installed, repeat the measurements at the same locations and under comparable conditions.
Compare the original measurements with the new readings to evaluate how the installation changes light distribution. Track the results alongside dry flower yield, flower grades, energy use, and environmental measurements.
Practical takeaway: Measure the light deficit before purchasing fixtures. A documented baseline makes it easier to compare lighting configurations, identify installation problems, and determine whether the additional equipment delivers a commercially meaningful result.
What the Research Shows
This is not a speculative technique. Multiple peer-reviewed studies and extensive commercial data support it.
Under-Canopy Lighting Research: Yield and Quality Findings
Published research suggests that supplemental lighting within or below the cannabis canopy can improve flower production under specific experimental conditions. However, results vary by lighting treatment, cultivar, crop cycle, and growing environment.
Study | Lighting approach | Reported finding | How to interpret the result |
|---|---|---|---|
Hawley et al. (2018), HortScience | Red/blue and RGB subcanopy lighting | Yield increases of 19.8% and 24.5% in the second crop cycle, respectively | Evidence that targeted subcanopy lighting can increase yield under the study's conditions. |
Garrido et al. (2025), Plants | Intracanopy lighting | Reported 29.95% increase in dry inflorescence yield, 24.4% higher THC accumulation, and 12.5% higher total terpene concentration | Evidence of potential yield and chemical-composition benefits under the tested conditions. |
Commercial facility trials | Depends on fixture, cultivar, and facility configuration | Results vary between installations | Facility-level measurements are needed to estimate commercial performance and payback. |
What growers should take away: These, but the reported percentages should not be treated as guaranteed commercial outcomes. Before estimating ROI, determine whether the research conditions resemble your facility and whether the additional flower generates sufficient incremental revenue to cover the system's costs.
University of Guelph (Hawley et al., 2018)
The most cited academic work on cannabis subcanopy lighting comes from Hawley et al., published in HortScience. In their controlled study, red/blue and RGB subcanopy lighting produced significant yield increases of 19.8% and 24.5% respectively in the second crop cycle. Both SCL treatments also increased the concentration of total Δ9-THC in bud tissue from the lower plant canopy. This is a critical finding: not just more flower, but better flower from the bottom of the plant.
Garrido et al. (MDPI Plants, 2025)
A more recent study by Garrido et al. pushed the numbers further. Their intracanopy lighting treatment achieved a 29.95% increase in dry inflorescence yield, 24.4% higher THC accumulation, and a 12.5% increase in total terpene concentration. The researchers noted that ICL was particularly effective for taller genotypes and unpruned plants, precisely the scenarios where the lower canopy gets the least overhead light.
Industry-Reported Results
Beyond academic settings, commercial growers consistently report 20% to 35% yield increases under optimized conditions. Those conditions matter: adequate CO₂ supplementation, VPD ranging from 0.8 to 1.2 kPa in early flower and 1.2 to 1.6 kPa in mid/late flower, and calibrated nutrient programs. The 2025 Cannabis Business Times annual lighting report found that interest in subcanopy lighting grew to 36%, up 12 percentage points from the prior year. Sixty-five percent of commercial growers considering new lighting said they wanted to explore ways to augment top lighting.
Quality and Grade Distribution
Hawley et al. (2018) found treatment-specific changes in cannabinoid and terpene concentrations and improved consistency for some measured compounds. Those findings do not demonstrate that all lower and upper flowers become chemically identical, or establish a commercial A-grade share. Measure your own dry yield, laboratory results, grading method and realized selling prices before estimating a revenue benefit.
Cross-Crop Validation
Cannabis isn’t the only crop that benefits. Subcanopy and intracanopy supplemental lighting has improved yields and quality across multiple horticultural crops including tomato, cucumber (with an 11% yield increase in one trial), sweet pepper, bush bean, and blackberry. This cross-crop evidence adds confidence that the underlying plant science is sound.
For a deeper look at the data, see our under-canopy LED lighting guide.
Spectrum: Match the Evidence to the Application
Choose a spectrum using evidence for the intended crop and lighting configuration.
How to Evaluate Under-Canopy LED Light Spectrum
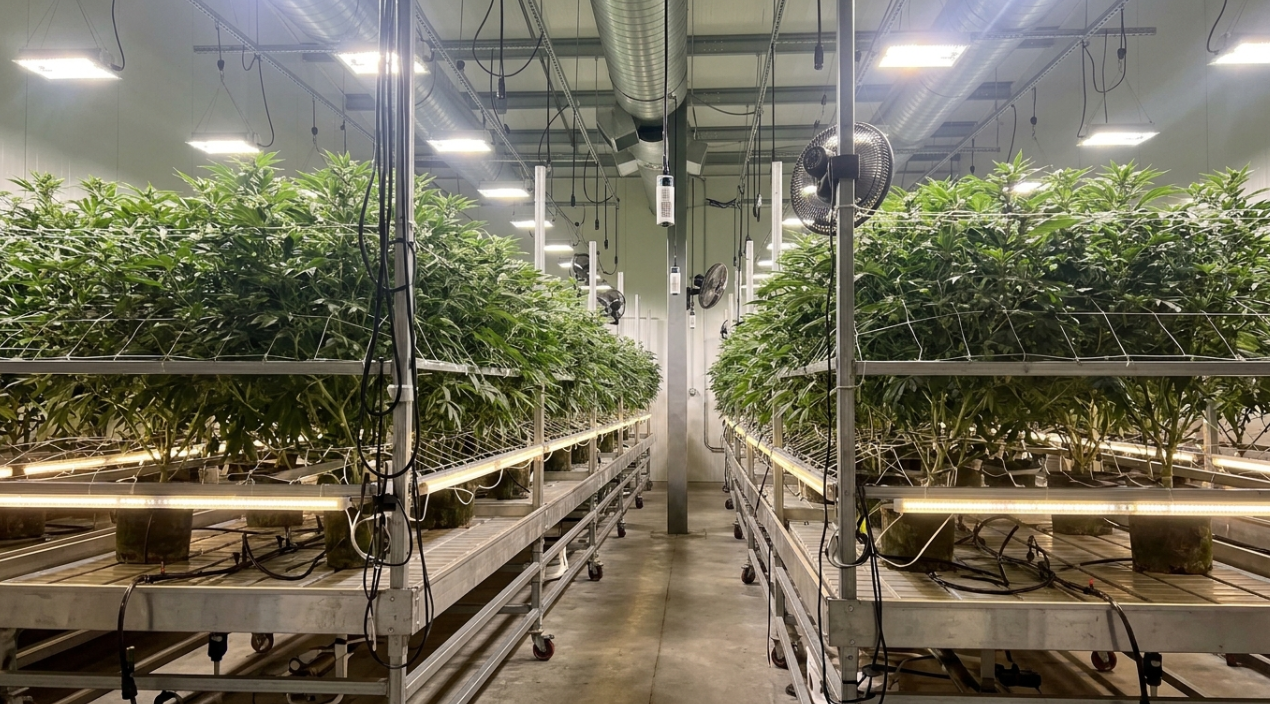
Different LED spectra can influence photosynthesis, plant architecture, and crop development. However, spectrum should not be evaluated independently of photon output, light distribution, electrical efficacy, and the growing environment.
Factor | What to evaluate | Why it matters |
|---|---|---|
Red wavelengths | Photon output and distribution in the red region | Red photons contribute to photosynthesis and can influence plant responses. |
Blue wavelengths | Blue photon output and its contribution to the overall spectrum | Blue light can influence photosynthesis, leaf development, and plant morphology. |
Green wavelengths | Green photon contribution and penetration through foliage | Green light contributes to photosynthesis and may reach deeper canopy layers. |
Far-red wavelengths | Far-red output and its interaction with other wavelengths | Far-red can influence photosynthetic responses and plant architecture. |
Overall fixture performance | PPF, PPE, spatial distribution, and crop-level measurements | These measures help determine how effectively a fixture delivers light to its intended target. |
Which spectrum is best for cannabis under-canopy lighting?
There is no universally established best spectrum for every under-canopy installation. Evaluate the specific fixture and lighting configuration using relevant experimental evidence and, where practical, controlled facility trials.
A spectrum comparison conducted with overhead fixtures does not automatically establish which spectrum will perform best when the fixtures are installed beneath the canopy.
Holweg et al. (2024) compared red and white spectra under canopy top-lighting at 600 and 1,200 µmol/m²/s. Increasing the white fraction did not increase inflorescence weight in that experiment. This was not a matched white-versus-red under-canopy trial, so it cannot establish a universal under-canopy spectrum winner.
Far-red can affect photosynthesis and plant architecture, but those effects do not establish a predictable harvest-time or yield gain for a particular commercial installation. Use a controlled facility trial before including harvest-time or yield changes in a financial forecast.
For more on how spectrum choices affect plant development, see our summary of light spectra impacts.
When Lower Canopy Lighting Makes Sense (and When It Doesn’t)
Not every operation benefits equally. Being honest about this is important.
Is Under-Canopy Lighting Right for Your Facility?
Use the following checklist to determine whether a facility is a strong candidate for evaluating supplemental lighting.
Facility condition | What it suggests | Recommended next step |
|---|---|---|
Dense canopy with substantial shading | Lower flower sites may receive limited light | Measure PPFD at representative lower-canopy positions. |
Significant lower-canopy flower production | Additional light may improve the value of existing crop space | Track baseline yield and flower-grade distribution. |
Minimal lower growth after pruning | Less shaded flower area remains to benefit | Map the remaining productive canopy before selecting fixtures. |
Inconsistent irrigation or environmental conditions | Lighting results may be difficult to interpret | Address major environmental inconsistencies before conducting a lighting trial. |
High electricity or cooling costs | Additional lighting may reduce the financial benefit | Model the full incremental operating cost. |
Difficult access beneath the canopy | Fixtures may complicate crop maintenance | Evaluate mounting, clearance, and labor requirements before installation. |
Uncertain commercial value of additional flower | More production may not produce enough revenue to justify the investment | Establish realized selling prices and grading criteria before calculating ROI. |
Decision rule: Prioritize under-canopy lighting trials where there is a measurable light deficit, meaningful potential for additional saleable flower, and a realistic path to covering the system's operating and installation costs.
Best candidates for under-canopy lighting:
Dense canopies where overhead light physically cannot penetrate to lower bud sites
Tall cultivars or growing styles that maintain significant lower growth
Operations already environmentally dialed in, with CO₂, VPD, irrigation, and nutrients optimized
Facilities focused on bud grade, where converting B-grade lower flower to A-grade materially changes revenue
Grows that want to reduce or eliminate lollipopping, preserving more of the plant’s productive capacity
Less impactful scenarios:
Heavily lollipopped plants with minimal lower canopy left to illuminate. Map the remaining shaded crop area before adding fixtures.
Thin, airy canopies where overhead light already penetrates reasonably well
Operations with unresolved environmental fundamentals. The Aroya platform has emphasized that growers who have plant density, feeding, and irrigation dialed in first are far more likely to see success with under-canopy lighting than those still troubleshooting baseline issues.
There’s also a nuanced point from Dr. David Hawley’s research that rarely appears in product marketing: for some operations, simply adding more top light achieves similar yield benefits with less complicated infrastructure, easier maintenance, and fewer obstacles to labor. Under-canopy lighting makes the strongest case when plant height, canopy density, or facility layout specifically favor bottom-up supplementation over just increasing overhead intensity.
One practical concern from growers: fixtures beneath the canopy can physically get in the way during plant maintenance. Multiple practitioners on forums have mentioned this. It’s a real consideration for workflow planning.
Environmental implications
Adding light below the canopy changes the microclimate beneath your plants. Even efficient LEDs produce heat. That heat shifts VPD in the lower canopy zone, affects transpiration rates, and adds load to your HVAC system. Any under-canopy lighting plan should include a capacity check on your climate control infrastructure.
Talk to a lighting specialist about your facility
How to Calculate Under-Canopy Lighting ROI for Cannabis
The return on investment (ROI) of under-canopy lighting depends on whether the additional saleable flower generates enough contribution margin to cover the system's installation and operating costs.
A lighting system can increase total flower yield without producing a positive financial return. The additional flower must have commercial value, and the incremental revenue must exceed the additional expenses.
Step 1: Calculate the Initial Investment
Include the complete cost of deploying the system, not just the LED fixtures.
Investment component | What to include |
|---|---|
LED fixtures | Purchase price of all under-canopy bars |
Installation | Labor, mounting hardware, and electrical work |
Electrical upgrades | Any required circuits, controls, or capacity improvements |
Integration | Dimming controls, monitoring, and system integration |
Commissioning | Installation checks, light measurements, and testing |
Initial investment = Fixtures + Installation + Electrical upgrades + Integration + Commissioning
Use actual supplier quotations and installation estimates for a reliable calculation.
Step 2: Calculate Additional Electricity Consumption
Use the following formula:
Daily lighting energy (kWh) = Total fixture input watts ÷ 1,000 × Daily operating hours
For example, consider ten 120 W fixtures operating for 12 hours per day.
Total connected load: 10 × 120 W = 1,200 W.
Daily energy consumption: 1.2 kW × 12 hours = 14.4 kWh.
Monthly energy consumption over 30 days: 14.4 × 30 = 432 kWh.
Electricity cost at an illustrative rate of $0.12/kWh: 432 × $0.12 = $51.84.
This example covers the lighting fixtures' electricity consumption only. It excludes cooling, dehumidification, demand charges, and other operating costs.
Step 3: Estimate the Additional Saleable Flower
Estimate the change in saleable dry flower production rather than applying a published yield percentage directly to expected revenue.
Additional saleable flower = Supplemental-lighting harvest − Baseline harvest
Use comparable production areas, documented harvest records, and consistent grading criteria whenever possible.
Account for flower that does not meet the facility's commercial specifications. Additional biomass does not necessarily translate into additional saleable product.
Step 4: Calculate Incremental Revenue
If additional flower can be sold at a known realized price:
Incremental flower revenue = Additional saleable flower × Realized selling price per unit
Use the price actually received for the relevant grade and product type, rather than a headline market price.
If supplemental lighting changes the distribution of flower grades, calculate the revenue separately for each grade.
Step 5: Calculate Incremental Operating Profit
Subtract all additional costs from the revenue generated by the lighting installation.
Incremental operating profit = Incremental revenue − Incremental operating costs
Operating costs may include:
Lighting electricity.
Additional HVAC and dehumidification energy.
Maintenance and fixture replacement.
Additional labor.
Other incremental production costs.
Where appropriate, include savings from reduced trimming or changes in other production processes. Count these savings only when they are measurable and attributable to the installation.
Step 6: Calculate ROI and Payback
For a defined evaluation period:
ROI (%) = (Incremental net benefit − Initial investment) ÷ Initial investment × 100
For a simple annual estimate, incremental net benefit can be calculated as the annual incremental operating profit attributable to the system. For multi-year evaluations, include the relevant cash flows, maintenance, replacement costs, and any residual value.
A simple payback estimate is:
Payback period (years) = Initial investment ÷ Annual incremental operating profit
Use this payback formula only when annual incremental operating profit is positive and reasonably stable. For seasonal production, changing electricity rates, or uneven cash flows, calculate payback from the actual projected cash flows.
Step 7: Test Different Scenarios
Do not base a purchase decision on one optimistic yield estimate. Compare conservative, expected, and favorable scenarios using your facility's measured data.
Input | Conservative scenario | Expected scenario | Favorable scenario |
|---|---|---|---|
Additional saleable flower | Lower measured outcome | Most defensible estimate | Higher plausible outcome |
Realized selling price | Lower price assumption | Expected realized price | Higher plausible price |
Electricity cost | Higher cost assumption | Expected cost | Lower cost assumption |
HVAC impact | Higher incremental load | Expected incremental load | Lower incremental load |
Installation cost | Higher quotation | Expected quotation | Lower quotation |
Populate the table with actual facility data rather than assuming that any scenario is guaranteed.
Bottom line: Under-canopy lighting is financially attractive only when the value of additional saleable production and measurable operating savings outweigh the initial investment and ongoing costs. A controlled production trial is a stronger basis for an ROI decision than a yield percentage taken from another facility.
How to Choose an Under-Canopy LED Fixture for Cannabis
Selecting an under-canopy LED fixture requires more than comparing wattage or purchase price. Evaluate photon output, light distribution, electrical efficiency, environmental compatibility, installation requirements, and total operating cost.
1. Compare Photon Output and Efficacy
Review the manufacturer's documented photosynthetic photon flux (PPF), expressed in micromoles per second (µmol/s), and photosynthetic photon efficacy (PPE), expressed in micromoles per joule (µmol/J).
PPE describes how efficiently a fixture converts electrical input power into photosynthetic photons. However, higher fixture efficacy does not automatically mean better light delivery to the target flower sites.
2. Evaluate Light Distribution
Look for photometric or photon-distribution data relevant to the intended mounting configuration.
Consider fixture spacing, overlap, mounting orientation, canopy depth, and the uniformity of light delivered to shaded crop areas.
Do not rely solely on a manufacturer's maximum output or a single measurement taken directly beneath a fixture.
3. Check Electrical and Environmental Compatibility
Confirm that the fixture is appropriate for the facility's electrical supply, installation environment, mounting configuration, and operating conditions.
Review applicable safety certifications, installation instructions, environmental ratings, and manufacturer requirements. Verify the suitability of the complete installation rather than assuming that every fixture can be used in every position beneath a crop.
4. Account for Maintenance and Workflow
Under-canopy fixtures may complicate pruning, irrigation maintenance, crop inspection, and harvesting.
Evaluate whether workers can access the plants safely and efficiently after installation. Include cleaning, maintenance, replacement, and fixture-removal requirements in the operating plan.
5. Compare Total Cost of Ownership
A lower purchase price does not necessarily produce the lowest lifetime cost.
Compare:
Initial fixture and installation expenses.
Electricity consumption at the intended operating schedule.
Incremental HVAC and dehumidification costs.
Maintenance and expected replacement requirements.
Warranty terms and available technical support.
Measured production benefits under comparable conditions.
6. Validate the Installation Before Scaling
Where practical, test the selected system in a representative production area before installing it throughout the facility.
Record the baseline lighting conditions, fixture settings, energy consumption, environmental measurements, harvest weight, flower grades, and realized product value.
Selection principle: Choose the fixture configuration that delivers a measurable production or financial benefit under your operating conditions, not simply the highest wattage or the largest advertised yield increase.
Related Terms
PPFD — Photosynthetic Photon Flux Density, the measure of usable light hitting a surface. Cannabis PPFD targets vary by growth stage.
DLI — Daily Light Integral, the total photons delivered over a 24-hour period. Critical for calculating whether supplemental lighting is needed.
Popcorn buds — Small, underdeveloped flowers caused by insufficient light at lower bud sites.
Lollipopping — The practice of removing lower branches and bud sites to concentrate plant energy on upper colas. Lower canopy lighting reduces or eliminates the need for this.
Apical dominance — The hormonal mechanism (auxin-driven) by which a plant prioritizes its topmost growth points.
Emerson Enhancement Effect — The synergistic increase in photosynthesis when far-red and red photons are delivered simultaneously.
VPD — Vapor Pressure Deficit, the difference between the moisture in the air and the moisture the air could hold at saturation. A key environmental variable that under-canopy lighting can alter.
Frequently Asked Questions
What is lower canopy lighting in cannabis?
Lower canopy lighting is the practice of placing supplemental LED fixtures beneath or within a cannabis plant’s canopy to deliver light to shaded bud sites. It targets the zones where overhead light cannot penetrate, turning underdeveloped lower buds into dense, potent flower.
How much yield increase can I expect from under-canopy lighting?
Published cannabis lighting studies have reported yield increases of approximately 20% to 30% under specific subcanopy or intracanopy lighting treatments. For example, Hawley et al. (2018) reported increases of 19.8% and 24.5% for two treatments in the second crop cycle, while Garrido et al. (2025) reported a 29.95% increase in dry inflorescence yield under their tested intracanopy lighting treatment.
These results do not guarantee the same gains in a commercial facility. Actual performance depends on cultivar, canopy structure, baseline light distribution, fixture configuration, environmental conditions, and cultivation practices. Measure the change in saleable dry flower under your own operating conditions before forecasting additional revenue.
When should I turn on under-canopy lights during the grow cycle?
The appropriate timing for under-canopy lighting depends on the crop's development, the fixture configuration, and the lighting strategy being tested. Rather than assuming that every grow should begin supplemental lighting 14 to 21 days into flowering, follow a documented protocol appropriate to the cultivar and production system.
For commercial evaluation, record when supplemental lighting begins, how long it operates, and how its use affects energy consumption and harvest outcomes. These records help distinguish the effects of lighting from other changes in cultivation practices.
Does under-canopy lighting replace lollipopping?
Under-canopy lighting may reduce the need to remove some lower branches by improving the light available to retained flower sites. However, it does not automatically eliminate lollipopping. The decision depends on canopy structure, plant architecture, labor requirements, flower quality, and whether the additional lower growth produces enough saleable flower to justify retaining it.
What spectrum is best for under-canopy lighting cannabis?
The sources discussed here do not establish one universally best under-canopy spectrum. Evaluate the exact fixture, photon distribution and efficacy, then compare crop results under your cultivar and growing conditions. A top-lighting spectrum experiment cannot by itself settle an under-canopy purchase decision.
Does under-canopy lighting increase electricity costs significantly?
Calculate the additional energy from fixture input power and operating hours rather than assuming a fixed percentage of overhead lighting cost. For an illustrative load of ten 120 W bars running 12 hours daily for 30 days, lighting energy is 432 kWh. At an assumed flat $0.12/kWh, that is $51.84, excluding cooling, dehumidification, demand charges and installation. This example is not a savings or payback promise.
Is lower canopy lighting worth it for small grows?
It depends on canopy density and growing style. If you run dense, multi-topped plants with thick canopies and want to maximize production from every bud site, the technique scales down well. If your plants are open and airy, or you already lollipop heavily, the benefit is smaller.
What’s the difference between under-canopy and intracanopy lighting?
Under-canopy lighting places fixtures below the canopy, aimed upward. Intracanopy lighting places fixtures within the canopy itself, between vertical tiers of foliage. Both target shaded bud sites, but intracanopy positioning is more effective for very tall plants with deep vertical canopies. In practice, many growers and manufacturers use the terms loosely.